Category Archives: Sewing

Belarius Bear

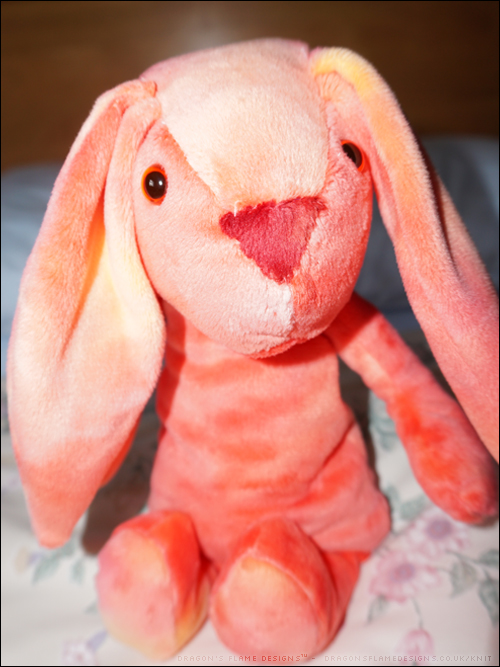
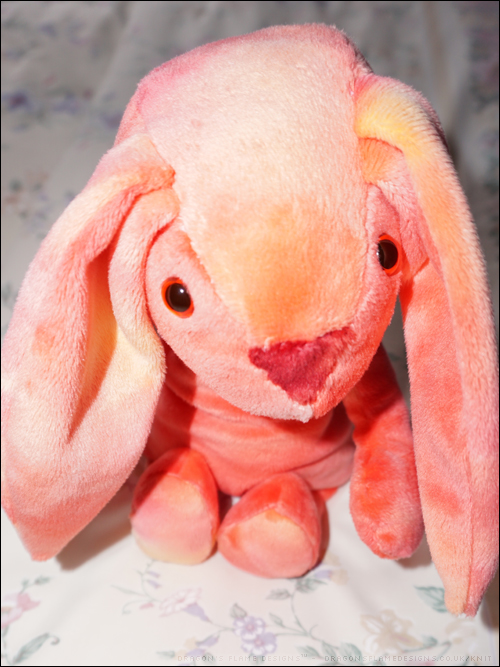
Ok, I admit it – I like making plush bears! I ordered some faux fur from Fabric Land a couple of months ago, and couldn’t resist trying out the Belarius Bear pattern from Emma’s Bears. But I also added in a couple of variations – I didn’t have any toy joints to hand, so I made him unjointed, and I also added in a ‘giggler’ mouth!

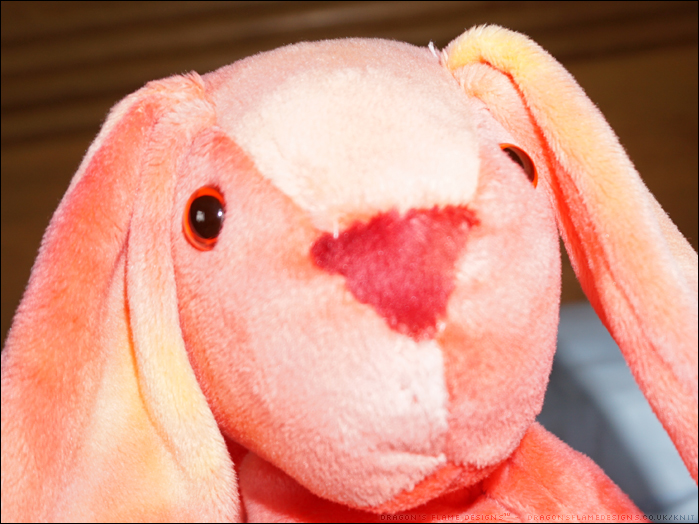
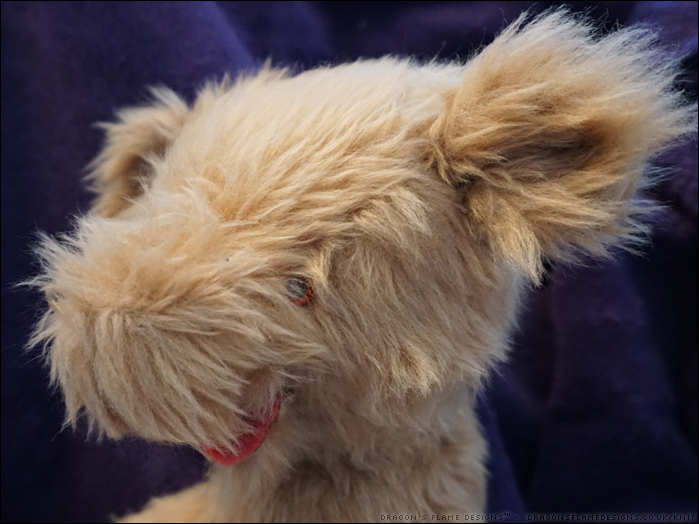
There’s probably a “proper” way of making a giggler style mouth for a plush bear, but I just cut a piece of faux fur that was marginally smaller than the ear pattern piece, cut the same out of a red plush fabric for the inner mouth, stitched them around the outer edge (right sides together), then turned it right side out and added a very small amount of stuffing. I then hand stitched down the middle (from the front to back of the mouth), to create a tongue-like effect. The mouth piece was then hand stitched in place, and the fur under the muzzle was trimmed a little, to stop him having a hairy inner mouth.

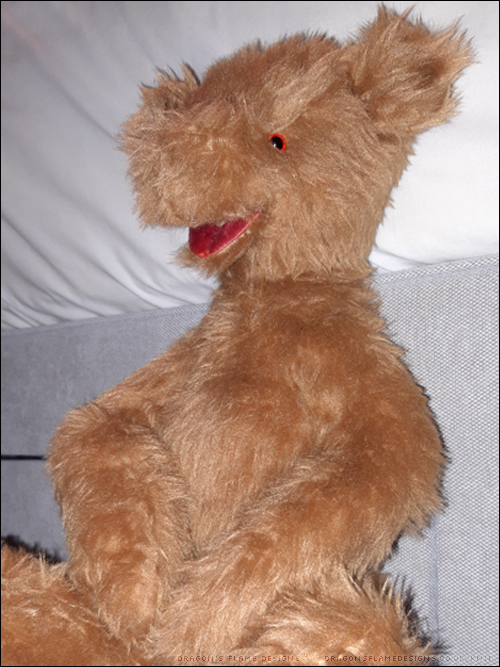
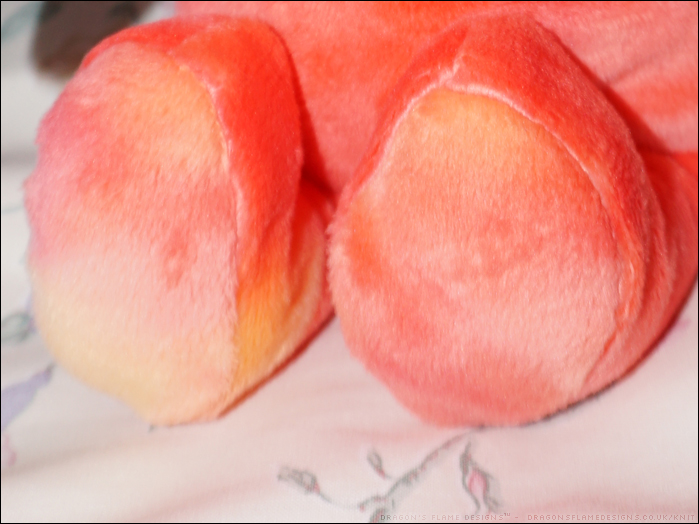
While the ‘giggler’ style went well, I did make a mistake in attaching his limbs – I was certain I had the legs lined up, but once I’d turned him right sides out and added the stuffing, it was clear that Belarius is a rather active bear….

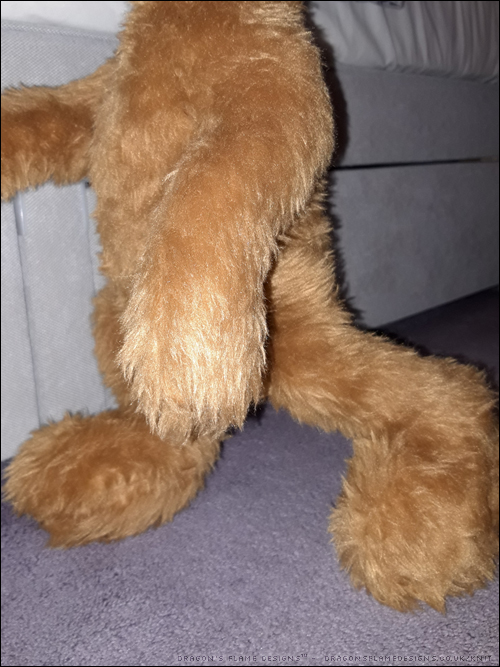
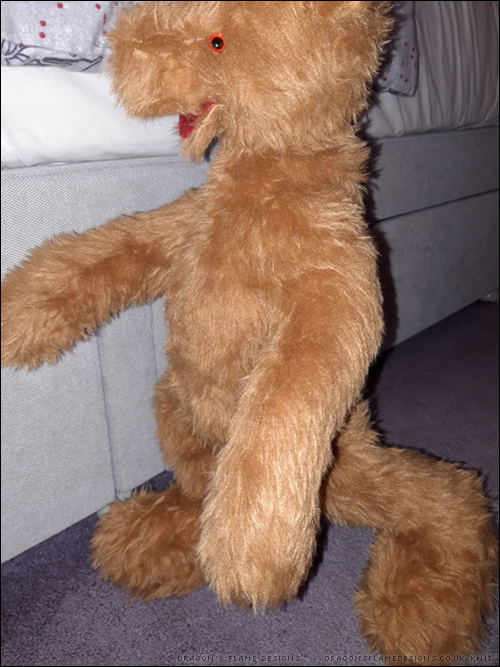
In fact, he seems to be permanently walking! He doesn’t stand unaided, and his uneven legs do make it more challenging for him to sit down comfortably, but I think he would make a great toy for a child who doesn’t mind him always wanting to go for walks!


Pattern: Belarius Bear by Emma’s Bears
Fabric: Faux Fur from Fabric Land and a tiny piece of plush fabric for the inner mouth

Happy Father’s Day

When I asked my Dad what he wanted for Father’s Day, his immediate response was “a hat”. To make sure it was something he would actually wear, rather than it just hanging on the clothes hook gathering dust, I got him to pick the fabric from the local shop. He chose a plain navy polycotton, which would make a very lightweight summery cap.

I picked out some navy and white starry polycotton to liven up the inside, and was able to also use a small piece of that to cover the button for the top.

I used brown thread rather than a blue, as I wanted it to be a slight contrast without being as obvious as a white thread would be. This also meant it was a lot easier to see the stitches when I needed to unpick a mistake!

The peak has buckram fused in place, although I think I must have got a crease in there at some point, as it refuses to lie as flat as I’d hoped. It’s still usable though, and Dad didn’t seem to be fussed by it not quite lying flat when it’s being worn.

Dad wasn’t overly keen on the idea of having his photo taken, so there aren’t any modelled shots of his cap. But it’s already had some wear (he was allowed to unwrap it a day early), and that has given me an idea to make a warmer cap for his Christmas present!


Pattern: Clovelly Cap by From the Studio (Jamie Kemp)
Fabric: Plain navy polycotton from Sewing Studio
Bias Binding from Sew N Sew

South Shore

I’ve seen lots of photos of women wearing rompers, and thought I’d take the plunge myself in making the Ellie and Mac South Shore romper from some scuba crepe.

I’ve got the side seams tacked at the moment, as I wasn’t too sure on the sizing – I added in a little extra fabric, but I think that’s making the top a little too baggy. My main problem at the moment, however, is that the top isn’t really possible to take off in the way you would need to for a romper!

I’m not sure if that’s down to the stretch of the fabric, or an error in my measurements (or an error in my seam allowances), but at the moment it’s looking like it’ll be a South Shore bodice, with the skirt of the Sunset Dreams dress!

But one advantage to mashing a dress pattern onto the romper bodice, will be that I don’t have to strip to go for a ‘bathroom break’! Overall, I think a dress is probably the most practical option, don’t you?


Patterns: South Shore Romper by Ellie and Mac
Sunset Dreams Dress by Ellie and Mac
Fabric: Scuba Crepe from Mibs

Hopping Along

When I first spotted this pattern on Etsy, I couldn’t resist getting it – the style reminded me of a Jellycat bunny. I used some of the tie-dye effect plush fabric I’d bought a year or two ago, which gives the bunny a blushing sun-kissed kind of feel.

The drawn pattern is good, and the bunny turned out exactly like I’d expected it to. However, the instructions are really poor in comparison. They don’t seem to have been proof-read at all, which leads to unfortunate errors such as telling you to sew the seams with wrong sides together…. of course that’d result in either the fabric being wrong-side out, or the raw edges of the seams being on the outside!

Ignoring the written instructions, I just used the drawn pattern combined with my knowledge of toy making. And the end result is a pretty cute looking bunny. I did deviate from the pattern on attaching the arms – I prefer to machine sew limbs in place, so I know they are really securely attached. So I added them into the side seams before turning the body the right way out.

Overall, I’m pleased I bought the pattern (it wasn’t an overly expensive one), but I wouldn’t recommend it for anyone who doesn’t already have some experience or knowledge of sewing toys – if you really need to follow the written instructions, you won’t find this an easy make!


Pattern: Bunny pattern from Etsy
Fabric: Plush fabric from Plush Addict

Minerva Product Testing

I’m over at the Minerva Crafts Blog again today with a product test of this super stretchy denim! Head on over to see what I made – I’ll give you a hint, this time I made two items!


* affiliate link
Pattern designers: WinterWear Designs* and From the Studio (Jamie Kemp)

I Finished the Dinosaur Hunting Cap!

I wasn’t too sure if the Clovelly Cap would work for a child – the pattern is designed for adults after all. But after checking the head sizing against the pattern, I realised I could just grade down to make an XS size which in theory would work for a child.

I was pleasantly surprised that I could fit the pattern onto one and a half fat quarters – I used one for the front two panels, and another for the rest of the cap. The underside of the peak is also patterned, while the inside of the cap is a plain black polycotton.

I cheated with the topstitching, using a zigzag stitch to ensure the biasbinding was caught with the stitches on the inside. I found it too fiddly to manipulate the layers to get my stitches accurate enough for a straight stitch.

Unlike the caps I made for myself, this one has buckram fused on the inside of the peak for stiffness. It actually gives a much better feel to the peak, so I think I’ll be using that for any hats I make in the future too!


Pattern: Clovelly Cap by From the Studio (Jamie Kemp) graded to a XS size
Fabric: Dinosaur fat quarters from Hobbycraft

Why did the Zebra Cross the Road

…no, wait that’s not the right joke is it? Anyhow, I bought this Zebra jersey panel ages ago and was scared to cut into it in case I messed it up. While I was sorting through my bag of UFOs, I rediscovered it and decided to take the plunge and cut myself a Union Street Tee before I could scare myself off again!

The panel came as one piece with four different sections, and I’d calculated that the sleeves would work from the hoof print and there should be just enough of the zebra pattern for the neckline and sleeve cuffs. What I hadn’t calculated correctly, was the height of the t-shirt itself, as I had to piece a couple of plain sections on the shoulders to make it work. But that could easily be a design feature, especially now it’s topstitched for added strength.

Of course the real draw of the panel was the ‘rear view’ of the zebra – it definitely makes the back of the t-shirt more interesting than normal. I just wish they had more panels with other animals on as well as the zebras – I’ve love a little zoo of animal panel t-shirts!


* affiliate link
Pattern: Union Street Tee* by Hey June Handmade
Fabric: Zebra Panel from Mibs Fabrics

Dinosaur Hunting Shirt

I found this polycotton fabric in the Sewing Studio last year, and bought a metre of it to make into a child’s shirt. I thought it would be perfect for K’s birthday. Of course things never work to plan on timescales do they? A month after his birthday, and I still had only got as far as cutting out the shirt pieces and starting a Clovelly cap for him.

I thought it was time I actually sat down, blocked out all the distractions, and finished his shirt – and much to my amazement, it worked!

I decided to not have the top button on the collar – K is only 4, so I didn’t think he’d really need a formal feeling shirt just yet. And having that top button slightly lower made the button placement slightly easier to work out too!

This was my first attempt at pleated pockets, and they actually came out looking almost exactly as they should do! I think maybe one pocket is slightly smaller than the other, but who’s going to notice? I did skip the pocket flap buttons and buttonholes, as I thought that would be way too fiddly for a four year old to undo just to stash things in his pockets.

The base and sleeves have a simple double turned hem. I used purple thread for the needle, and had a beige thread for the bobbin. Thankfully I had the thread tension set perfectly, so the beige doesn’t show on the right side of the fabric.

Add the shirt to the baseball cap I’ll be blogging later in the month, plus a hand drawn dragon card, and you have the perfect belated birthday present!


Pattern: Bookwork Buttonup by Blank Slate Patterns
Fabric: Dinosaur polycotton from Sewing Studio

Jonathan’s Wee Lap Tee

When a friend announced he was going to be a daddy, I decided it was a good reason to dig out the Patterns for Pirates Wee Lap Tee pattern to make a little t-shirt for the baby. I was organised and had the tee made well in advance, but wanted to wait for the birth announcement to know what colour to make the bear’s top on the card!


Like the previous Wee Lap Tee I made, this one is made from starry jersey. I didn’t want to go with a baby blue shade and as his parents both like shades of green, this should meet with their approval!

Unlike the previous Wee Lap Tee, I added a waistband cuff to this one – I think it makes the overall t-shirt look more professional in its finish.

All I have to hope now, is that it fits little Jonathan!


Pattern: Wee Lap Tee by Patterns for Pirates
Fabric: Jersey from Sewing Studio

Dinosaur hunting hat

What do you do when the shirt you’re sewing isn’t progressing as quickly as you’d hoped? You shelve the shirt, and make a small Clovelly cap instead of course!

As you can probably tell from the raw edges, this isn’t quite finished yet – I need to get another metal rectangle loop thing for the back, to feed the velcro section through, to make the cap fully adjustable.


Pattern: Clovelly Cap by From the Studio (Jamie Kemp)
Fabric: Dinosaur fat quarters from Hobbycraft