Tag Archives: jersey

Twittering Union Street Tee

It’s taken me a while to get back to my  Union Street Tee*, seeing as I knew I’d messed up the neckline. I’ve actually shelved this since May, as the neckline was annoying me! However, I realised that unpicking it would be unrealistic as the binding was already top-stitched once I noticed my mistake. 

Now the weather is starting to cool down, I thought it was time I actually finished the hems so I could get on and wear it. 

You wouldn’t know I’d made a mess of the neckline, would you? I know there’s puckers and catches in the bodice around the neckline, but I can happily ignore those!


* affiliate link
Pattern: Union Street Tee* by Hey June Handmade*
Fabric: Fashion Fabrics

Zen Chameleons

Not content with my unfinished jeans, I decided to start another pair of trousers this week…. this fabric is the same type as the penguins, polar bears and astronomy designs and has just about the right amount of stretch to make a pair of Zen Pants* by 5 out of 4 Patterns. I bought a metre and a half this time, just in case a metre wasn’t enough, and picked out a vibrant pink for the top stitching.

I played around with the back pockets, making them a hybrid of the Zen pocket, crossed with the Real Deal Jeans pocket.

And what better way to try out my new smiley face poppers, than on the cargo pocket? This is the first time I’ve tried adding a cargo pocket to a pair of trousers, and it went surprisingly well.


* – affiliate link
Pattern: Zen Pants* by 5 out of 4 Patterns
Fabric: Cotton Elastane from Fashion Fabrics

Union Street Tee (UFO)

After trying some raglan sleeve t-shirts, I decided it was time I attempted a v-neck, and the Union Street Tee* by Hey June Handmade caught my eye.

As usual with Hey June Handmade* patterns, the instructions are really detailed, so I figured I would be able to make a super v-neck…. unfortunately, due to user error, my v-neck is currently looking rather lopsided.

As I was sewing the neckline band, I think I must have stretched one side further than the other…. unfortunately, I didn’t realise until I’d top stitched the band, so I don’t know if it’ll be possible to unpick to resew that.

Maybe I’ll just leave it wonky, and call it a design feature!


* – affiliate link
Pattern:  Union Street Tee* by Hey June Handmade
Fabric: Fashion Fabrics

Knot your Average – take two

After my previous  Knot Your Average Top* by 5 out of 4 Patterns, I decided to try making one without the contrast colour and also in a slightly different size to see if it ended up as a better fit.

I got on better sewing the knot this time, although there are still a couple of points where I had to hand stitch the seam line, as I still didn’t get the sewing machine needle quite close enough to the knot itself!

I will admit I forgot to change the sizing on the back, although the front is now a S all the way through. Maybe in a slightly less ‘clingy’ fabric it wouldn’t feel quite so slim-fit still.

I stuck to the pattern instructions with the hems this time and the front panel obviously went in a lot better, as there are no awkward lines coming down from the knot! Maybe next time I will remember to alter the sizing at the waist and hips, so it has a more relaxed feel.


* – affiliate link
Pattern: Knot Your Average Top* by 5 out of 4 Patterns
Fabric: Fashion Fabrics

Knot your Average

I wear t-shirts pretty much all the time, but they’re not something I’ve made an incredible amount of before. But there was something about the Knot Your Average Top* by 5 out of 4 Patterns which caught my eye. They recently ran a sew-along for the Knot top, with extra videos and instructions for each step, so I decided to give it a go.

I cut the fabric to fit my measurements…. which was a bit of a mistake. This pattern is more of a slim fit than the style I normally wear, so I think next time I would grade out to a S or maybe between a S and M below the waist.

I wasn’t too sure about the colour scheme to start with and originally intended on adding in a hem band to the base just to tie it all together. Unfortunately I had already cut out a second Knot top from that fabric, and only had enough left to band the sleeves! I think the sleeve band works better than a hem band was going to.


* – affiliate link
Pattern: Knot Your Average Top* by 5 out of 4 Patterns
Fabric: Fashion Fabrics

Adventures in hemming jersey

My first attempts at hemming jersey were complete failures – none of the hems stretched with the fabric, which resulted in several scrapped items.  Ideally I’m looking for a hem that looks “right” for a sweatshirt or t-shirt – either something that looks like a regular straight stitch, or a twin needle effect. Sewing two lines of stitches just left me with a seam that had no stretch at all, so I’ve given up on the twin needle look for the moment.

After asking some advice in an online sewing group, I dug out my sewing machine’s instruction book and set about making some scrap hems to see which one came out best. Three stitches were recommended:

  • regular narrow zigzag
  • lightning bolt stitch
  • triple stretch straight stitch.

Narrow zigzags haven’t stretched as much as I need and a wider zigzag has given a lot of tunnelling where the fabric catches up, so I didn’t try that out this time. I don’t actually have a lightning bolt stitch on my machine, and I’m pretty sure the triple stretch straight stitch is what my machine calls the Straight Stretch Stitch.

Setting my machine up with the even-feed (walking) foot and a ballpoint needle, I changed the tension to match the instruction book’s details, and lowered the pressure on the foot to the ‘applique’ setting.

First up was the Straight Stretch Stitch which to give credit to my machine’s instruction book, is used for reinforcing a hem (such as the crotch of a pair of trousers) as well as in bag making as the stitch will not unravel. It doesn’t mention using this for stretchy fabric at all.

Dragons Flame Designs - Hemming Jersey

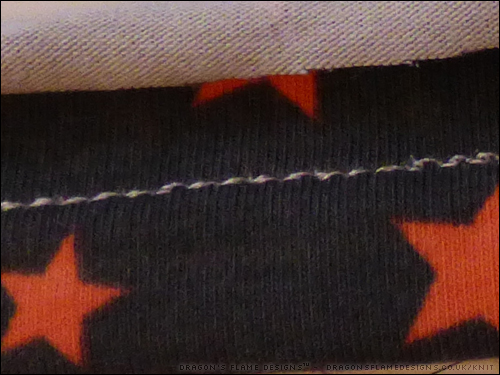
I could probably adjust the stitch length to get it to look slightly neater – parts of it line up right, but others looked quite messy. However, it didn’t actually stretch all that much – the jersey could stretch twice as much as the stitches allowed.

So that clearly wasn’t going to work for a sweatshirt that needed to stretch enough to allow me to get it on. Maybe the Stretch Zigzag Stitch which the instructions say can be used whenever you would use a regular zigzag, but for knit fabric would be better.

Dragons Flame Designs - Hemming Jersey

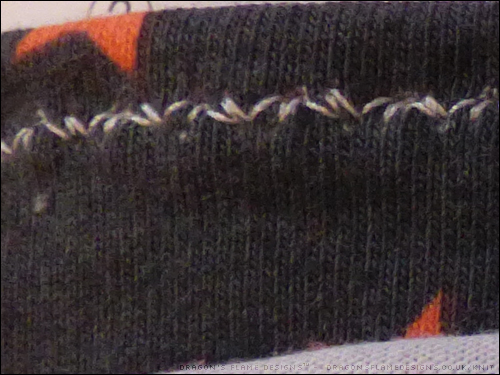
Again, the stitch length could do with adjusting to get the triple stitches to line up correctly. However, it does stretch perfectly, and while it would be ok for a seam, it doesn’t look neat enough for a hem stitch that will show on the right side.

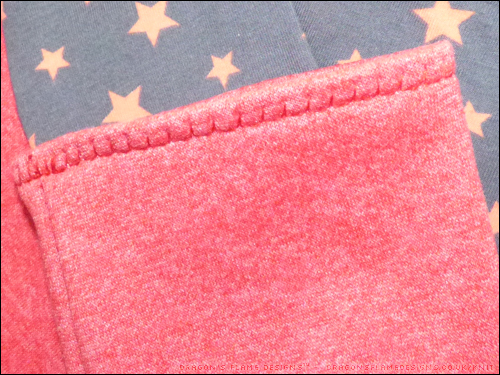
Flicking a page or two back, I came across the Knit Stitch which is said to finish off the ends and seam at the same time.

Dragons Flame Designs - Hemming Jersey

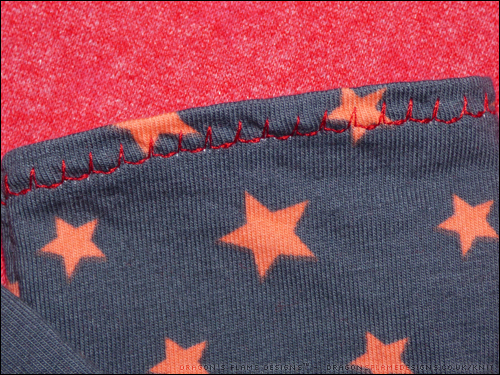
This one also has a perfect amount of stretch, and doesn’t look too terrible even though it’s not quite the look I was aiming for. It did however make for a brilliant pair of fingerless mitts! I hemmed the top and bottom with the knit stitch, then stitched the side seam with the straight stretch stitch, remembering to leave a thumb hole!

Dragons Flame Designs - Hemming Jersey

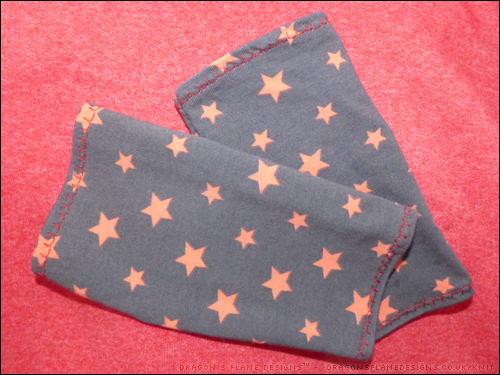
I’m not as fussed about the look of the stitch for these – as long as the fabric stretches sufficiently so I can wear them comfortably, I’d rather people were looking at the unusual stitches on my gloves than staring at the eczema on my hands! Overall, these are the most successful mitts I’ve sewn so far, and the knit stitch hem is perfect – stretchy without leaving a bulk of stitches on the inside that might irritate my skin.

I decided to use the same stitch to hem the fleece hoodie I started making last winter – I was determined to finish it before this winter, so I can actually get some wear from it!

Dragons Flame Designs - Hemming Jersey

These stitches don’t show up as clearly, as the thread is an almost exact match for the fleece. However, if I was making a sweatshirt or t-shirt in a patterned fabric, I think I still would want a stitch that looks a little more ‘normal’. Maybe I need to get a few more jersey scraps and test out a couple more stitches!