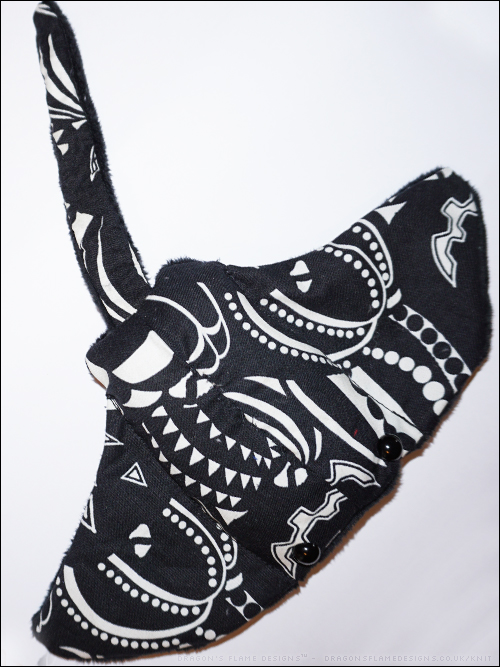
You’ve probably noticed that I like quirky fabrics, and what could be more quirky than a glow in the dark Halloween fabric?
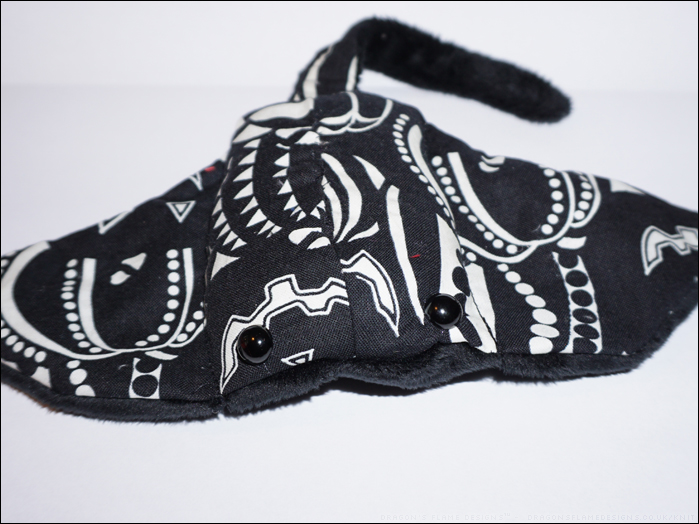
In daylight the stingray is just plain old black and white cotton, with a plush fleece underside. Because the cotton doesn’t stretch, I did find it challenging to sew the top seam neatly after stuffing the stingray, as I’m used to using stretchy fabrics for toys.
I didn’t want the eyes to stand out and detract from the glowing fabric, so I used some plain black eyes which I think look a little more natural than the coloured ones.
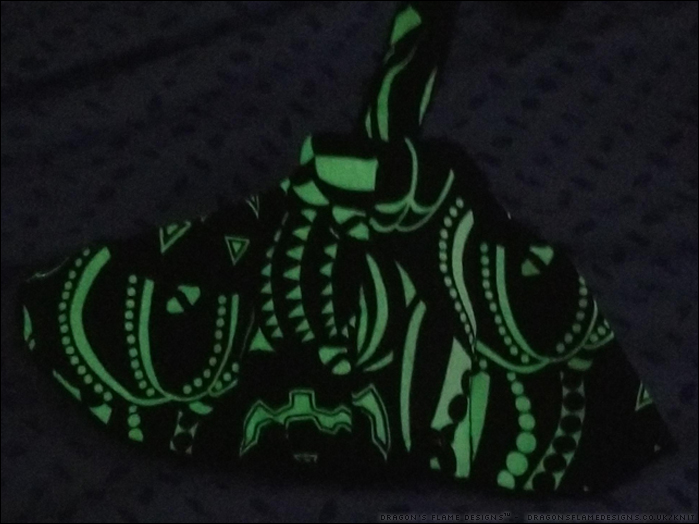
But I know you’re waiting to see what this little stingray looks like in the dark, and I will admit I actually failed at getting a photo in focus with the stingray glowing!
But fear not, this stingray was actually a present for a friend, and she had much better luck with taking a photo:
I’m amazed with how well the fabric actually glows, as some of my glow-in-the-dark fabrics have felt a little underwhelming in the dark. I might have to see if I can get some more of this fabric, and make a few more stingrays!
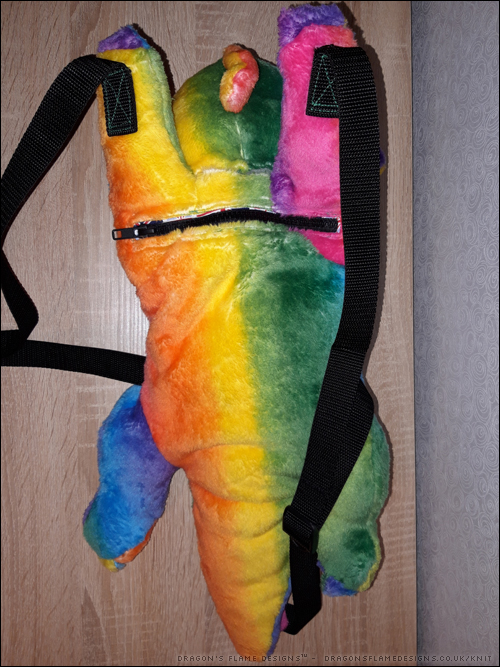
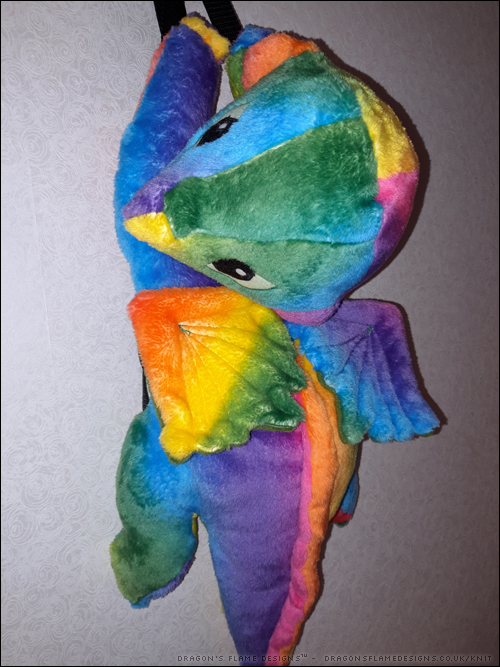
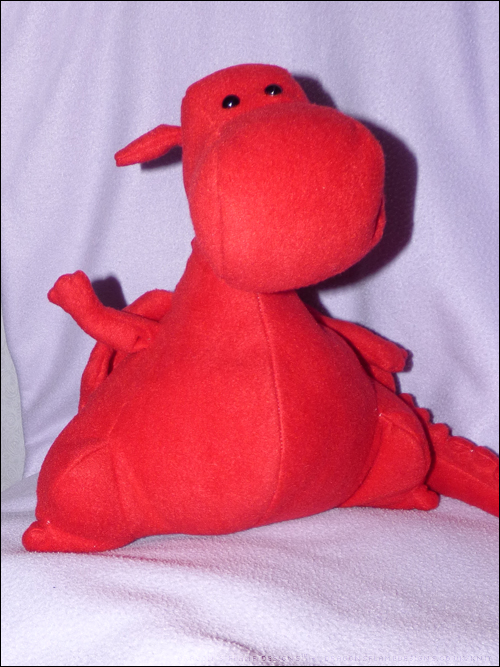
Since Lockdown 1.0, I haven’t done much sewing – the majority of things I made were face masks for friends and family. I wanted to sew something as a Christmas present for K, but what do you make a young boy who loves dragons? A dragon backpack of course!
I’ve made plush toys before, but this would be the first backpack I’ve ever attempted…. I like to make things challenging!
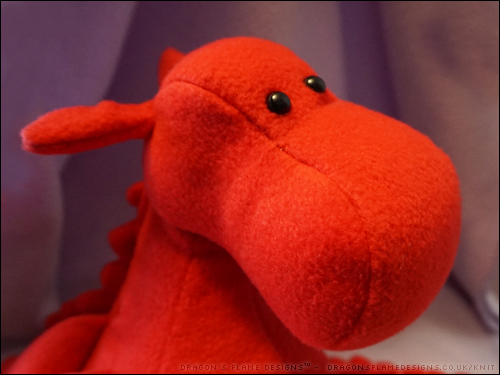
My original plan was to use some glow in the dark fabric paint on the eyes to add an extra fun little detail. However, the glow paint I’d purchased online was a ‘lucky dip’ when it came to colour, and I ended up with pink – perfectly fine, but I didn’t really want this dragon to have pink glowing eyes! So I stuck with the pattern’s recommendation and appliqued the felt eye pieces onto the face.
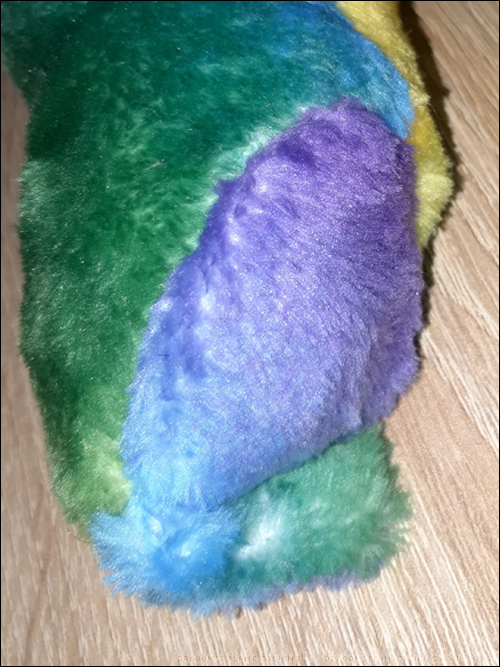
This fleece fabric is surprisingly slippy – it behaves almost like a fake fur rather than fleece when you’re sewing. As a result, the zip on the main pocket isn’t the neatest of stitching.
I had a Union Jack patterned fat quarter lying around, which worked perfectly for the pocket lining. I didn’t want anything too dark, as it would make it quite challenging to find something in the bag otherwise.
After a while of fighting the fabric, I tried an alternative technique – placing a layer of calico fabric against the feed dogs when sewing. That worked like a dream, allowing the fabric to feed through evenly, and no more squished stitches!
Because the dragon needed to be stuffed and the fabric had a slight stretch, I wanted to make sure the seams would allow some stretching, so I trimmed down the calico to as small a piece as possible. Ideally I would’ve used a tear-off fabric stabiliser or even tracing paper, as both of those could be fully removed after sewing. But as usual, I didn’t have either to hand, and I really needed to get this dragon finished!
As an optional extra in the pattern, there’s a hidden pocket in the dragon’s tail. I thought this would be a neat addition (which I didn’t point out when I gave K his present – I wanted him to discover it for himself), so not only is this my first backpack make, it’s also my first attempt at sewing in an invisible zip (albeit without an invisible zipper foot)!
My only other slight mishap was when I stitched the strap to the wrong side of the dragon’s paw (oops!) and had some well-nigh impossible unpicking to do to resolve it. But thankfully you couldn’t see the mistake once I’d finished.
And I can safely say that K loves his new backpack – after he’d opened it, he put the bag on his back and ran round the room shouting “I’ve got wings”!
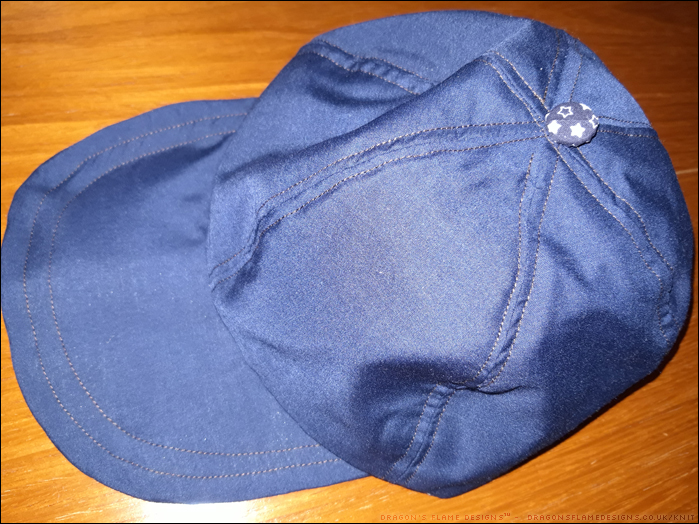
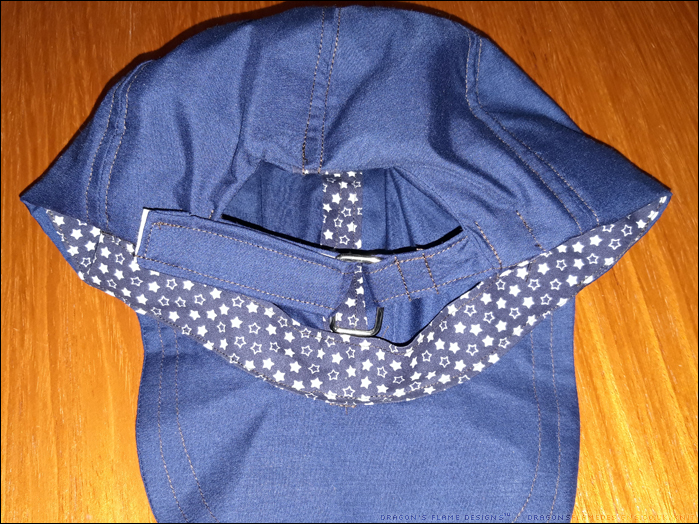
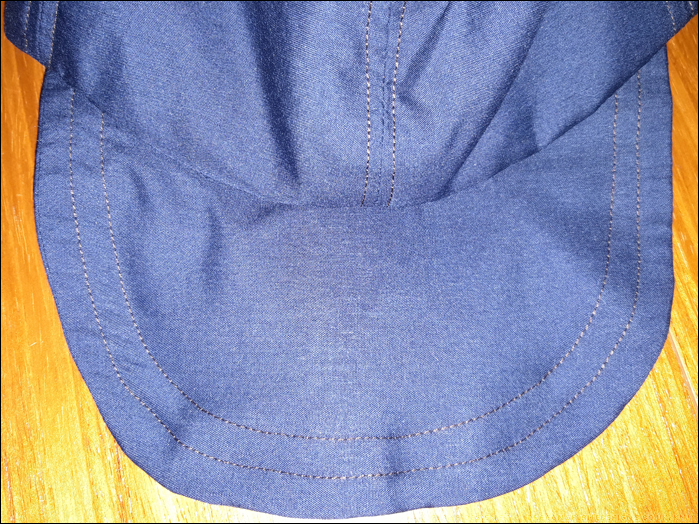
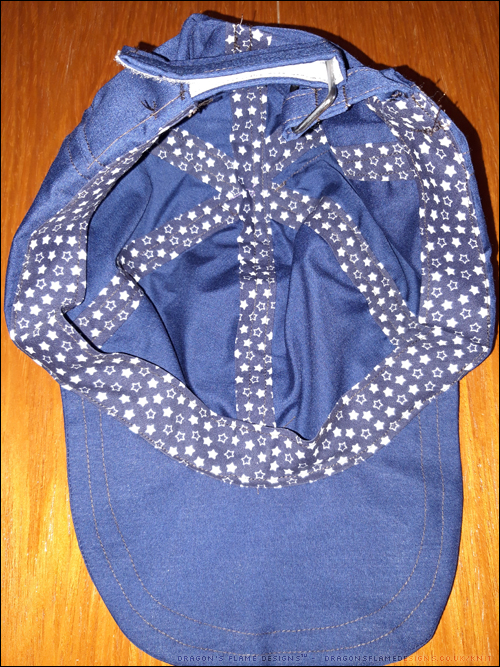
When I asked my Dad what he wanted for Father’s Day, his immediate response was “a hat”. To make sure it was something he would actually wear, rather than it just hanging on the clothes hook gathering dust, I got him to pick the fabric from the local shop. He chose a plain navy polycotton, which would make a very lightweight summery cap.
I picked out some navy and white starry polycotton to liven up the inside, and was able to also use a small piece of that to cover the button for the top.
I used brown thread rather than a blue, as I wanted it to be a slight contrast without being as obvious as a white thread would be. This also meant it was a lot easier to see the stitches when I needed to unpick a mistake!
The peak has buckram fused in place, although I think I must have got a crease in there at some point, as it refuses to lie as flat as I’d hoped. It’s still usable though, and Dad didn’t seem to be fussed by it not quite lying flat when it’s being worn.
Dad wasn’t overly keen on the idea of having his photo taken, so there aren’t any modelled shots of his cap. But it’s already had some wear (he was allowed to unwrap it a day early), and that has given me an idea to make a warmer cap for his Christmas present!
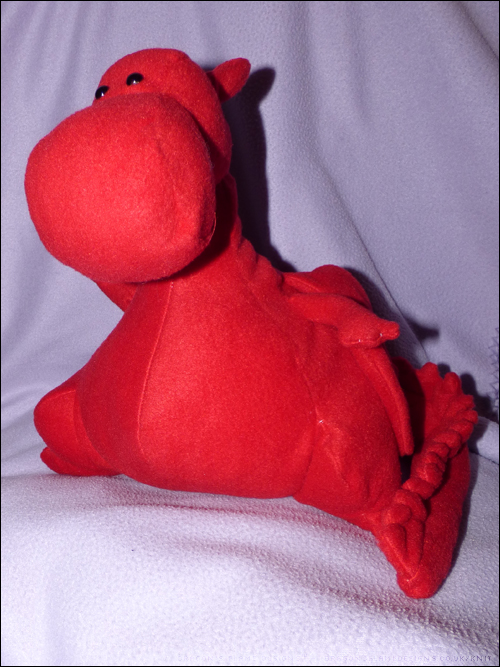
Strawberry is finished! When I started, the only alteration to the pattern was going to be printing the pattern at 150% for a larger dragon. In the end, I made a few more alterations just to hopefully end up with a sturdier dragon.
I cut the spines from two layers of fleece rather than using felt. With a dragon this size being given to to my cousin’s little boy for his third birthday, I wanted something that would be soft, yet sturdy if he was picked up by his spines.
The arms and wings are meant to be ladder stitched onto the body, but I cut a slot and machine stitched them on the inside just to make sure they stay attached! This gave Strawberry a small dart-like shape on his sides, but the fleece is quite stretchy so once he was stuffed you couldn’t really see the dart shape.
A slight error in reading the pattern meant I machine stitched the tail base to the tail sides and bottom part of the body, rather than leaving that gap to add the stuffing. So, as I was finding the foot pads challenging to sew by machine, I stuff him through that gap, and hand stitched the foot pads at the end!
Hopefully K will approve of his not-so-scary, cuddly dragon.
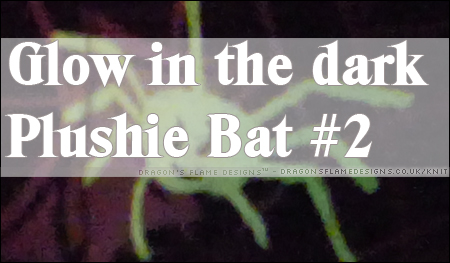
I actually made this bat back in August but I had to wait until now to share this post, because it was a Christmas present. Using the tried-and-tested BeeZeeArt bat pattern, I got on much better sewing the head gusset and feet than I did with my starry bat.
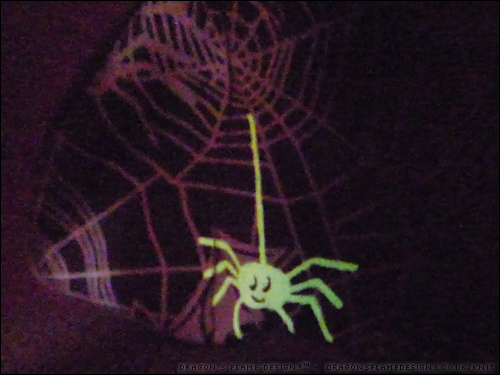
Strictly speaking, the spiders are a little large for the wings, as it’s only the spiders and strand they’re dangling from, which glow in the dark.
But as a gift for a friend who likes Halloween and bats, it should work really well. The dark “minky” fabric means the spiders seem to glow even better than the stars do on my blue bat.
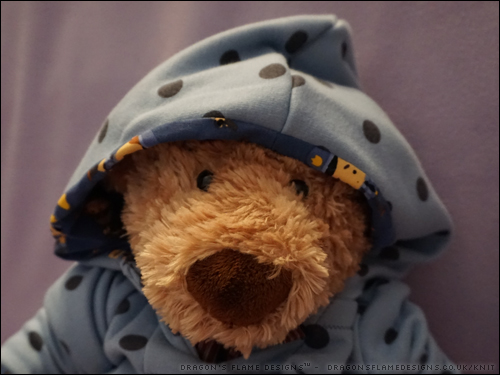
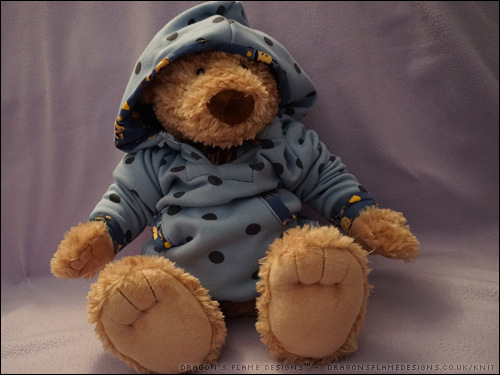
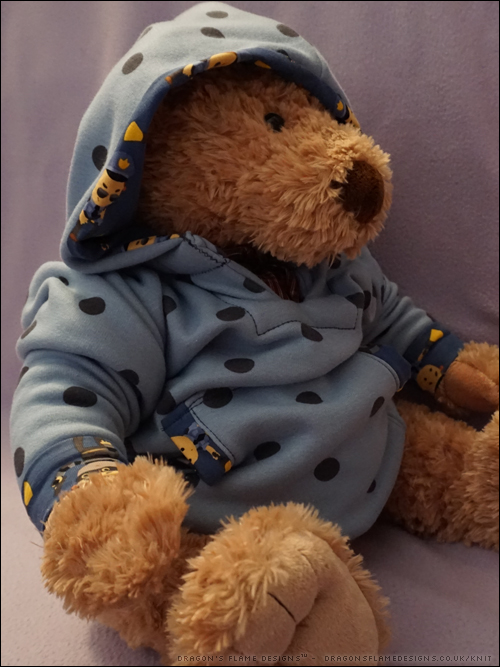
Seeing as the Halifax Hoodie went so well, I had a crazy idea to make K a hoodie as an early Christmas present. Hey June Handmade’s Hatteras Hoodie* is made in exactly the same way as the Halifax, so I felt reasonably confident at my ability to make it.
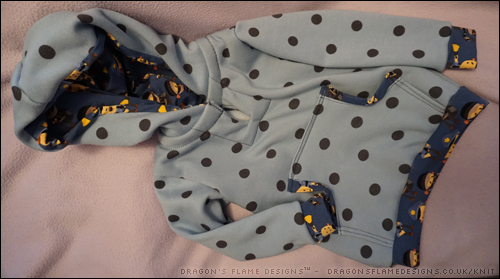
I chose some blue spotty sweatshirt fabric for the main body, along with some ‘cops and robbers’ t-shirt fabric for the hood lining. To break up the spots, I also cut the cuffs and waistband from the t-shirt fabric.
The Hatteras pattern doesn’t include a drawstring around the hood, which meant I could skip hammering in any eyelets! It also doesn’t include binding on the edges of the pocket, but I added those in just to give some interest to the front panel.
The sweatshirt fabric isn’t brushed like you would expect – it has a furry feel to it, and a definite nap. This means it should be snug and cosy to wear, but did give me some challenges when it came to sewing. I’ve sewn faux fur fabric before, but never anything with the furry side facing out. Of course that resulted in the fabric slipping mid seam, which was a nightmare when it came to attaching the hood.
After two mis-sewn seams, and unpicking far too many stretch stitches, I was at a loss for how to resolve the problem. In desperation, I attached a walking foot, and reverted to a zigzag stitch instead of a stretch stitch – it was the only thing I could think of to try.
Much to my amazement, that did the trick! The hood stayed pinned as it was meant to, and even the cuffs weren’t as terrible as I thought they could be.
The pattern on the cuffs is upside-down…. but that’s an intentional design. I like the idea of K being able to see the pattern the right way up when he’s wearing the hoodie.
The sleeves are a little snug for the bear that’s modelling it, but hopefully it will fit K perfectly, and keep him warm when he’s playing outside this winter.
Mum had asked for me to buy her a new wallet for her birthday; it had to match the look of her old wallet, complete with a zipped pocket, and velcro closure, but that was easier said than done, as nowhere seems to stock a wallet that style now!
So instead, I decided to be reckless and have a go at making my own from scratch. After a rummage through my fabric scraps bag, I came across some suitable fabric, a zip I’d unpicked from a failed bag attempt, a small amount of velcro that Mum had let me have, and some bias binding that I think was originally earmarked for binding the seams on a bag.
With some measurements taken from the original wallet, and a little planning on paper to ensure I was able to put the zip in without too much trouble, I ended up with a passable wallet that looks almost the same in style as the original! The original wallet did use a more sporty fabric than the polycotton I’ve used, but this way Mum can have a unique wallet rather than something mass produced that everyone else might also have.
The only disadvantage of making Mum a wallet, is that now she has plans for a wallet for every season! But at least it means I’ve already got an idea what I can make her for Christmas.
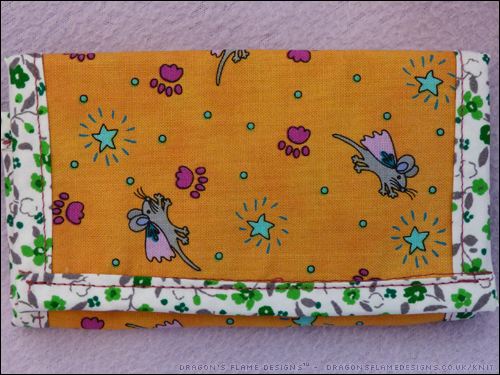
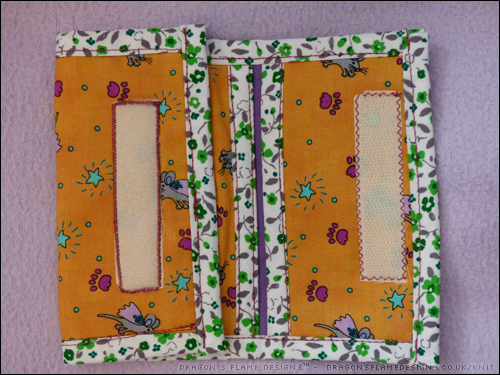
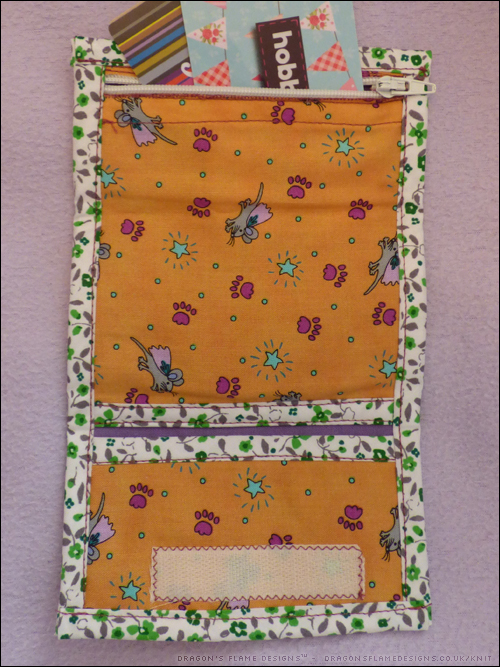
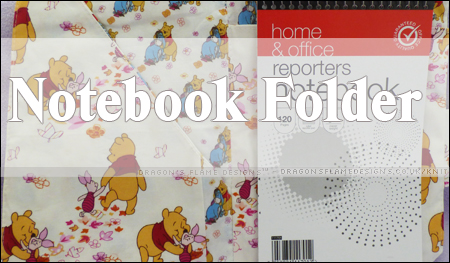
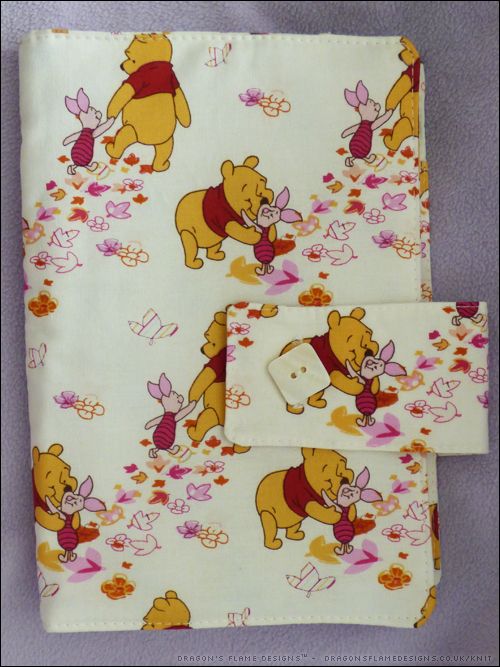
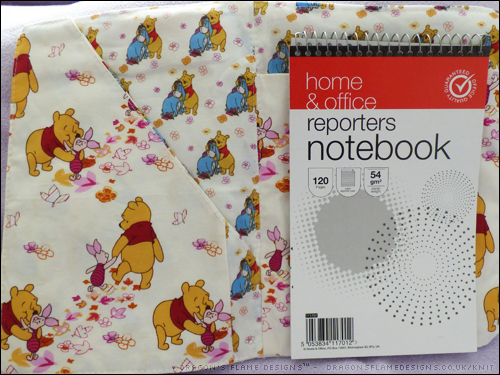
In the run up to my Mum’s birthday, I was trying to think of something I could make as a present. I’m not confident enough to make clothing for her, and she didn’t need a new bag – so what could I possibly make her? I did notice, however, that she was using a reporter’s notebook, which gave me the idea of a new notebook folder for her. The original one I made was on Mum’s sewing machine, and proved a struggle to sew through all the layers of fabric. The second one was easier, although I still used non fusible wadding, so I had to quilt the inside cover.
This time, I was determined to follow the pattern (almost) exactly! I used two fat quarters, a small amount of dress lining fabric, and some fusible fleece, so there was no need to quilt the inside cover.
I ensured the button and strap were the right way around this time, as the first attempt had the strap on the inside of the cover, with the seam allowance sticking out… rookie mistake!
I left out the pen and card holders, as Mum prefers to keep her pen separate to the folder, in case the pen leaks.
I cheated on the inside of the notepad pocket, as it seemed a waste to use a fat quarter when you weren’t going to see the pattern. So I used some cream dress lining fabric instead.
The angled pocket was slightly wider than the fabric I had left over, hence the small piece of the second fat quarter in the right corner. But rather than that looking like a mistake, I think it just adds to the quirky appeal of the folder.
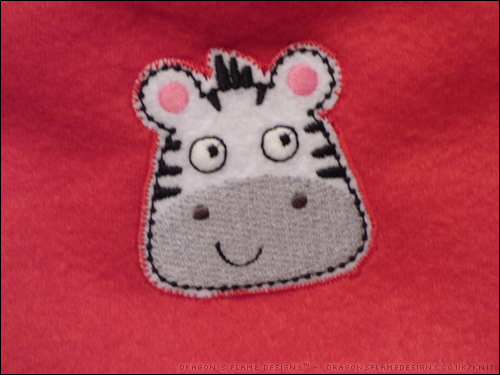
I was looking for something relatively easy to make for K’s Christmas present – his Mum has given me a great idea for a present I can work on for his birthday, but I needed something that would be a faster make for Christmas!
Enter the free Fleece Hat pattern from Fleece Fun – not only was it useful to make my own hat, but it has sizes all the way from baby to extra-large adult! I found just over half a metre of red fleece in my local fabric shop, along with a cute zebra iron-on patch just to liven it up a little.
I did modify the pattern slightly, making the hat a little longer than it’s meant to be, to allow for the brim to be rolled for a snugglier fit. I wasn’t too confident at how the patch would iron on (there weren’t any instructions on it), so I zigzag stitched around the outside just to ensure it would stay in place.
Hopefully we’ll get some seasonal cold weather, so K has an excuse to wear it!
The trouble with buying bubble bars from Lush, is that they come in a paper bag. Great for the environment, but what do you store it in to stop all the pieces going everywhere? I’ve found some small plastic food containers in Poundland that work pretty well, but then you get a pile of them in the wardrobe, which invariably falls over whenever you want to find something.
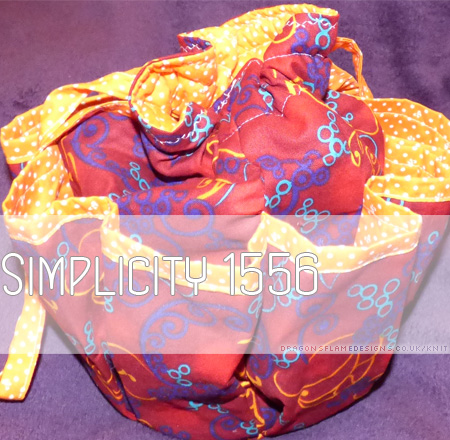
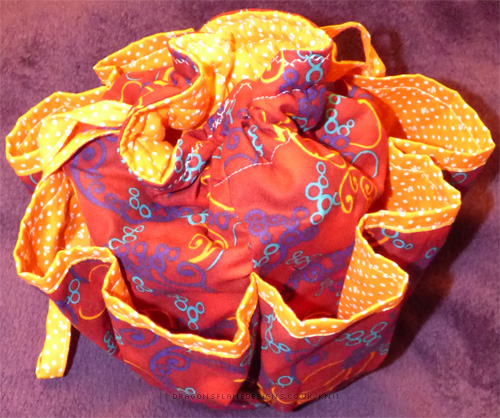
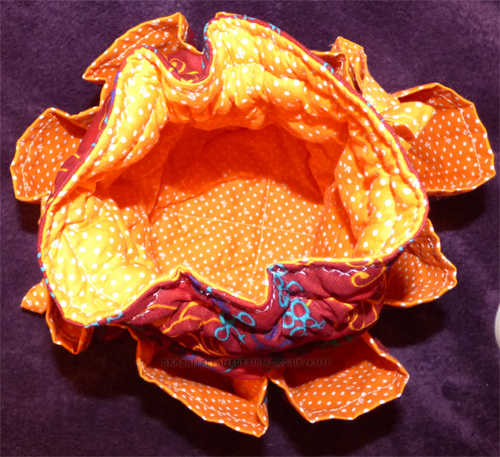
So, I decided to make Simplicity 1556 for my Mum’s Christmas present – a drawstring bag with pouches around the outside. There’s no dimensions given on the pattern envelope, but going on the fabric requirements, I hoped it would be large enough to work.
Armed with my red and orange outer fabric, and some nicely patterned orange lining fabric, my first problem was with the usual “fusible fleece”. Not having any of that to hand (and realising that if I bought it from the only shop I found it for sale, it’s cost more than the fabric did), I decided to use 2oz polyester wadding instead. I quilted that to the base and bag linings, so you can’t see the stitching on the outside.
Attaching the pouch strip was challenging, and some of the pouches are a different width to the others, but it fits the items I want to put in there. I will also admit I messed up the drawstrings, sewing the wrong ends together, but it still draws closed so I’m not going to unpick that!
I wanted to give her a pack of bath bombs from Slimbridge Soaps, but the packet of 4 wouldn’t fit into the pouch, so I made some small sewn bags to put them in individually – that way I can get one item per pouch, so it’ll fill them up 🙂
Lush didn’t stock her favourite bubble bar this year, but I did find an alternative – but what to put it in? I couldn’t just put it straight into the pouch, as they sometimes leave a greasy stain and that wouldn’t look good for a present. So I made a quick quilted pouch (quilting the lining again), which should mean the bubble bar can slide in, and hopefully not make a mess everywhere!
Basket fabric from Fashion Fabrics, Christmas fat quarters from John Lewis