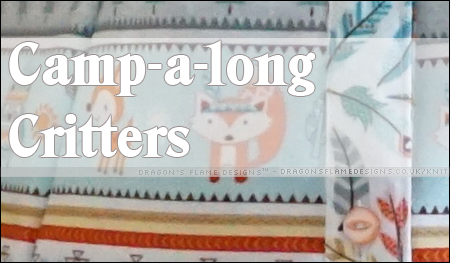
Do you remember the camping themed shirt I blogged about a couple of years ago? No? Well I’m not surprised, as it’s been so long, I hadn’t realised I’d not actually posted the finished shirt!
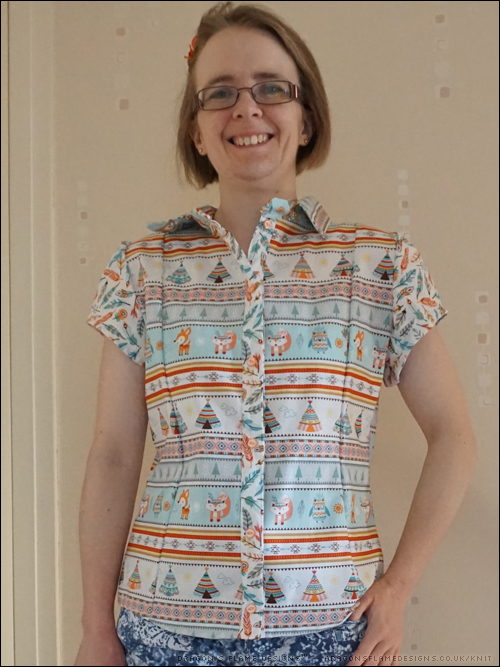
It’s always a nerve-wracking process sewing the buttonholes when you’re pleased with the progress you’ve made. One tiny little mistake, or something nudging the automatic buttonhole lever, could mess up the buttonhole and prove really challenging to fix!
Thankfully the buttonholes all went smoothly, and my Camp-a-long Critters button-up shirt is finished!
I do like the shape the princess seams give to the shirt, although either some pressing or topstitching might make those seams sit a little better.
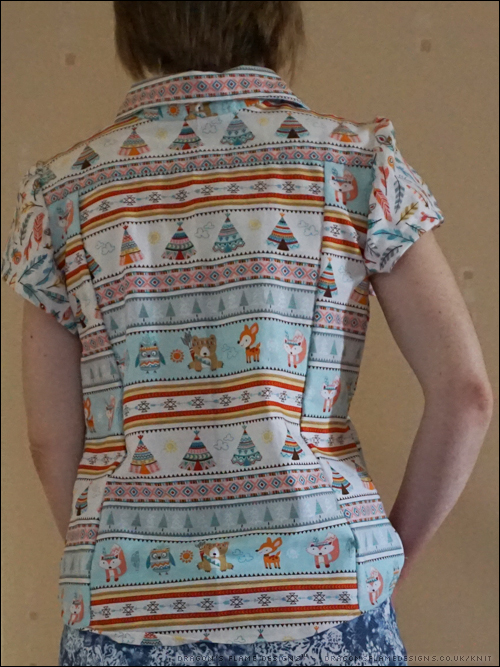
Ok, you can see where I didn’t have enough fabric to even pattern match the horizontal stripes, but I don’t see the back of my own shirt when I’m wearing it!
One sleeve head has come out more ‘puffy’ than the other, which I think is a clear sign that I really need to get my head around the whole concept of “easing” fabric. I either end up with accidental puffy sleeves, or lots of pleats and tucks in the sleeve fabric where the easing hadn’t gone to plan.
Going through my photos, I realised there were quite a few sewing projects that I hadn’t actually blogged, so be prepared for some random changes in my hair length with photos!
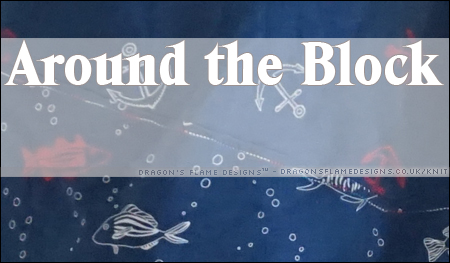
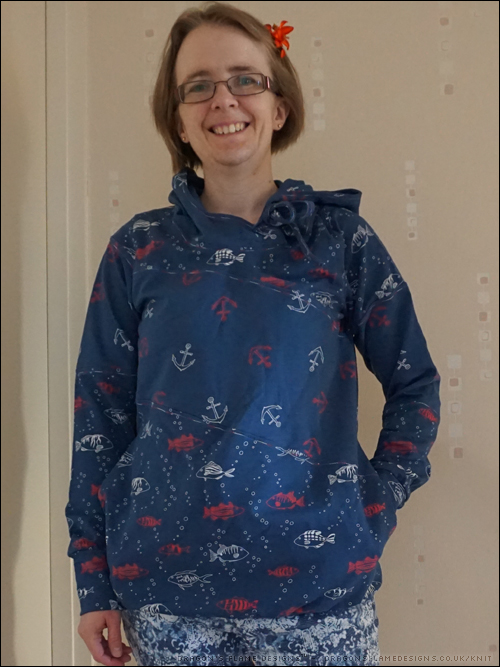
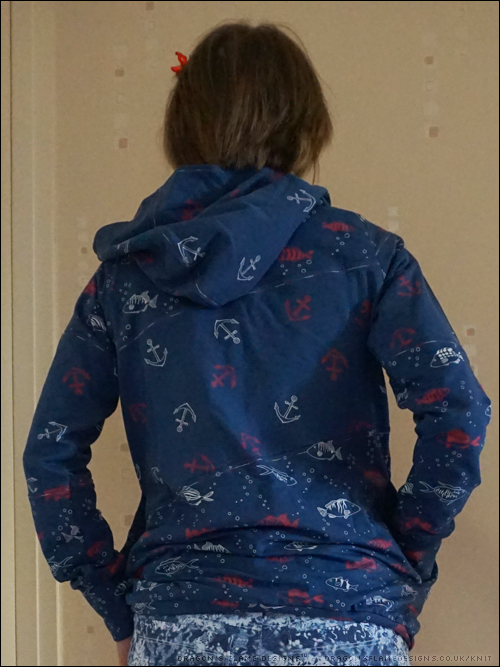
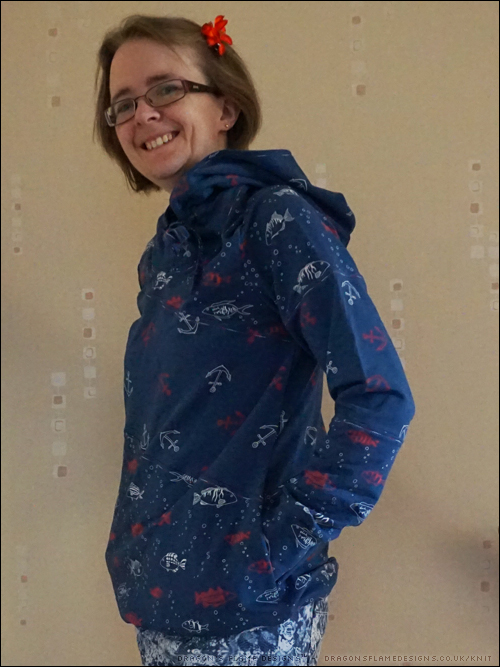
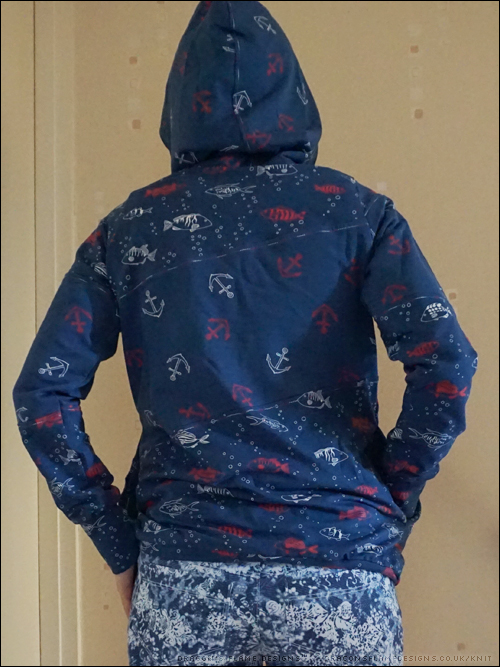
This is the Around the Block Hoodie, which features a contrast diagonal panel across the bodice and sleeves, plus in-seam pockets and a cross-over hood.
I didn’t want my contrast panel to be really contrasting, so I picked out two designs of French Terry which had matching background colours, while still being within the same nautical theme.
The hood itself is lined with the contrasting fabric, which I also used for the ties. So far I’ve not been able to find some quality ribbing to use for the cuffs and waistband – everything I’ve used has either been quite thin, or has lost its shape after a few washes. Rather than risk that again, I stuck with the main fabric for the waistband and cuffs – if that stretches out in the wash, then at least the entire hoodie will stretch along with it!
The only thing I wish I had done, is shorten the pattern to allow for being 5′ tall! This hoodie is considerably longer than the ones I’d normally wear. However, after wearing it for a while, I’ve got used to the longer length, and it does keep my warm!
Most, if not all, hoodies have a kangaroo pocket on the front, but because of the diagonal panel, the Around the Block hoodie has in-seam pockets. They weren’t hard to sew, but sometimes I find myself going to put something in the pocket on the front – which of course isn’t there!
My nautical hoodie is finished off with some multi-coloured topstitching – I had some Gutermann red white and blue variegated thread left over from a previous project, which worked really well.
With the way our weather seems to be heading, it won’t be long before it’s chilly enough to wear this again!
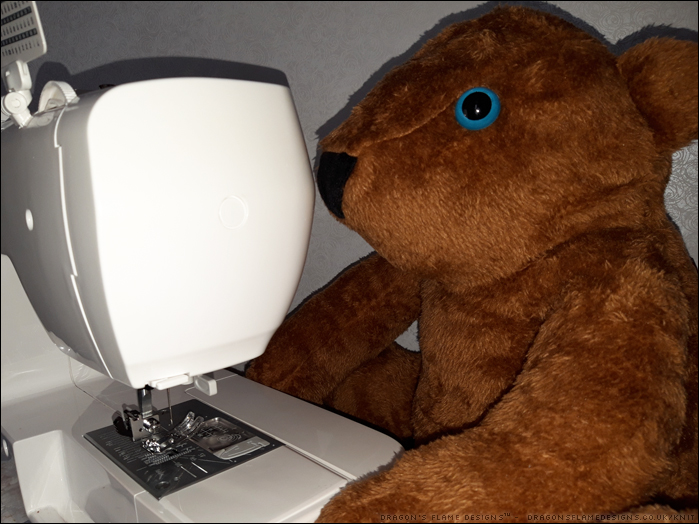
I’m sure you’ve realised that I really enjoy sewing bears – especially ones from the Polar Bear pattern that was in Simply Sewing several years ago. I was offered the opportunity to make something using this faux fur, and it just had to be two brown bears!
These bears were made at 200% sizing, which was just the right height for this one to try helping to sew his brother!
I’d crocheted these mugs and cakes several years ago, and they seemed the perfect photo props to use for these two bears.
Not long after these photos were taken, these two bears went on a little adventure of their own, moving to live with an old school friend’s two sons.
Head over to the Minerva site to find out more about these really cuddly bears I made.
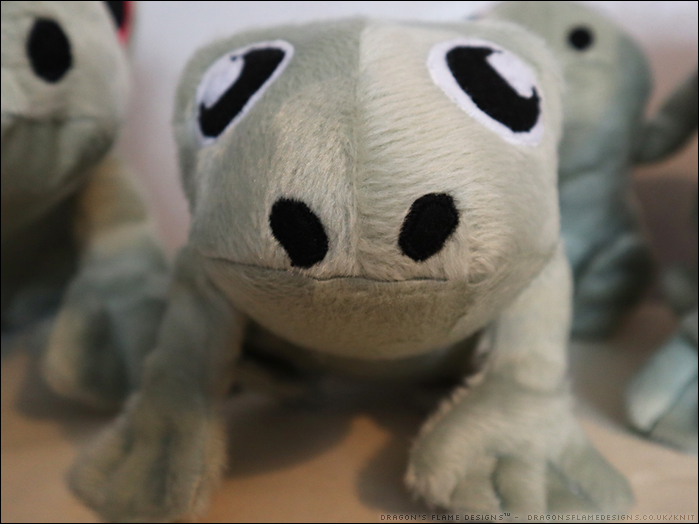
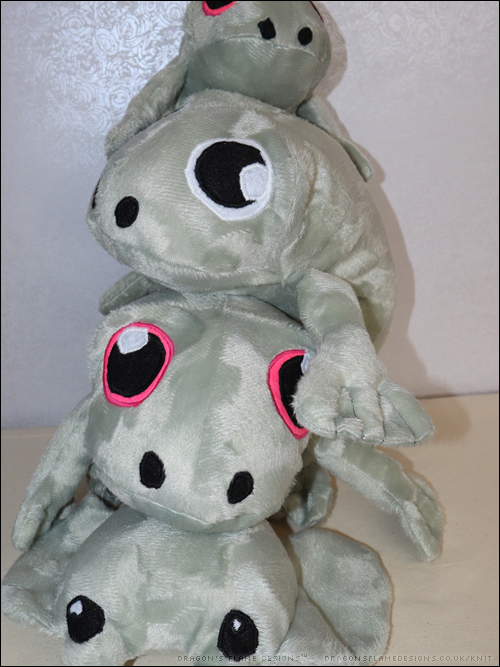
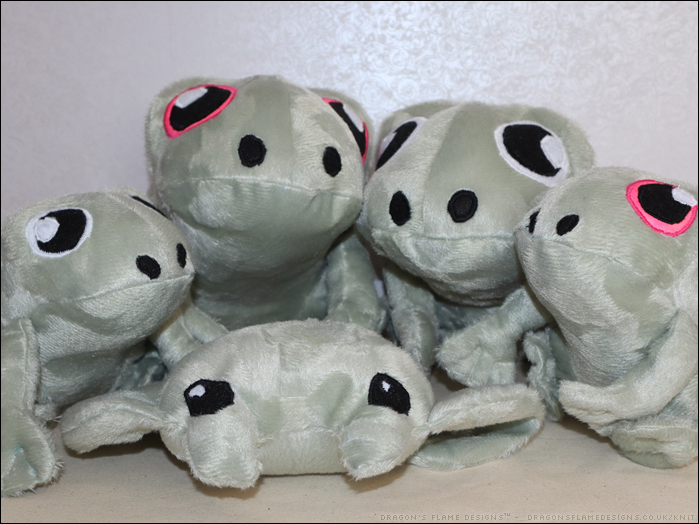
I’ve never made plushie frogs before, but when I had the opportunity to make something from Velboa, it seemed a natural choice!
I’ve sewn with various styles of faux fur before, but Velboa is totally new to me. It does have a nap (so the fur can be brushed in one direction), but this particular velboa has an abstract pattern where the nap changes direction multiple times. This meant it was a bit more challenging to lay the pieces out, but I tried to just get the background nap in the same direction at least.
I wanted to try out the glow in the dark fabric paint I bought in the sale from Minerva a couple of years ago, so I used that on the white felt eyes for two frogs. It does give them a bit of a strange look in daylight, but the glow works perfectly once the lights are out at night.
As you can tell from my stack of frogs, there’s also a Manta Ray lurking with them. I had enough fabric left over after making those four frogs, and thought a Ray would be a good companion for them.
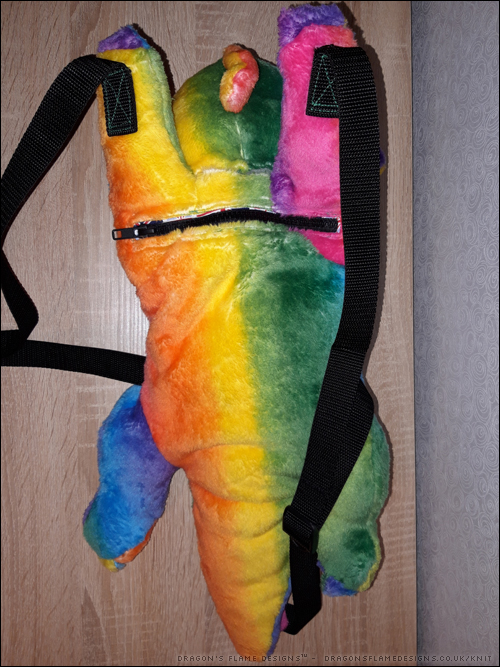
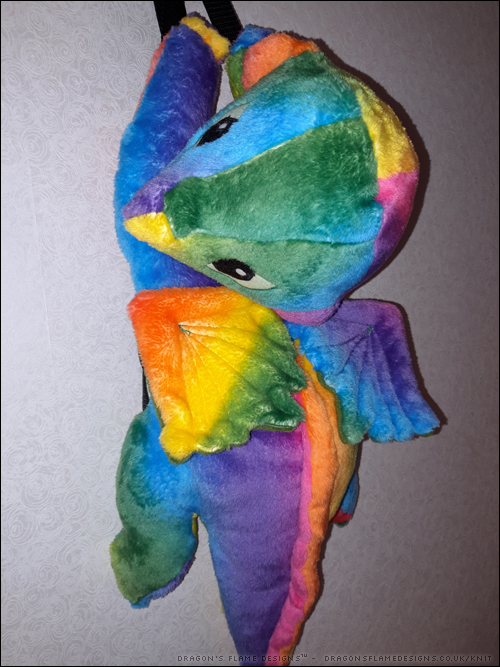
Since Lockdown 1.0, I haven’t done much sewing – the majority of things I made were face masks for friends and family. I wanted to sew something as a Christmas present for K, but what do you make a young boy who loves dragons? A dragon backpack of course!
I’ve made plush toys before, but this would be the first backpack I’ve ever attempted…. I like to make things challenging!
My original plan was to use some glow in the dark fabric paint on the eyes to add an extra fun little detail. However, the glow paint I’d purchased online was a ‘lucky dip’ when it came to colour, and I ended up with pink – perfectly fine, but I didn’t really want this dragon to have pink glowing eyes! So I stuck with the pattern’s recommendation and appliqued the felt eye pieces onto the face.
This fleece fabric is surprisingly slippy – it behaves almost like a fake fur rather than fleece when you’re sewing. As a result, the zip on the main pocket isn’t the neatest of stitching.
I had a Union Jack patterned fat quarter lying around, which worked perfectly for the pocket lining. I didn’t want anything too dark, as it would make it quite challenging to find something in the bag otherwise.
After a while of fighting the fabric, I tried an alternative technique – placing a layer of calico fabric against the feed dogs when sewing. That worked like a dream, allowing the fabric to feed through evenly, and no more squished stitches!
Because the dragon needed to be stuffed and the fabric had a slight stretch, I wanted to make sure the seams would allow some stretching, so I trimmed down the calico to as small a piece as possible. Ideally I would’ve used a tear-off fabric stabiliser or even tracing paper, as both of those could be fully removed after sewing. But as usual, I didn’t have either to hand, and I really needed to get this dragon finished!
As an optional extra in the pattern, there’s a hidden pocket in the dragon’s tail. I thought this would be a neat addition (which I didn’t point out when I gave K his present – I wanted him to discover it for himself), so not only is this my first backpack make, it’s also my first attempt at sewing in an invisible zip (albeit without an invisible zipper foot)!
My only other slight mishap was when I stitched the strap to the wrong side of the dragon’s paw (oops!) and had some well-nigh impossible unpicking to do to resolve it. But thankfully you couldn’t see the mistake once I’d finished.
And I can safely say that K loves his new backpack – after he’d opened it, he put the bag on his back and ran round the room shouting “I’ve got wings”!
It was almost impossible to look at sewing posts last year without seeing at least one face covering, or a pattern for one. Some people were making hundreds of them to give away, others made hundreds to sell, and for a while I felt that I was “failing” for not making them or scrubs!
However, I eventually came to accept that while I have the skill to be able to make things and I also liked the idea of helping out charities and local organisations / the local doctor’s surgery & hospital, the whole ‘production line’ way of making multiples of the same item like that, just isn’t something I am able to do.
I didn’t actually make any face coverings until the first mention that they were going to be essential to wear when entering a shop – so I made my first few for my parents.
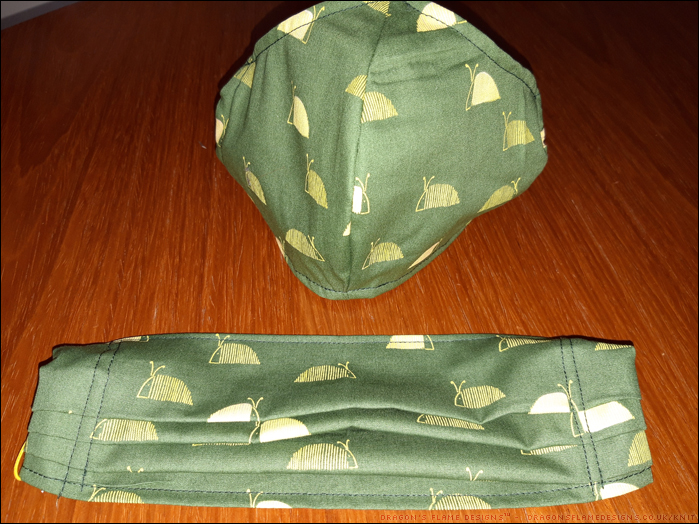
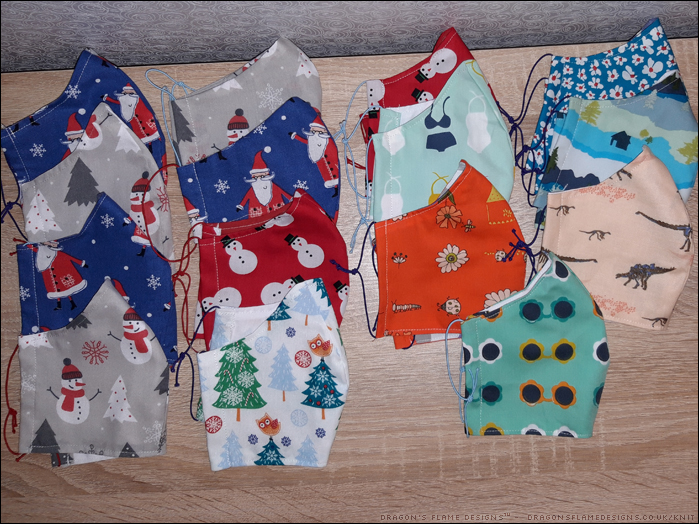
A little while later, another relative requested masks for their family members which included a 5 year old child. By this point I was feeling comfortable with the adult patterns I was using, but what was I going to do for a child’s pattern? The first pattern I found was marked as age 2-5 and age 6-10 – how on earth was I going to know which would work the best, given that the masks were going to be posted?
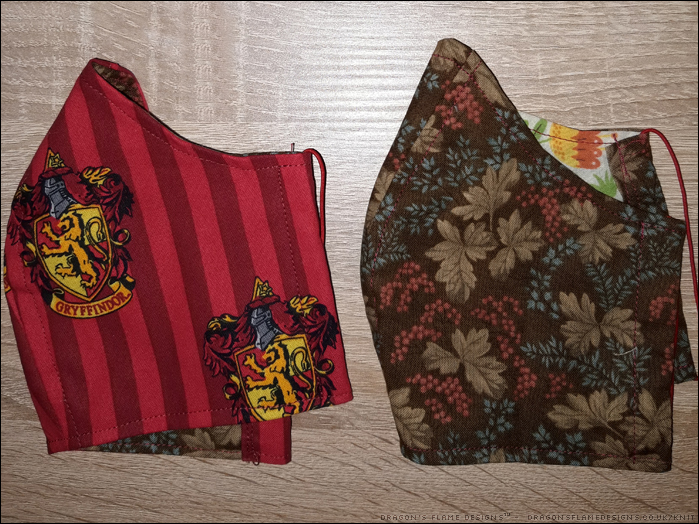
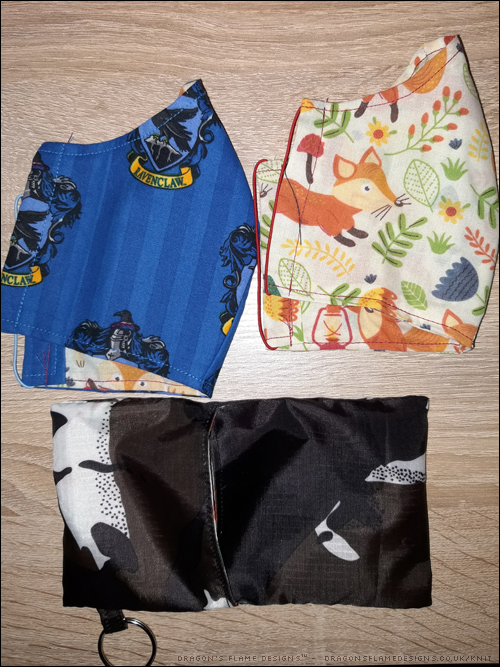
In the end, I made three different child’s masks (one of each size, and another from a different pattern) in the hope that at least one would work well. I made the two different sized ones in totally different fabric (the foxes and dinosaurs on the bottom right of the photo above) so it would be easier to work out which face covering actually fitted the best.
Spurred on by my success, I made two matching masks for a friend’s birthday (who would’ve thought that a face covering would be a suitable birthday present?), picking the same adult patterns I’d used previously. Again, I wasn’t too sure which that friend would find most comfortable to wear, hence the two different designs. These were made from a fat eighth that I’d won as part of a bumper prize from Sew Magazine a couple of years ago.
Of all the masks, the pleated ones were the hardest to make as threading the elastic through the tunnel with all those pleats in place, was almost impossible at times. So for my next batches, I stuck with the shaped masks. These two went to a friend in Norway, while the ones below were sent to a friend in America. You can just about see the same fox fabric on the lining for the right-hand mask – these work really well for using up those smaller pieces of fabric that you’re not quite sure what to make from!
More foxes! I used the same foxes for the lining on the right-hand mask, which probably wasn’t overly intelligent – while the shaped mask is reasonably clear which way round it goes, having a different pattern to the lining (or even a plain fabric) makes it really clear for those “not quite awake” mornings when you need to go grocery shopping!
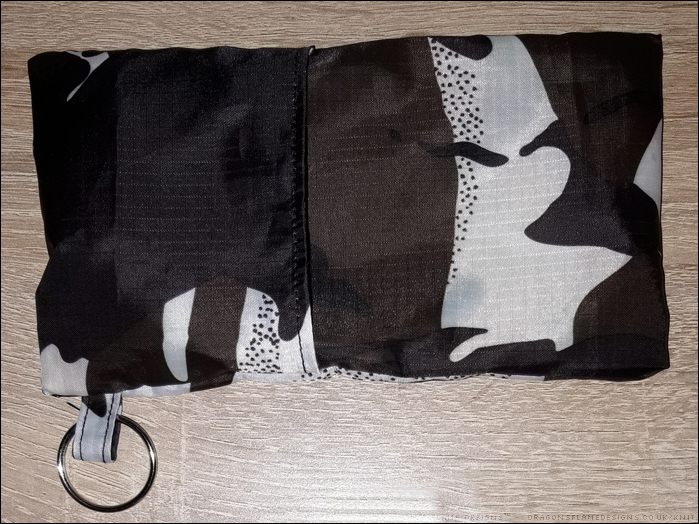
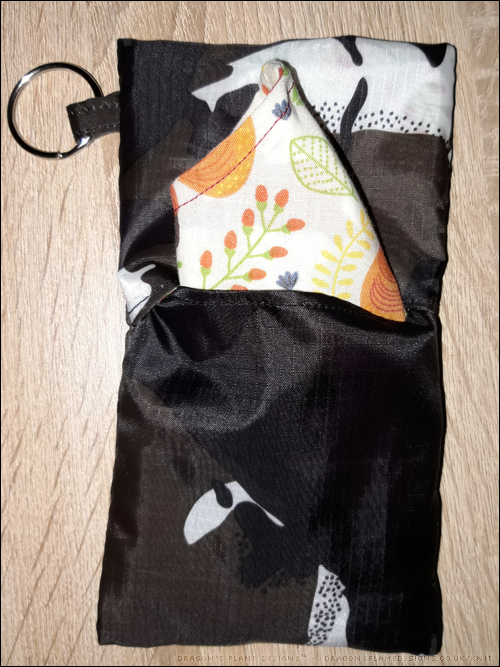
I also added in a little waterproof ripstop carry bag for the face coverings – the ring on the edge means you can clip it to your keys, or into your bag so you should never be caught out without a mask!
And finally, I had another request from the same relative for some Christmas-themed masks just to make work seem a little more fun in the run up to Christmas last year. They also requested a couple of matching sets to include a children’s mask.
I not only made the Christmas themed ones, but also added in some more spring and summer face coverings just to give them something fun for the warmer months when Father Christmas and snowmen didn’t quite seem ‘right’.
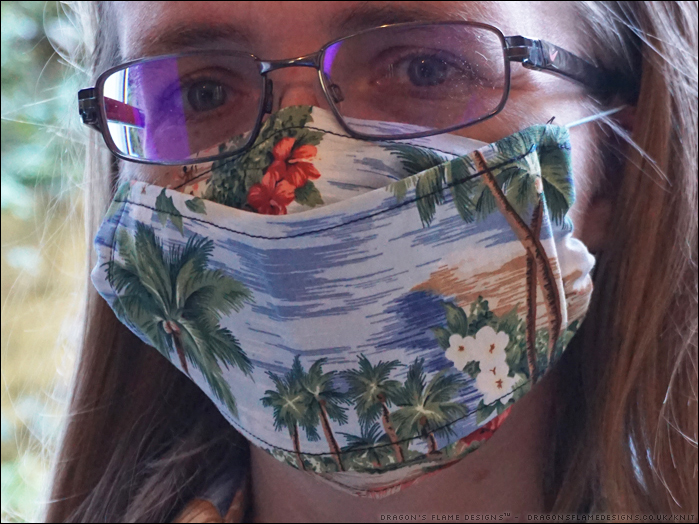
And just to try out a different pattern, I made one of the 3D Masks for myself. I didn’t get the topstitching quite as close to the fold, so the shape feels a little smaller than I think it should, but it does feel pretty comfortable.
I used the same thin elastic for all my face covering makes, as I felt that thicker elastic might cause a problem if it caught the back of the glasses arm behind the ear.
If you’re reading this today (Saturday 13th March 2021) then Minerva are holding one of their special discount days for Craft Club members today! Craft Club membership is £20 for the year, and gives you 10% off all purchases year round, plus a couple of these special 20% off days in the year.
*aff
Offer valid Saturday 13th March 2021
But “what can I make from Minerva fabric?” I hear you ask – here’s a selection of my makes but I’m sure you would be even more creative.
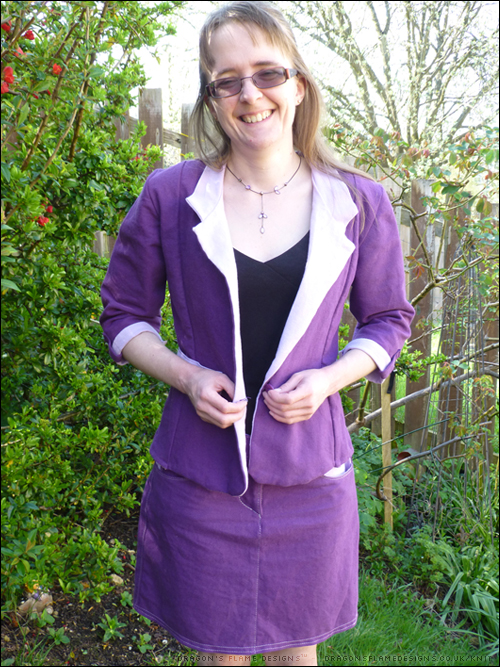
This cotton linen blend was crying out to be a skirt & jacket combination and the contrast facing & cuffs really help to lift it from being just plain purple.
My first time sewing with Scuba fabric, resulted in this top & trouser combination. I could’ve made the top a little larger to compensate for the fabric being more structured, but the trousers worked particularly well.
And speaking of trousers, these jeans were made from a super stretchy fabric which removed most of the jeans-fitting problems I’d had previously. I do need to add some elastic to the waistband though, as I made it a little too generous on the sizing!
Onto a more summery make, with this nautical polycotton. I made this dress and a pair of shorts from this fabric, which definitely helps liven up a dull rainy British summer’s day. I did line the shorts with some plain white polycotton just in case this was a little see-through, and they’ve held up to multiple wears on long walks so far.
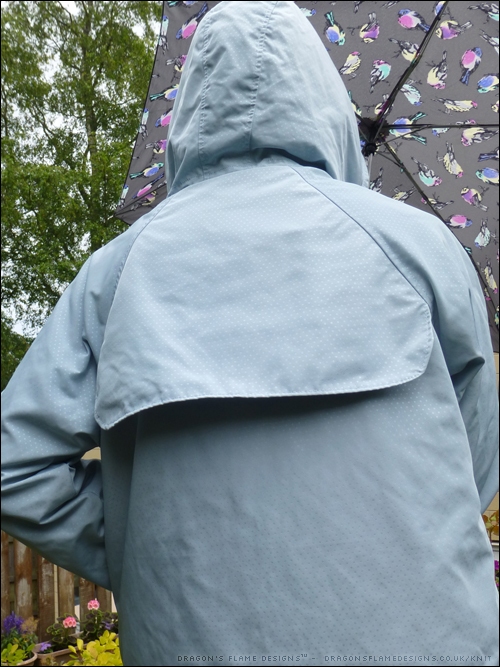
Typical British Summer’s weather means I really needed a decent waterproof coat to wear. I really never thought I’d ever sew myself one, but this memory raincoat fabric (lined with a spotty polycotton) was perfect! I used the Tilly and the Buttons Eden jacket pattern for this, with no alterations.
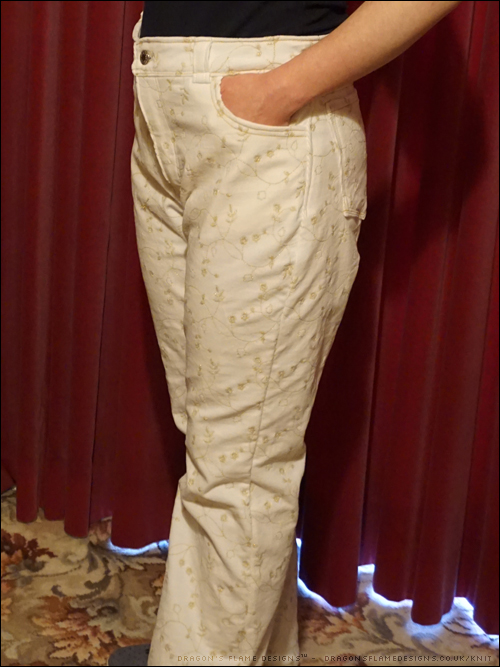
Another pair of jeans, this time in an embroidered cord fabric. These are made from the Megan Nielsen Dawn jeans patterns, with a few alterations (I think I still need to tweak the pattern to get the best fit for me). It was an experience sewing with embroidered cord, but once I had a new denim needle in my machine, it was pretty easy to sew.
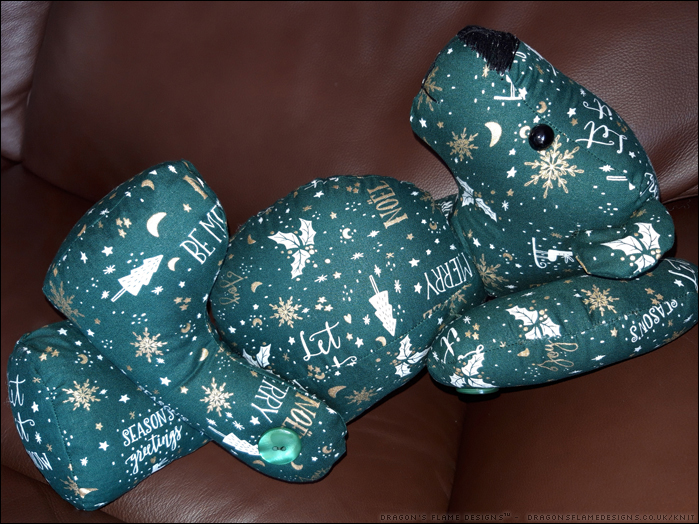
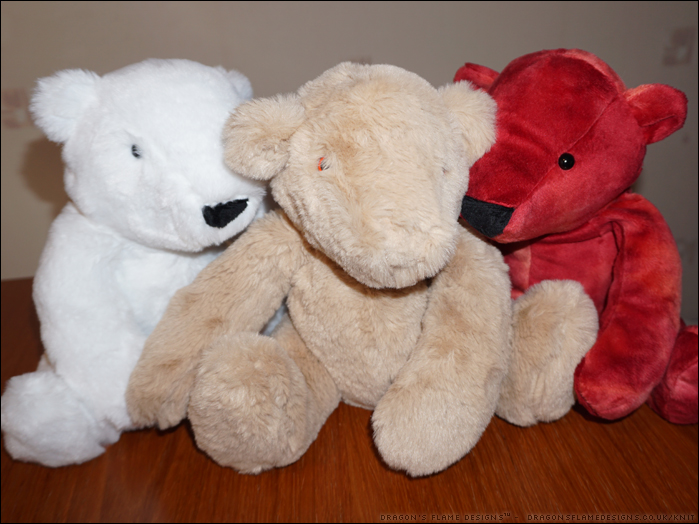
It’s not just clothing – I made a family of three bears from some Christmas cotton fabric! I would normally pick stretchy fabric for bear-making, but this cotton worked really well. The advantage of this fabric is that the pattern is non-directional, so it didn’t matter which way up I had the pieces.
My most recent Minerva make is this Halifax Hoodie from a textured knit fabric. I’d never sewn with textured knit before, so I was wondering how well it would work. I’m pretty pleased with the end result!
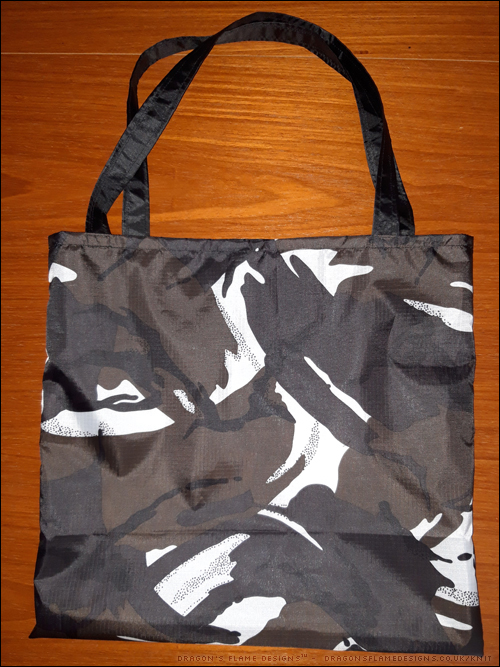
And finally, this is a bag which will (eventually) be a tutorial here. It’s made from ripstop fabric which is showerproof and also can be wiped clean. The bag can also be folded up to fit in a trouser pocket, so it’s a great reusable alternative to plastic carrier bags.
I hope that’s given you some inspiration for what you could make – why not check out what Minerva have available (even if you miss the 30% off day, it’s worth just browsing their fabric and sewing supplies)?
*aff
Offer valid Saturday 13th March 2021
* aff – The banner link at the top & bottom of this post are affiliate links. This means I get a small amount of commission if you click through my link then go on to purchase anything from the Minerva website. It does not cost you anything extra to use these links, but does help fund my next fabric purchase!
I am a Minerva Ambassador, which means that I have the opportunity to get a piece of fabric for free, in exchange for photos and text to feature on their website. Some of the makes in this post were done as part of that role, and others are made from fabric I purchased myself.
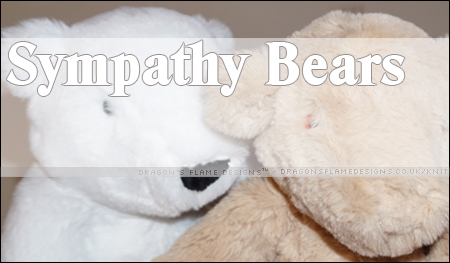
Sympathy bears weren’t something I had originally set out to make. But after I made Caramel, I heard that a friend’s cat had died. That’s the kind of time when you would give that friend a sympathetic hug. However, said friend lives in a different country, which made it impossible to give a hug in person!
What better way could there be of sending a hug, than posting Caramel as a hug through the post?
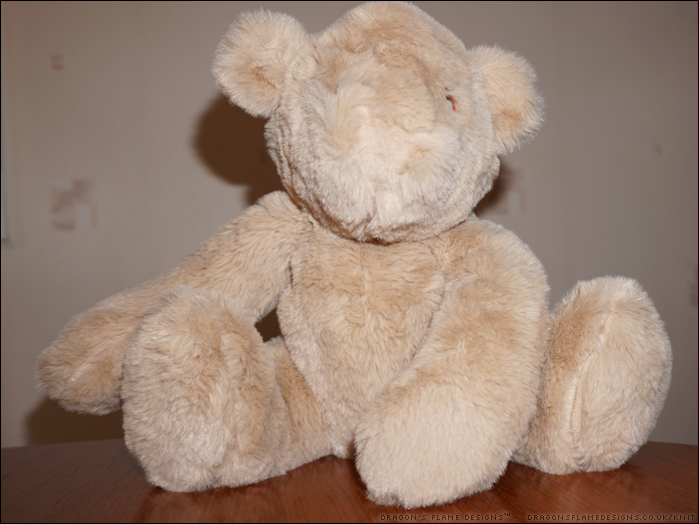
You can probably tell that Caramel was the first bear I made from this pattern, as he’s not entirely accurate compared to my later makes. But despite his lack of visible nose (I didn’t have any suitable black fabric to hand when I made him), he gives a lovely hug, and that’s what matters.
I’d purchased the fabric online which doesn’t always make for a success with faux fur. But I was pleasantly surprised how tactile this fake fur is! There’s the usual shedding when you’re cutting and sewing, but once the bear is made there doesn’t seem to be any further shedding of fur.
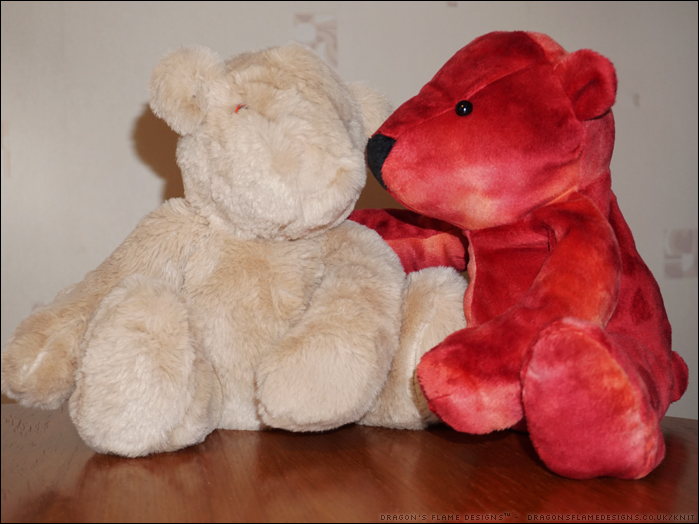
Caramel and Rusty bears
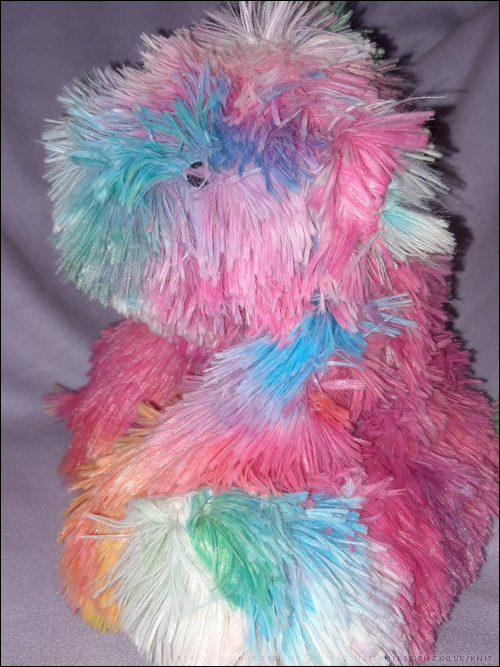
I made Rusty from the same pattern, but using a tie-dye effect Cuddle Plush fabric (also known as Minky), which has a much shorter pile. So although both bears are made from the same pattern, Caramel’s facial features aren’t as defined – even with his body-coloured nose!
Caramel Bear
Fast forward to 2020 and even for friends living closer to home, it’s obviously not suitable to give them a hug when they need one. So when a local friend’s dog passed away, I knew just the thing to make.
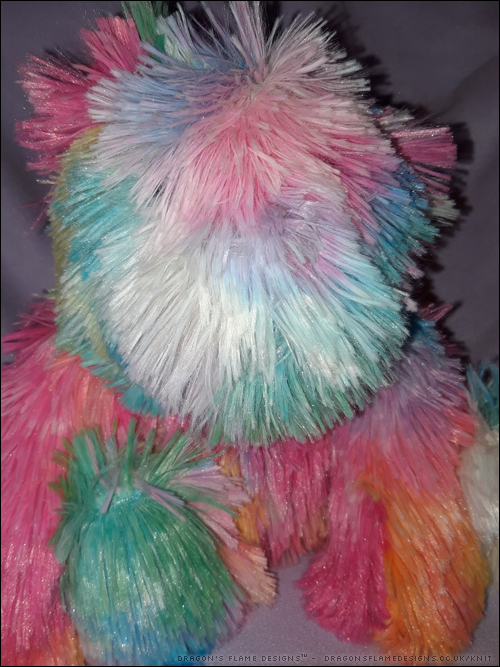
Duster Bear (with clips holding his back seam as I was testing how much stuffing he’d need to enable him to sit upright)
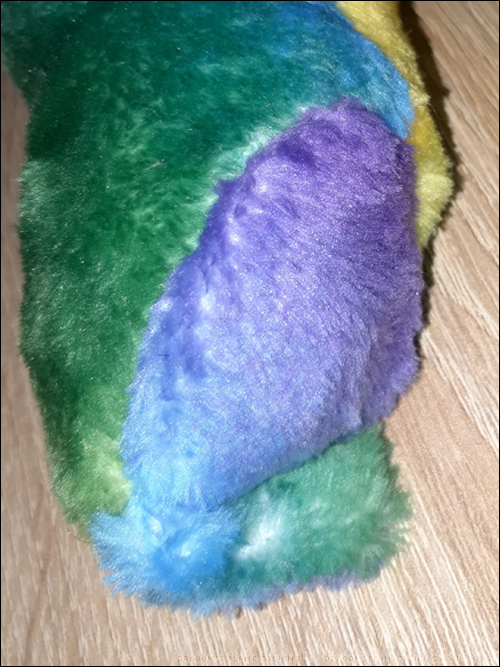
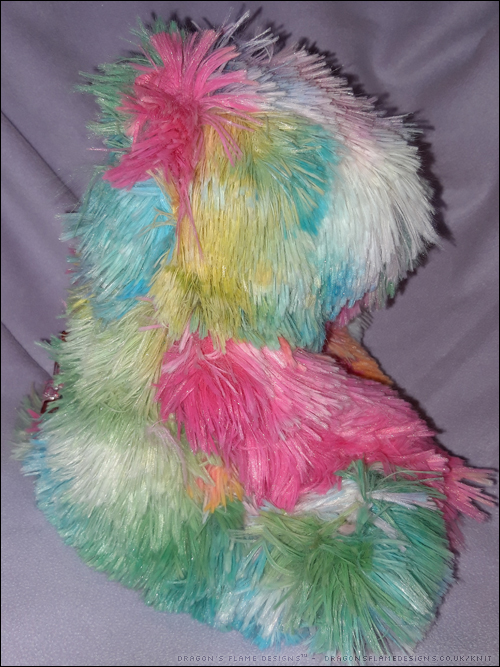
Meet Duster, who was made from a long pile rainbow fake fur. This had a much thinner backing fabric and wouldn’t be something I was happy using for a child’s toy, but for a sympathy bear it worked really well.
My friend’s dog was long-haired, so I thought the long pile of this fake fur would work well to run her hands through in the absence of her faithful companion.
It’s the kind of project where you strongly hope you’ll have no need to make any more soon, but if you do then they aren’t too challenging to make!
The pattern is from Simply Sewing issue 24, but unfortunately it’s not available as a back issue. You can, however, download the pattern templates from their website – gathered.how. One important thing to note, is that templates downloaded from a magazine’s website do not include instructions, so if you don’t have issue 24 then you would need to have some toy making knowledge to know how everything should fit together!
I’ve also made some larger versions of these bears, but for sympathy bears I think this is the perfect size.
Pattern: Simply Sewing issue 24 Fabric: Premier Plush from FabricLand Rainbow Faux Fur from MIBS Tie-dye Cuddle Plush from Plush Addict
Ok, I will admit it’s been a looooooong time since I posted anything on my blog! 2020 was a strange year in more ways than one – I didn’t get as much opportunity to work on sewing projects as I’d planned, and I struggled to get into the swing of blogging about them too!
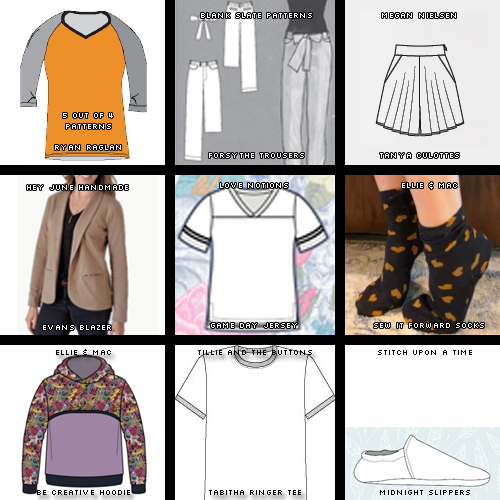
But I thought I’d start 2021 properly and actually get sorted with a Make Nine post of what I’m hoping to make this year. I wanted to pick patterns I’d already bought but not yet made anything from, and also a couple of ones that help me use up some oddments & offcuts of fabric – those pieces that are too big to just throw away, but too small to make a whole item from.
So from the top row we have:
5oo4 Ryan Raglan * Who says a Make Nine has to be solely for me to wear? I’ve wanted to make my Dad a Raglan sweater for a while, and I think this pattern might just be the one that works!
Blank Slate Patterns Forsythe Trousers I’ve had the pattern for what feels like an eternity, but still haven’t made an Forsythe Trousers. These look comfy and suitable to sit in all day (no high waist that’s going to dig in after a few minutes) so I’m hoping these will work well.
Megan Neilsen Tania Culottes I had some culottes when I was a child, but the Tania pattern golds appeal as looks like a skirt from a distance… just without the risk of flashing anything on a windy day!
Second row, left to right:
Hey June Handmade Evans Blazer * I bought the pattern not long after the Evans Blazer was released, but it’s a more complex jacket pattern than any I’ve made before. However, if I can find the ‘right’ fabric and be brave enough to actually cut the pieces out(!) then I think this could work.
Ellie & Mac Sew It Forward Socks As the name suggests, this is another one that’s destined to be a gift for someone rather than making just for me. I’m hoping to make my Dad some slipper socks (regular socks just with a grip on the base), and also to make some funky socks for a friend.
And third row, from the left:
Ellie & Mac Be Creative Hoodie Although I’ve made quite a few hoodies, I’ve never made myself a Be Creative one – it looks like a great way to use up some of those offcuts that aren’t quite big enough to make a complete garment from.
Tillie and the Buttons Tabitha Ringer Tee from Make it Simple I bought Tilly’s Make It Simple book when it was released, and I think it’s about time I made something from there, don’t you? The Tabitha Ringer Tee caught my eye when I was flicking through, and I think that would be a good one to start with, especially as my t-shirt neck bindings never seem to work out all that neatly!
Stitch Upon A Time Midnight Slippers I’ve never tried making slippers for myself… but if the product I’ve ordered to make the grip for slipper socks works, then I’m hoping to use that on the soles of Midnight Slippers so I can use up some of my fabric oddments and make myself something useful at the same time!
I can’t believe I haven’t posted these here yet! I made these jeans last year, with some embroidered cord from Minerva. To make it fit on their new website (I had too many photos for a single post!), the blog post is split into three: