Tag Archives: Simplicity Sewing Challenge

Sleek Satin Sewing Success!

I wasn’t entirely convinced that I would get this dress finished in time, but after a lot (and I mean a lot) of unpicking and resewing, I finally have a finished dress!

I went with the idea of using two different fabrics to show off the different pieces of the bodice, and chose a combination of two animal print satin fabrics from Minerva Crafts. The fabric was so sleek and had such a great feel, I also made a small shawl to go with it. I quite liked the semi-frayed look of the selvedge edge so I kept that on the shawl edge.

Originally I had aimed for the yoke and waistband to be in the leopard print, with the rest of the bodice in the tiger print, with the opposite on the lining. However, after a few mistakes, I ended up swapping the lining and main pieces, which thankfully went much better.

I would use satin fabric again, but only for a top – I don’t think my sewing skills are quite up to the task of tackling another dress in such a temperamental fabric just yet. I would try making another dress from this pattern though…. but out of polycotton or cotton instead.

But this has challenged me to make a dress I probably wouldn’t have attempted, out of a fabric I usually would avoid…. and I’ve got a dress out of it, so I’m happy!


Simplicity Sewing Challenge 2017

Fabrics used: Tiger Print Satin, Leopard Print Satin


Pattern? Check. Fabric? Check. Finished Shirt? Check!

I’ve been steadily working on my Simplicity Sewing Challenge makes, and tackled the dreaded buttonholes over the weekend…. much to my amazement, the gingham fabric I chose was a dream to sew! There were no ‘birds nests’ of thread and the sewing machine didn’t try eating the fabric through the bobbin either!

The fabric is a 1″ Check Corded Gingham from Minerva Crafts which works really well. I will admit I didn’t even attempt to match the checks on the seams, but then when you look at Dad’s ready-to-wear shirts, very few of them have matching patterns anyway. I did attempt to get the front checks to line up, but as you can see they were quite a bit off…. but that makes for a more unique looking shirt, right?

I did make a couple of alterations to the pattern; dad’s not all that tall, so I had to take out some of the length. In doing so, I realised I could actually get away with using one less button. As this is going to be a casual-wear shirt, I also left out the button on the collar. Dad doesn’t like to have the top button done up anyway, so there really wasn’t much point in adding one in just for show!

I think it passes the “dad test” – after posing for these photos, he didn’t want to change back out of the shirt, so I think he approves.


Shirt Inspiration – a Simplicity Sewing Challenge

Simplicity Sewing Challenge 2017

I’ve been working on my dress for the Simplicity Sewing Challenge, using a couple of really sleek satin fabrics from Minerva Crafts.

I measured out the bodice, stitched all the seams, then realised the waistline was about an inch lower than it’s meant to be (argh!). So I have to unpick the zip (which didn’t go in quite right in the first place anyway), to let me redo the horizontal bands and hopefully get everything lining up properly.

So, I’ve come to realise that there’s no way I will get it finished before the closing date. If I hadn’t needed to unpick the zip, I might have managed it, but unpicking stitches on a satin fabric has to be done more carefully than on a polycotton, so it’s going to take a while.

I’m determined to get it finished though – even if it will be too late to enter into the competition.

Simplicity Sewing Challenge – Dressmaking Inspiration

“Your take on a Simplicity Make”

….it sounds so easy, doesn’t it? But just how can you show your individuality in a dress?

I had considered using some unusual fabric – maybe combining two colours, to separate the bodice, waistband and skirt.

Or maybe I should move the zip to the side and have a plain back.

Different still, would be losing the zip completely, and putting a front buttoned opening to make the dress into a shirt dress, although the thought of those buttons has me breaking out in a cold sweat!

I even considered taking a leaf out of a previous year’s winner’s book, and making the dress into top and skirt separates.

In the end, I decided to try adding elbow-length sleeves. I dug out some fabric oddments and made a rough version of the bodice, using version C with straps. I drafted a rough sleeve using another pattern I had as a template, and stitched them in.

Realisation 1 was that a boatneck style neckline with straps was never going to work – the straps slid off my shoulders almost instantly, pulling the sleeves with them.

I thought then maybe I needed to go for a smaller size, so I cut a size 10 from another selection of oddments, but realisation 2 was that a size ten made the armsyce way too snug so that it felt like I was about to bust the seam stitches each time I moved,

So it’s back to the original idea of a size 12, and I have just enough oddments left over to make another mockup version to check the fit before I cut into my ‘proper’ fabric.

Wish me luck – I think I’ll need it!

Shirt Inspiration – a Simplicity Sewing Challenge

I’ve made clothing for myself before, but the only wearable things I’ve ever made my dad (that fitted successfully) was a fleece hat. I think it’s about time I made hime something different, don’t you?

So I entered the menswear category of the Simplicity Challenge as an incentive to get something made.

At the moment I have taken the measurements (I didn’t want to rely on what dad said he measured!), and I’ve picked out some polycotton to make a “wearable muslin”.

I did get in a complete mess with sewing the facing – a combination of partially-written instructions, and a distraction while sewing, meant that I didn’t quite get it lying accurately. However, other than adding in the buttonholes and buttons and the final hems, this should be a shirt Dad can wear.

It does look a bit…. boring though. Plain polycotton might have been dad’s choice, but it isn’t going to look all that startling. So I had a rummage through dad’s wardrobe to see the kind of shirt design he prefers, and there’s a lot of checked fabric in there! I’ve got some gingham fabric and he’s picked out some buttons ready for the final version.

Wish me luck!

Simplicity Sewing Challenge – Best Blogger Feature

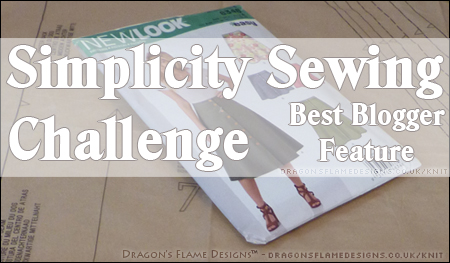
This year I thought I would challenge myself by making a skirt. An ideal make for the “best blogger feature” in the Simplicity Sewing Challenge. We were able to pick any of the challenge patterns for this category. I chose the New Look 6346 skirt pattern – I never seem to have the right style of skirt when we have warm summer weather! I also need more practise at making skirts that actually fit me!

Originally I was going to pick version A (the longer button-up skirt), given the cooler summers we often get I thought this would be a good choice! After looking at the options in detail, I went with version C – the shorter zipped version instead. I think that style will be more user-friendly when it comes to wearing it, and should be just the right length for me, especially as I am just five foot tall!

The whole idea of the sewing challenge is to make “your take on a Simplicity make” but how on earth can you make a skirt different enough? I didn’t think that simply adding pockets or a decorative trim would be radical enough, and I’m not really into “girly” trims anyway, so I thought I’d be totally different and make the skirt into a dress!

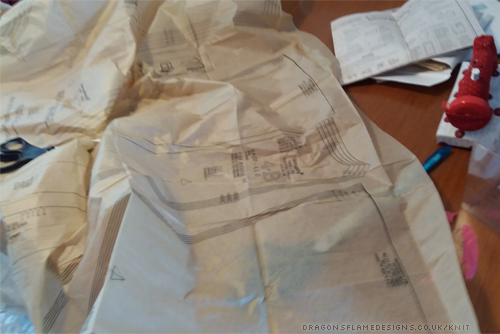
Armed with my self-drafted bodice pattern, I worked out that I’d need a size 12 for the skirt, but just in case I needed to make a larger size at a later date, I didn’t want to cut into the paper pattern. Then came the next challenge – how to trace off the pattern accurately. I’ve seen freezer paper mentioned on a lot of blogs, but I’ve never seen it on sale over here; greaseproof paper is nicely transparent, but only comes on narrow rolls and no matter how hard I try it will not stick to itself! And believe me I have tried!! Instead I bought a pack of Burda dressmakers’ carbon paper from a local fabric shop plus a roll of brown paper from Poundland on a whim to see if that would work.

Dragons Flame Designs - Simplicity Sewing Challenge

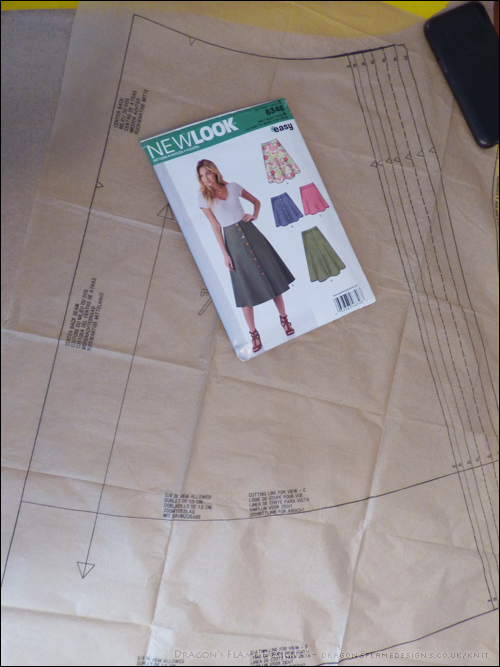
It definitely works well – the yellow and white show up brilliantly on the brown paper, and it can be stuck together with ordinary sellotape to make a wider sheet if needed.

My bodice pattern finishes at the waistline and the New Look 6346 skirt waistband sits just above the waist, so I was able to line them up perfectly. Because of the darts in the bodice, I chose to cut the pieces separately, so I had the bodice and neck / arm facing, waistband and skirt for the front and back. Keeping the waistband in the dress, meant I was able to retain the shape of the New Look 6346 skirt, while still making it into a completely fresh look.

The dress had the potential to turn into a ‘mongrel’ where I was trying to join two different patterns together, so before I cut into my posh fabric, I made up a wearable muslin version first. I find this really helpful to have a “rough” version to experiment with. Who knows it may even turn out wearable! The bodice needed a little fiddling to get the waistline to match the skirt – rather than making the darts larger, I folded over a little more fabric at the base of the darts to make the measurements match without cutting out too much breathing space.

Dragons Flame Designs - Dress Muslin

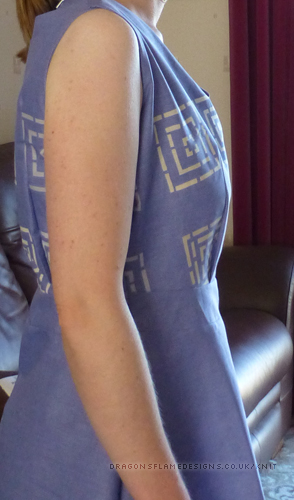
My Simplicity Sewing Challenge skirt dress muslin – fabric is half a duvet cover

Despite the excess fabric at the front, the fit was a lot better than I’d anticipated. However, in sewing the zip into the back, I managed to get the seams misaligned. Argh! Decision time. Do I want to unpick a lot of tiny stitches and risk making a hole in either the fabric or the zipper tape? I decided to be reckless and break out my posh fabric to start the final version. I am always anxious when cutting into my posh fabric.  Making that first cut is a challenge in itself!

Dragons Flame Designs - Simplicity Sewing Challenge

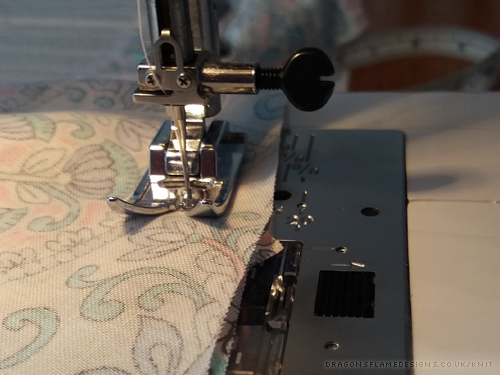
Sewing the seams, trying to make them as neat as possible

This particular polycotton is quite ‘fray-happy’ so I’ve taken care to finish all my raw edges as I go – the faux overlock stitch on my machine is proving really handy for this. I find that using a zigzag stitch with the regular foot makes the fabric catch up a little, leaving a ridge instead of a nice flat edge.

The facings were a challenge, as I had drafted one facing to cover both the neck and armhole, but had no idea how to stitch it without any of the stitches showing on the right side! In the end, I stitched the neck as normal, and top stitched the armhole facing into position. It’s not visible unless you really look closely, and it certainly shouldn’t come undone in a hurry!

Dragons Flame Designs - Simplicity Sewing Challenge

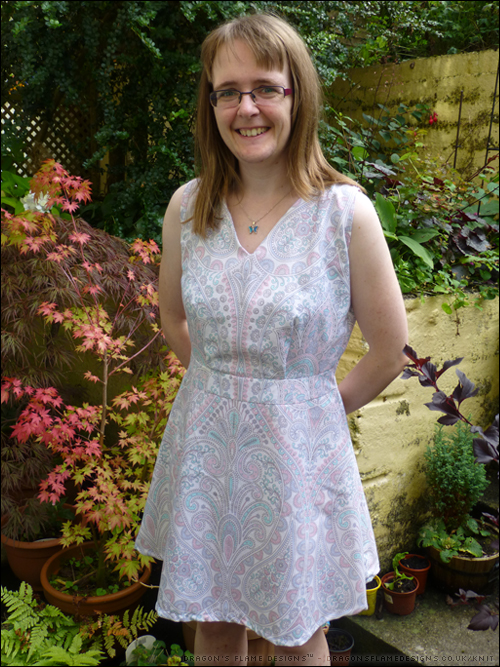
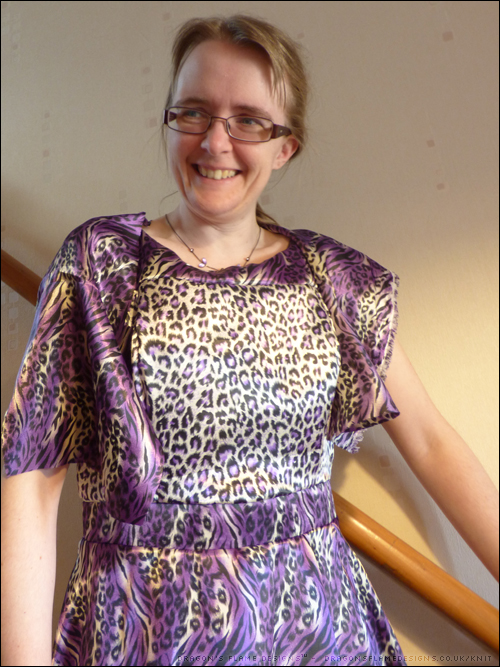
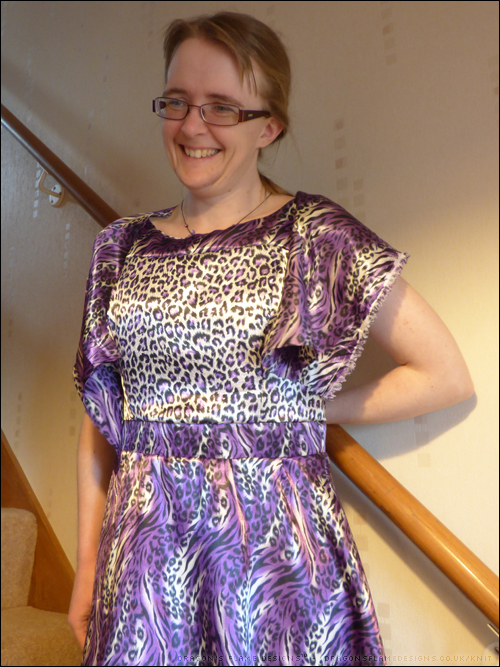
A finished dress from New Look 6346 and a self-drafted bodice pattern. I am really pleased with the way the bodice and the skirt come together in the design of the fabric. The finished garment fits really well, and I think the fabric works wonderfully – it reminds me of a painting by numbers pattern. Thanks for the challenge Simplicity – now I have a whole new look!!


Simplicity Sewing Challenge 2016

Back in May, I signed up for the Simplicity Sewing Challenge – I chose two categories to enter: Best Dressmaker, and Best Blogger Feature. Part of the challenge is to put your own style into the pattern, so I’ve been trying to figure out just how I’m going to do that.

It took a while for the patterns to arrive, but they came in the post at the beginning of the month, so I’ve started on a muslin version of the dress. Cutting out the pieces was interesting, given that I’ve never made a dress with princess seams before, and my ability to sew an accurate opposing curve tends to be lacking! But I’m definitely up for the challenge for that.

Dragons Flame Designs - Simplicity Sewing Challenge

Tracing off the dress panels using dressmaking carbon paper

The blogger category allowed you to pick a pattern from the other categories, so I chose the skirt. Originally I was planning on making the button-up version, but I decided that the zipped one might be a style I would get more wear from. I do have an idea of how I can make that slightly different to the pattern, but it’ll be interesting to see if I can actually achieve what I have in mind!

So far so good – I’ve got the pieces cut out for the dress, and have started working on the skirt for a bit of variety. All I need to do now, is get a zip in the right length, so I can work on that part.