Tag Archives: toy

What is black and white, and red all over?

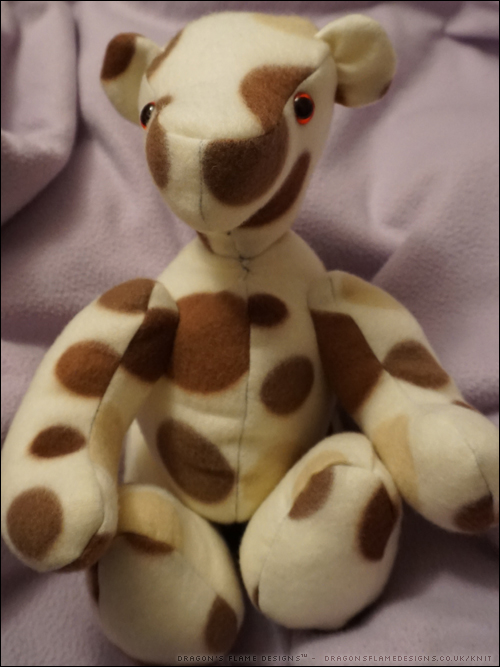
There aren’t many sewing patterns out there for penguins which look like they’re sliding down a snowy bank, so when BeeZee Art released her latest penguin pattern, I knew it was one I wanted to try making.

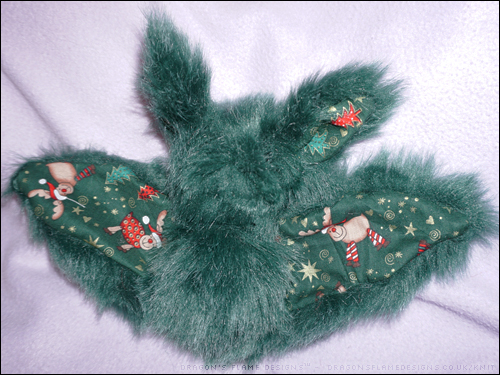
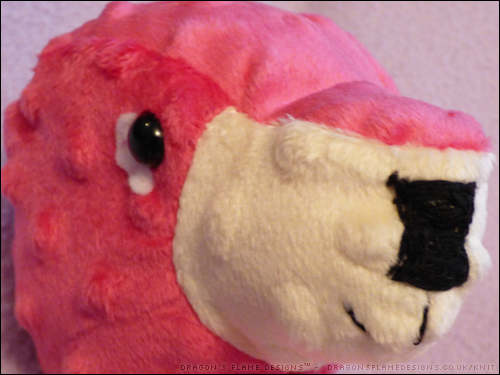
Rather than sticking with the traditional penguin colours, I decided to use some tie-dye effect plush fabric I had lurking in my fabric bag. Of course this means that Percy Penguin looks like he’s been out in the sun for too long, but I quite like the colours on him.

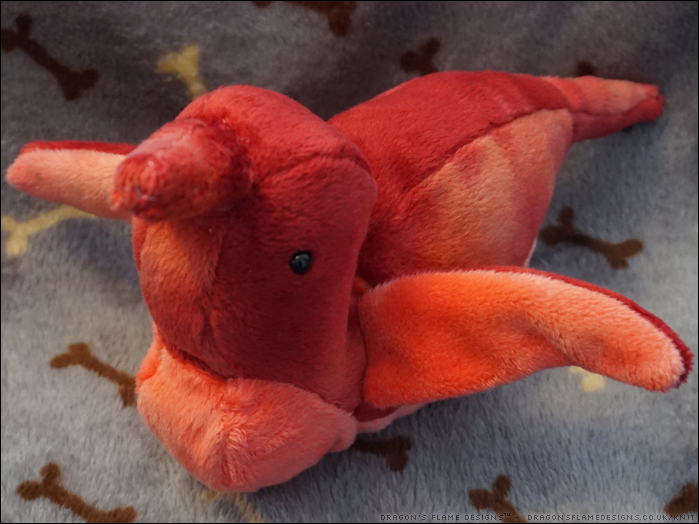
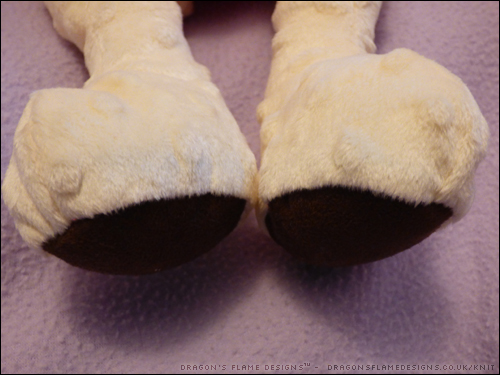
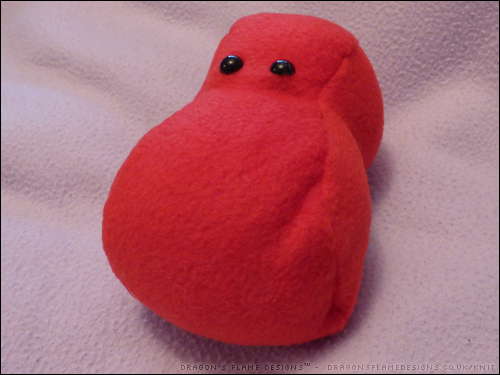
As yet, Percy doesn’t have his feet attached, but because I added some plastic pellets to his tummy, he balances really well without his feet.

It’s strangely tempting to make more penguins in various different colours…. and hopefully make sure that their flippers come out at a better angle next time – Percy’s look like they aren’t quite right somehow.


Pattern: Penguins by BeeZee Art
Fabric: Tie-dye plush from Plush Addict

Jumbo (finished)

Do you remember ages ago when I was working on the Jumbo bear pattern by Emma’s Bears? Well, I’ve finally got him finished!

Jumbo lives up to his name – he’s so big, he takes up the entire chair! So at the moment, he’s sitting on the floor, looking out of the window. 

I didn’t have the right size eyes, so his eyes are a little smaller than intended, and I think I was a bit stingy on stuffing as his head really could do with a bit more padding in places. But for my first time sewing such a large bear (and having to hand stitch some seams because my sewing machine struggled), he’s come out really well!


Pattern: Jumbo by Emma’s Bears

Strawberry Dragon (finished)

Strawberry is finished! When I started, the only alteration to the pattern was going to be printing the pattern at 150% for a larger dragon. In the end, I made a few more alterations just to hopefully end up with a sturdier dragon.

I cut the spines from two layers of fleece rather than using felt. With a dragon this size being given to to my cousin’s little boy for his third birthday, I wanted something that would be soft, yet sturdy if he was picked up by his spines.

The arms and wings are meant to be ladder stitched onto the body, but I cut a slot and machine stitched them on the inside just to make sure they stay attached! This gave Strawberry a small dart-like shape on his sides, but the fleece is quite stretchy so once he was stuffed you couldn’t really see the dart shape.

A slight error in reading the pattern meant I machine stitched the tail base to the tail sides and bottom part of the body, rather than leaving that gap to add the stuffing. So, as I was finding the foot pads challenging to sew by machine, I stuff him through that gap, and hand stitched the foot pads at the end!

Hopefully K will approve of his not-so-scary, cuddly dragon.


Pattern: Yoki the Dragon
Fabric: Red apparel fleece from Fashion Fabrics
Safety eyes: Hobbycraft

Festive Forest Furry Bat

I finally finished the Forest Furry Bat without jabbing myself with the sewing needle too many times! It wasn’t the easiest of things to hand sew, given the thickness of the faux fur pile, but I think the end result was worth it.

I know it’s not really seasonal given that I’d chosen some Christmas fabric for the inner ears and wings, but I didn’t want to wait for December to share it!

I think if I make another bat in faux fur, I’d be tempted to use fleece or felt to make the feet so it stands up a little better! But it has given the bat a totally different look to the original design, which was definitely worth the effort.


Bat Pattern: BeeZeeArt
Faux Fur & festive fabric (wings and ears): Fashion Fabrics

A Delight in Fleece

Whenever I’ve tried making a bear out of a non-pile fabric, they haven’t come out looking quite ‘right’. Usually it’s the head or muzzle that just seems to be the wrong shape compared to the faux fur example picture. Delight, however is specifically designed for faux for or calico, so the head shape should look perfect regardless of the fabric I use.

I decided to test it out with some remnants of a fleece blanket (the same one I used for the reindeer a couple of years ago) and made Delight entirely unjointed.

The head was a struggle to align, so I think Delight would benefit from a scarf or ribbon just to cover up the shoddy stitching! I used a combination of plastic pellets and toy stuffing to make Delight as cuddly as he looks. You may notice that he’s missing a nose and mouth – that was done on purpose, as I felt that the stitching would detract from the spotty details of the fleece ….that’s my excuse, and I’m sticking to it!

I do love the overall look – it’s a much better head shape than the other patterns I’ve tried before. I think the next Delight I make will be in faux fur, but as Delight is designed as a signature bear maybe it would also work to have a calico version which has an embroidered design on it (or if that fails, just a hand drawn design instead!).

And yes I admit I used a darker thread than was advisable with such a light coloured fleece!


Pattern: Delight
Fabric: Fleece blanket from Shaws

Glowing Spooky Spidery Bat

I actually made this bat back in August but I had to wait until now to share this post, because it was a Christmas present. Using the tried-and-tested BeeZeeArt bat pattern, I got on much better sewing the head gusset and feet than I did with my starry bat.

Strictly speaking, the spiders are a little large for the wings, as it’s only the spiders and strand they’re dangling from, which glow in the dark.

But as a gift for a friend who likes Halloween and bats, it should work really well. The dark “minky” fabric means the spiders seem to glow even better than the stars do on my blue bat.

Dotty Dinosaur

Having made a dolphin, I could hardly pass the opportunity to make a dinosaur! The body shaping was a lot easier, although I will admit his face is slightly off-centre.

I used black faux suede for the eyes and mouth but looking closely at the stitching, I should practise my applique skills for unusual shaped pieces! The spines are also faux suede, just to add a little colour to lift the grey.

The faux suede was quite stiff, which made it challenging to turn such small pieces, but I think it was worth the effort, as it sets off the dotty grey really well.

Both Dotty Dinosaur and Dotty Dolphin are just the right size to sit on your hand, and despite having never made either of them before, didn’t take too long to make up.

Dotty Dolphin

I’ve seen a lot of dolphin plush toys online, and I was pleased to find a free pattern from Choly Knight. The pattern uses minky or similar fleece and I thought it would be ideal to use some of the dotty fat quarters I purchased from Hobbycraft.

Although the eyes look embroidered, they are actually appliqued! I cut the black from a faux suede fat quarter, and the eye white is cut from acrylic felt.

The tail is straight rather than having a v-shaped notch, as I made a mistake in the sewing…. but I don’t think that really matters. The dolphin plush still looks suitably cute and her misshapen tail won’t prevent her from pretending to swim!

Raspberry Ripple Bear (UFO)

After a mini shopping spree at Hobbycraft, I found myself with some dotty cuddle fat quarters. I thought they would make a lovely soft squishy bear, using the “Happy” pattern from Emma Bear’s.

I was originally going to use the pink and yellow for this bear, but the yellow looked a little harsh so I plumped for cream instead. It gives the bear a raspberry ripple look, and that was the fastest I’ve ever named a bear!

So far I have his head stitched (although he still needs ears), and his legs finished. The paw pads are faux suede just to add a different texture to the sleek dotty fabric.

Strawberry Dragon (UFO)

You’d think that with a blog called Dragon’s Flame Designs, I would have sewn several dragons already. But while I’ve sewn lots of bears, I’ve never tackled a dragon…. until now! I’m reliably informed that K likes dragons, so Yoki Dragon looked like the perfect early Christmas present for him.

I thought the original size might be a little fiddly to sew, so I scaled the pattern to 150% before printing. I’m using some red clothing fleece rather than minky, as I think it’ll stand up to rougher play.

So far I have the head sewn, and you can just about see the dragon shape starting to emerge.