Category Archives: Sewing

Fruit Polo Polar Bears – finally finished!

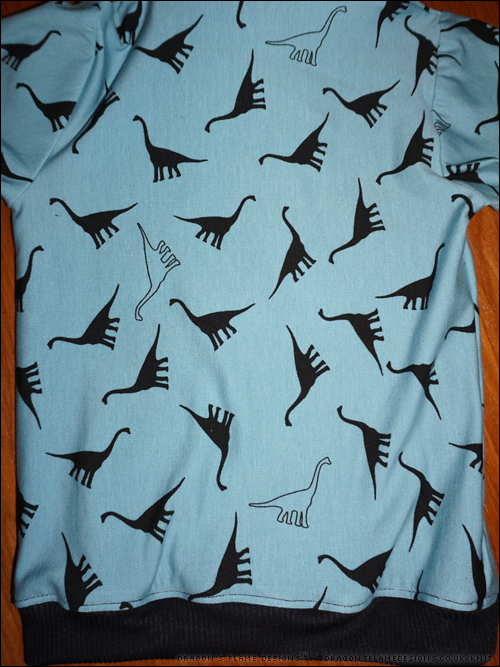
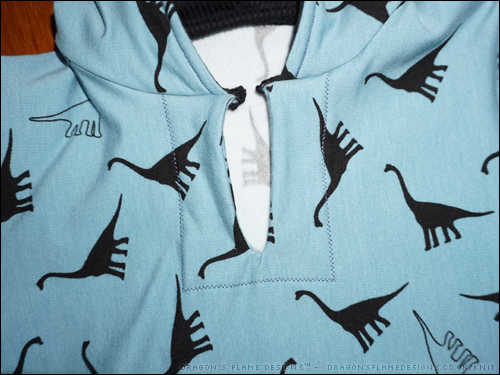
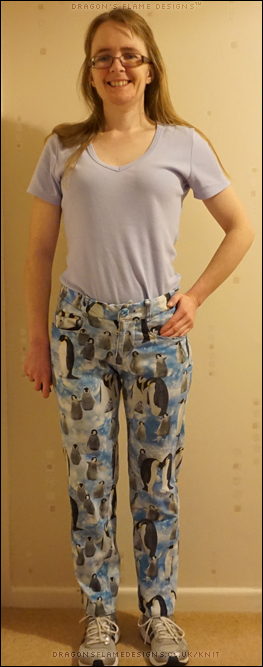
Ok, I will admit I finished this Knot Your Average Top* late last year, but I realised I hadn’t ever blogged the finished top! Back in May, I had got to a sticking point with this Polar Bear Knot top, when I wanted to add in a shelf bra style part that isn’t in the pattern, but wasn’t too sure how to make it work.

After what felt like hours of instruction-less fabric origami, I wrangled the shelf bra into place, but had to unpick one sleeve as I’d made a basic error in attaching that to the shelf bra armscye. But that was mostly user error, and trying to add in a shelf bra for the first time, on a pattern that doesn’t include that option.

I won’t be sharing how I eventually achieved adding it in, as I made it ultra complicated – I need to try adding it into a few other patterns to perfect my method, before feeling confident at sharing it!

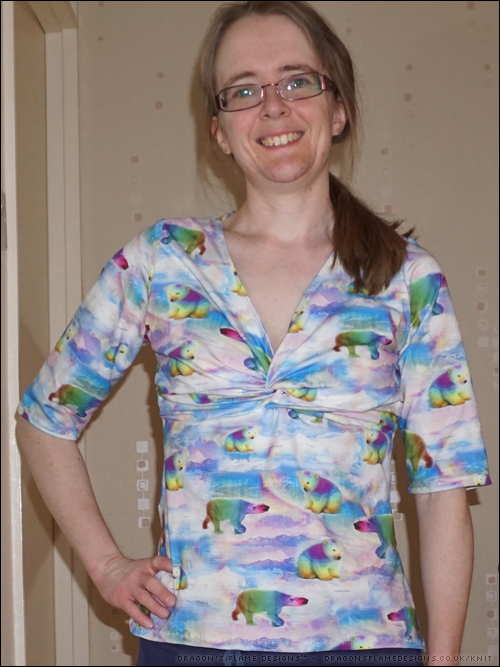
As with my other Knot your Average tops, the bust section has folds where it appears there’s too much fabric. It’s still there even when I change the cup size on the pattern (even on the smaller cup size top I made from scuba), so I’m assuming that it’s down to either the fit on the shoulder, or maybe needing to take out some height between the shoulder and underbust (that’s not an adjustment I’ve ever tried doing).

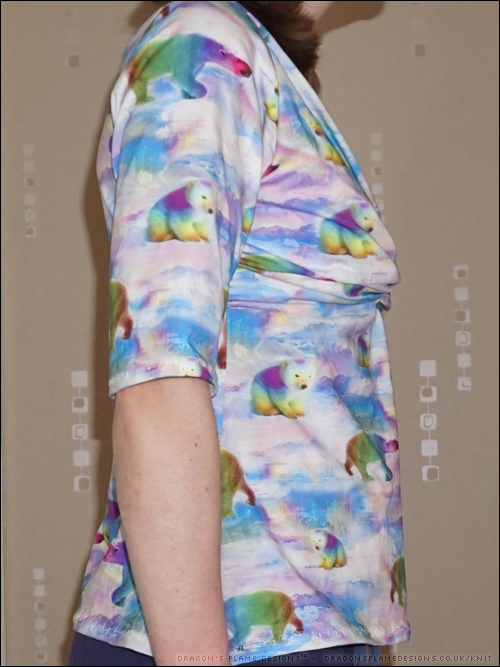
So ok, it’s not perfect but then if I’d bought a ready to wear top in a similar style, that was never going to fit me perfectly anyway. I had fun sewing this top, and learnt quite a bit in trying to add in the shelf bra, and that’s what matters!


* – affiliate link
Pattern: Knot Your Average Top* by 5 out of 4 Patterns
Fabric: Cotton Elastane from Fashion Fabrics

The first UFO of 2019

Ok, I will admit that I did the very first part of my WinterWear Designs Fashionista* last year, but because I filed it away over Christmas and New Year, I’m counting this as my first UFO for 2019.

The Fashionista* has a shaped front yoke which looks really good, but did prove a little challenging to sew accurately. I know there’s a slight catch in the front section below the yoke, but there’s a matching one on the other side so I’m calling it a design feature rather than a mistake 😉

The back still needs pressing from where the middle panel was stored folded, but it’s looking like the variegated topstitching thread was worth buying. I chose to only do one line of topstitching instead of two, but I’m using a triple straight stretch stitch so it shows up more than a regular stitch.


That’s the front and back panels complete, so I’ll be working on the shoulder seams next, before diving into the sleeves. Denim jackets normally are unlined, but I spotted this ex-designer fabric on the Minerva Crafts website and thought it could make an interesting addition to my Fashionista. Once I’ve got the sleeves attached, I’ll then work on the lining, before adding the front plackets, cuffs and waist band…. or at least that’s the plan – it might well end up unlined if I can’t figure out how to add a lining!


Starting the Denim Fashionista (this post) – Part way through the Denim Fashionista – Finished Denim Fashionista


* affiliate link
Pattern: Fashionista * by WinterWear Designs*
Fabric:
Denim and topstitching thread from Sewing Studio
Lining fabric from Minerva Crafts

Nine things to try for 2019

Top Row:

  • Fashionista Jacket* by WinterWear Designs
    I’ve always wanted to try sewing my own denim jacket, and I will admit I’ve already got the denim and some variegated topstitching thread ready to start this one!
  • Bryce Cargo Trousers* by Hey June Handmade*  
    I bought this pattern last year, realised that it was more fitted than any I’ve made before, and instantly shelved the idea. But this year will be the one when I make some Bryce Cargo trousers…. or at least start them!
  • Brunswick Sweater* by Hey June Handmade*
    Ok, so I have a lot of hoodie patterns, but the design of this one stood out as one to try, I’m quite taken with the button detail at the base of the bodice, which would make a good excuse to buy some fancy buttons to use!

Middle Row:

  • Provence Pea Coat* by WinterWear Designs*
    I’ve never tried sewing a coat before, so what better time than if I can get it started in the Winter? I do have some faux wool fabric sitting in a box, just waiting for this particular pattern
  • Around the Block hoodie by Ellie and Mac
    I’ve sewn several hoodies, but so far nothing from an Ellie and Mac pattern (although my latest hoodie is a mash of Hey June bodice and sleeves, with Ellie and Mac neckline and hood). This year I’m determined to change that, and make myself an Around the Block hoodie.
  • Scrundlewear by Stitch Upon a Time
    Ok, this one is a bit more unusual, but seeing as I tried sewing socks in 2018, why not try sewing pants in 2019?

Bottom Row:

  • Neck Tie Top* by WinterWear Designs*
    Not the style of top I would normally pick, but there’s something about this Neck Tie Top which makes me want to give it a go!
  • Kelly Anorak by Closet Case Patterns
    Not content with adding in a Pea Coat, I really want to try sewing a showerproof coat this year – the Kelly Anorak was a pattern I kept coming back to browse during 2018, so maybe 2019 is the year I will attempt making it! I’ve already bought the fabric I want to use, so there’s no excuse now…. right?
  • Belladonna Bear by Emma’s Bears
    It wouldn’t be a 9 to Try if I didn’t include at least one plushie, would it? Belladonna is quite a large bear, but if I can find the ‘right’ faux fur, I think she could look amazing!

2018 was quite successful for achieving my 9 to Try, so let’s see what comes of my nine for 2019!


*affiliate link
WinterWear Designs*
Hey June Handmade*

Nine things to try in 2018 – recap

Remember my 9 to Try for last year? I didn’t really think I’d achieve making any of them, so let’s see how successful I was….

Finished Projects

Zen trousers – 12 – 3 –  plus a pair of shorts I haven’t yet blogged, and a guest post coming to the Minerva Crafts blog next week!
Giverney Jacket – 1 plus one I haven’t blogged yet
Novelista Button-Up – 12 – 3
Plush Bat – 1
Willa / Atilla – 1 plus a couple of Atilla the Bun plushies which I haven’t blogged yet
Real Deal Jeans – 12 – 3 (penguins) – plus my Anchor RDJs which are currently needing a bit of tweaking before they’re hemmed (oops)


Unfinished Projects (UFOs)

Just the Anchor Real Deal Jeans, seeing as there were too many mistakes which need amending before I can hem them (oops)


Projects Not Started

Cheyenne
Marigold
Refined Raglan

I thought my most likely projects to not complete from that list would be the Real Deal Jeans, and Zen trousers! Oddly enough, it’s the projects which require simple woven cotton which I haven’t attempted…. maybe that’s something to work on for this year?

Off We Go!

I spotted this panel fabric in my local fabric store early in the year, made up the book, then forgot all about it! This was a Christmas present for K, although it does seem a little young for him now (oops).

The back page is obviously completely personalised, but I’ve edited out the details so his full name isn’t on the photo. Can I just say I love the alphabet options on my Janome M200 QDC!

So I sent it with the Dinosaur Hatteras Hoodie plus a note saying that the dinosaurs had eaten all the words for the story, so he’d have to make up his own story to fit!

Dinosaur Hatteras Hoodie

What do you make for a young relative who loves dinosaurs, when you’ve already made him a cuddly dinosaur before?

I settled for my tried-and-tested Hatteras Hoodie, and went to find some suitable fabric… which was harder than I’d first thought! Eventually I came across this dinosaur sweatshirt fabric at Sewing Studio, and despite the main stretch being vertical rather than horizontal, the random positioning of the dinosaurs meant I could still use it

I’d purchased some black ribbing fabric to use for the hood lining, waistband and cuffs. Unfortunately (the disadvantage of buying online) this fabric was a lot thinner than I’d anticipated. The hood lining didn’t need to be heavy, so I used the ribbing for that, but it wasn’t going to work for the cuffs as it was.

I had part of a pack of cuff ribbing left over, which worked for the cuffs on this hoodie, but there wasn’t enough for the waistband. 

Playing around with the original ribbing fabric, I tried holding two layers together and realised that might just work to give enough stretch and strength for the waistband. This hoodie is an age 6, but made for a child who wears an age 4 at the moment. It should give him a nice long time to wear it before he grows out of it, but it does then need a decent rib for the waistband to help hold it in until he grows more!

I cut four waistband pieces instead of two, and just used the additional ones inside the main waistband pieces to give it more strength. To me, that feels strong enough, but we’ll have to see how well it holds out – he won’t have the chance to try this hoodie on until Father Christmas delivers it next week, so I won’t know for certain just yet!

Another pair of jeans, another mistake

I really don’t know how I’m making so many mistakes with jeans at the moment – my first ever pair of denim jeans came out as I expected, but since then my jeans have been going wrong!

First let’s start with the positives on these Real Deal Jeans*. I decided to do some decorative top stitching on the back yoke, and also for the back pockets. The yoke stitching isn’t overly visible unless you look closely, but that doesn’t matter as the anchor pattern is quite bold anyway.

So the back was a definite success, which means the front must have the disaster, right? I don’t know if it’s just the way I put the zip in, or if I’m missing something in the instructions, but the left side is a different height at the waistband to the right-hand side.

This is the same pair of jeans – I didn’t use the flash for this photo, so it came out a bit darker than the real shade of blue

What seems to happen, is that the zip moves (despite being pinned), and ends up slightly higher on the second side. I had this before with my Penguin RDJs but while my Dawn jeans didn’t have this mistake, these anchor jeans have a more noticeable difference between the left and right at the waistband.

Not only that, but I had a disaster with the button – when I hammered it in, it ended up skewed. 

So before I get on and sort the hem to finish these off, does anybody have any recommendations for how to remove the hammered-in button, and also to resolve the waistband problem, or will I be stuck with that lopsidedness forever?


* affiliate link
Pattern:  Real Deal Jeans* by WinterWear Designs*
Fabric: Anchor denim from Sewing Studio

Baby Tee

I hardly ever make baby clothing, but when a neighbour was expecting I decided it was a good excuse to try out a Patterns for Pirates free pattern to make a tee.

I will admit I made several mistakes in the sewing, most of which came about because it’s a much smaller size than I’ve ever sewn before! The lap part of the tee (where the back panel laps over the front) isn’t quite sewn into the seams fully… but it’ll be perfectly wearable until the little’un grows out of it!

And of course, I had to make a card to go with it. I just hope the tee fits little J!


Pattern: Wee Lap Tee by Patterns for Pirates
Fabric: Jersey from Sewing Studio
Card: graphics from FreePik.com

Penguin RDJs

After wearing these Real Deal Jeans* for several weeks, I realised I hadn’t blogged them! The fabric is stretchier than the pattern requires, so I added in some elastic to the waistband to stop it stretching out of shape. I didn’t stretch the elastic as I added it in, so it will hopefully hold the shape without pulling the waist in at all.

The pocket bags are a plain black polycotton I found in my fabric stash, and although the length of the jeans looks a little short in these photos, I wanted to ensure I could comfortably wear them barefoot without standing on the hem.

I made these from the grand total of 1 metre of fabric, so they were a cheap make – I do need to practise the zip, as the waistband isn’t entirely level but they’re really comfy to wear and that slight error on the waistband isn’t really all that noticeable when I’m wearing them!


* affiliate link
Pattern:  Real Deal Jeans* by WinterWear Designs*
Fabric: Cotton Elastane from Fashion Fabrics