Category Archives: Plush

Funky Furry Bear

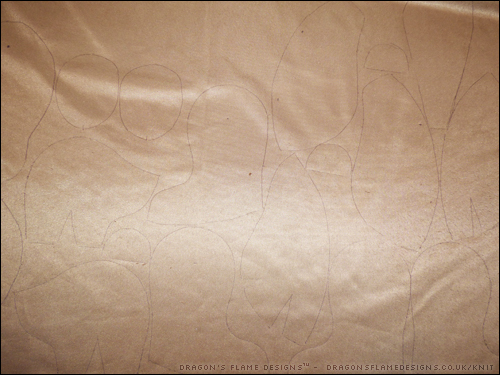
After a couple of recent attempts at making bears from other people’s patterns, I decided it was time I tried making a pattern of my own. I wanted to use furry fabric, as that gives the muzzle a better shape, and can also help conceal any lumps in the seams, but fake fur can be expensive and I didn’t want to spend too much on something that might not even work.

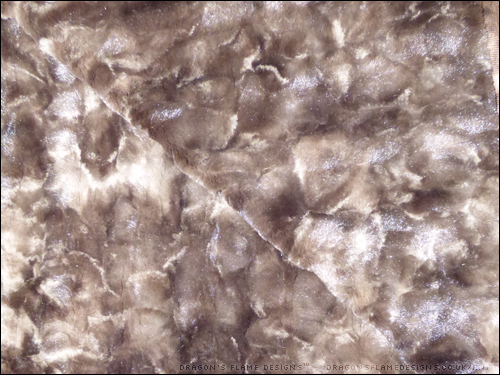
Luckily, Abakhan had a sale which included some brown fake fur for just £3.99 a metre, so that made the perfect fabric choice.

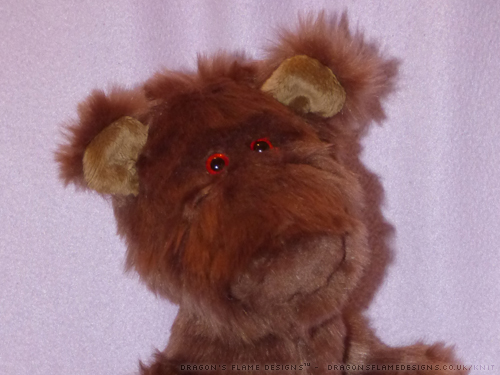
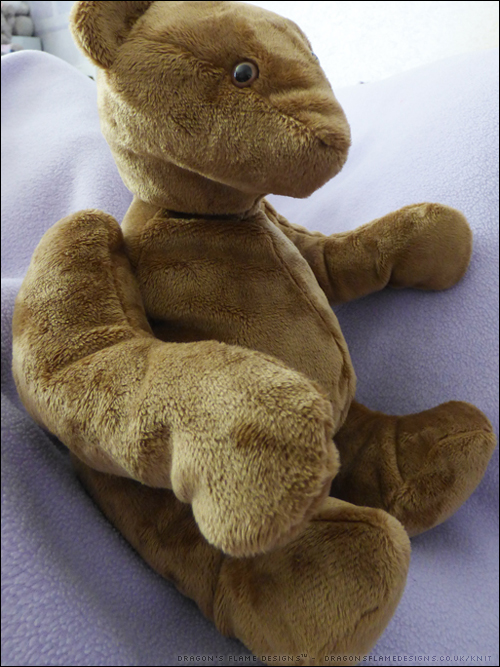
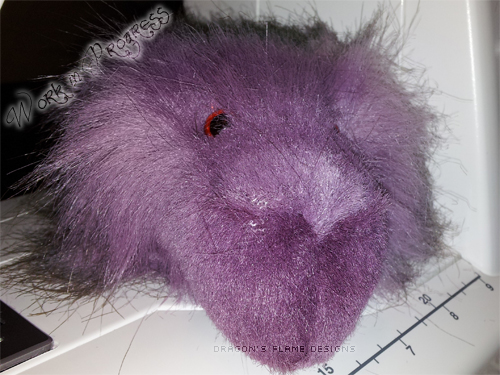
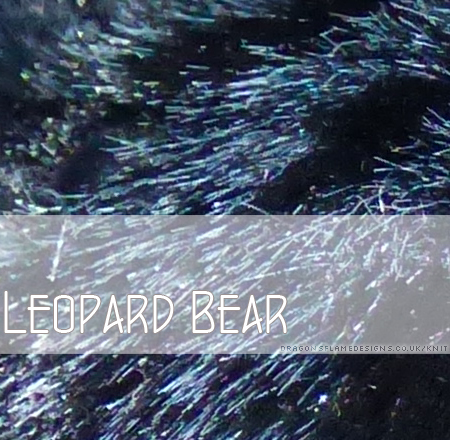
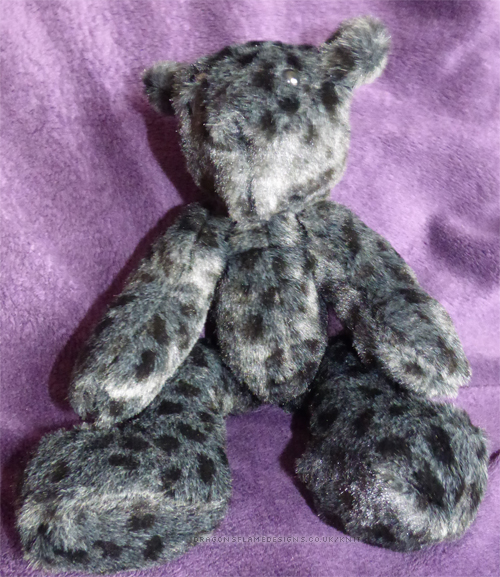
The fur is shorter than the purple I used before, and is also trimmed at certain points, so it isn’t all the same length. The small size of this bear doesn’t really show off this multi-length fur to its best, as it does look like I’d just trimmed it myself and made a pretty bad job of it….

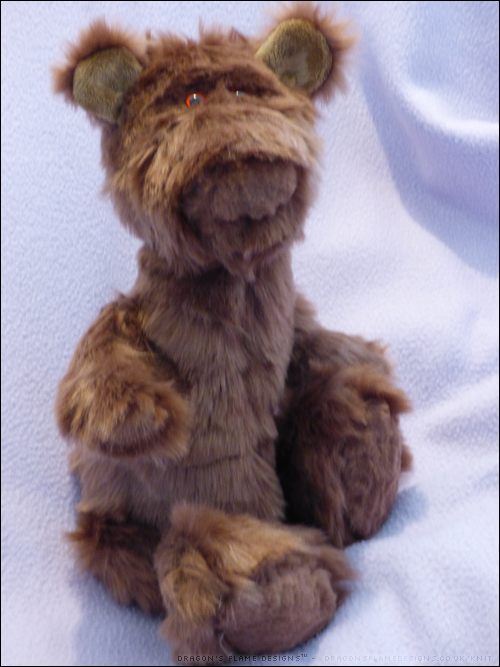
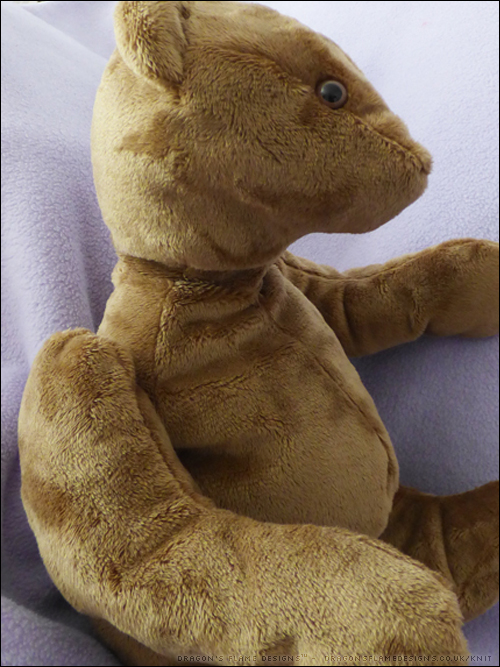
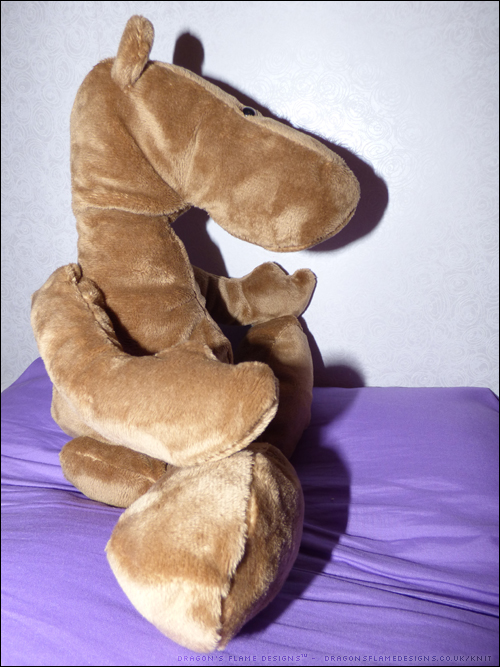
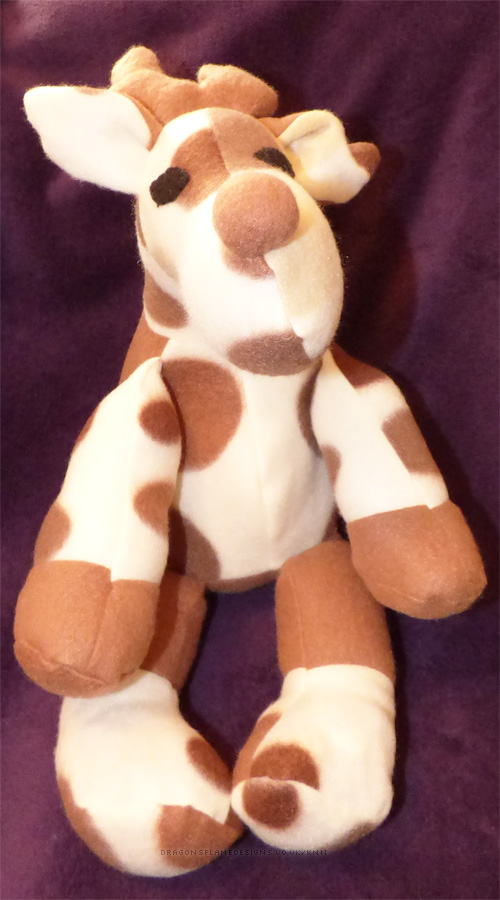
But considering this is a first draft of a self-made pattern, I’m pleased with how it came out. I think I would lengthen the arms on the next one, and possibly shorten the body, as he does seem quite thin and lanky.

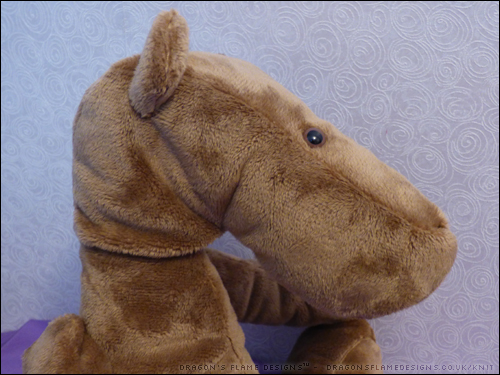
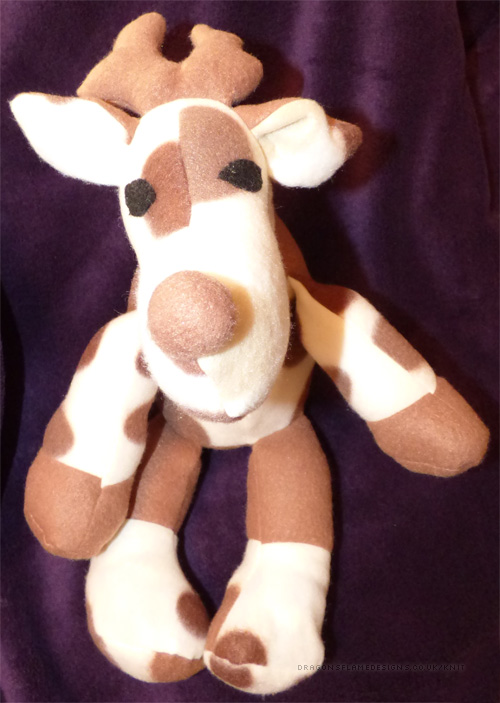
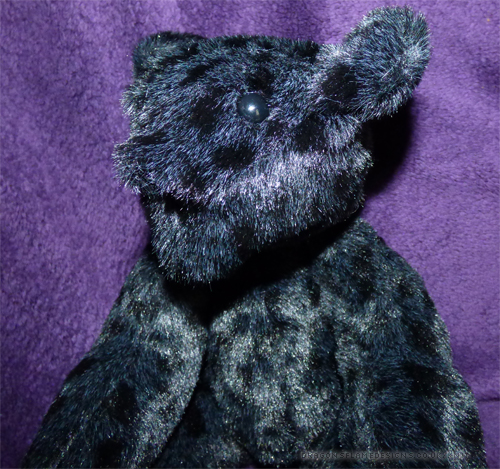
The inner ears are made from scraps of minky left over from the previous bears, and so far I’m undecided if I should embroider a nose, or if he looks ok with a brown furry nose.

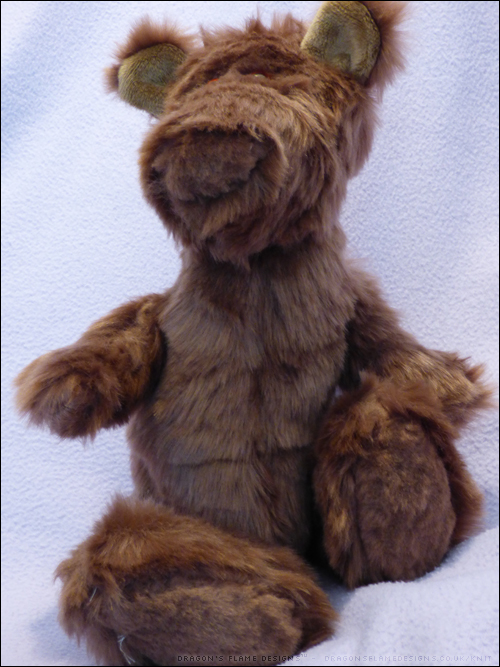
The round muzzle is a particular favourite feature, as most of the patterns I’ve seen have a pointy muzzle with the head gusset reaching all the way to the nose. This bear doesn’t actually have a head gusset at all!


Ping Panda

Meet Ping the Panda! Although he doesn’t really look like a panda, because I used the same fabric throughout. Ping the Panda’s pattern came from a back copy of Sew Magazine. It was designed for mohair fabric, so like the long neck bear, Ping does look a little different to the picture in the pattern.

Ping’s neck doesn’t seem to be elongated which is a bonus, although his paws look like they aren’t quite attached at the right angle. I think his arms are positioned a little too far back, which makes them splay out at the front, rather than being held straight down by his side.

Taking out my never ending quest for perfectionism, Ping is perfectly cuddly and would make a great bed time buddy for someone.

Long Neck Bear

It’s taken a while to get this bear finished, but here’s my first “minky” bear! I can’t remember where I got the pattern from, but I think it’s the same one I used for my purple furry bear a while ago.

The lack of fur length gives this bear a totally different look – his muzzle seems much longer than the purple bear’s. The only real difference other than the fabric is this bear is unjointed, whereas the purple bear has movable joints.

I think I need to improve my sewing skills when it comes to the neck of unjointed bears though, they always seem to have an elongated neck, which does give them a rather unusual appearance. Maybe this one just needs a scarf to hide that a little….

Minky Fleece

Lots of patterns for plushies use what they describe as Minky fabric. I found several American companies that sell it, but nowhere in the UK. I even asked in my local fabric shop, and had a confused look from the salesperson who had obviously never heard of it.

Browsing through one shop online, I discovered that UK stores actually call minky fabric “Cuddle Fleece” or “plush” fabric – no wonder I couldn’t find it anywhere!

I placed an order for a small amount of Soft Cuddle in Cappuccino, which is quite a neat shade of brown, and also some “Rabbit Cuddle” which has more of a random texture to the fabric rather than being totally soft and sleek.

I’ve not yet finished making anything from these, but I have got as far as marking out the pattern on the reverse. I wasn’t too sure what would be the best way of marking the pattern – chalk wouldn’t be that easy to use on the fabric, so in the end I used a biro.


Spooky Spiders

I was lucky enough to be one of the pattern testers for the Sweet Briar Sisters Spooky Spiders pattern, and thought it was about time I shared my spider creations with you.

I started with the Baby Spider, which is about 4 inches tall. Not only because I was short on stuffing, but I wasn’t too sure how much polycotton I had left in this colour, and didn’t want to run out before I finished sewing all those legs!

Dragons Flame Designs - Spooky Spiders

Meet Nigel the spider – Mum decided that he looked like he was wearing a suit, with the business-wear-colour polycotton I’d used, and thought he needed a traditional sounding name.

Apart from getting two legs facing the wrong way (he has a slightly knock-kneed look on one side), he came out really well. I deviated from the pattern and used a stiff cotton instead of felt for his eyes, adding some interfacing to the back of the polycotton so the zigzag stitch didn’t catch up too much.

Dragons Flame Designs - Spooky Spiders

Rummaging in my “I started making this but abandoned it” bag, I found a dress I’d started making from this orange leaf patterned polycotton. Realising that the dress wouldn’t suit or fit me, I decided to unpick it and turn it into a Mama Spider!

Dragons Flame Designs - Spooky Spiders

Turning the legs on Norma the Spider was so much easier than with Nigel! This time I had some white wool felt, so the eyes are stitched properly – I added another layer of fabric behind the eyes and mouth again to assist with the zigzag stitches.

Nigel’s mouth was hand sewn, but Norma’s was just zigzagged on the machine, which leads to a clearer line. I do need to hand sew some detail on her eyes, but so far the outer line is machine stitched, with a little pencil mark in the centre so I know where to sew!

Dragons Flame Designs - Spooky Spiders


Gryffindor Sock Owl

I was browsing the Primark website the other day, when I came across a pack of 4 pairs of Harry Potter themed socks. “Nothing special about that”, I hear you say, but I had plans for these socks….

Sock Owls

Wouldn’t it be a neat idea to make these into sock owls? I’d already made one out of a grey sock, but while it looks cute, it’s not really all that startling. My first challenge was the orientation of the sock – the pattern uses the toe part of the sock as the head, but then the writing and crest would be upside-down. Gathering the heel part of the sock, I realised I would need to add something to the head in order to cover the stitches and make it look more finished.

Sock Owls

Cue the Witch Hat free pattern from BeeZee Art on Craftsy – what better way to shout “Harry Potter” than an owl wearing a wizarding hat?

I stitched the hat by hand, but I think it would look better on the machine, as then the brim could be totally flat on the edges. However, for a first Gryffindor Owl, I think it looks pretty cute, and I’m already planning the next 7 owls from the remaining socks! 🙂


Reggie the Reindeer

When I spotted the pattern for Reggie the Reindeer, I knew I was going to want to make at least one of them. I found a pack of two fleece blankets on sale for £3.95, which were the perfect colours for a Reindeer, so he was a bargain to make!

The first Reggie I made had thread jointed limbs, but this one is for a 9 month old child, so I used the alternative instructions to machine sew them into the seams.

spottyreindeer1

If I was to make a third Reggie the Reindeer, I would probably turn the legs 90 degrees before sewing, so they shouldn’t turn inwards at the hoof, but that’s just a minor annoyance for me.

spottyreindeer2

Mum keeps saying that Reggie is a cow (because of the spotty fabric), but whether you see him as a cow or a reindeer, hopefully little K will like him when Santa delivers the package on Christmas Eve!

Purple Bear

Following on from Leopard Bear, I had also bought 50cm of some longer pile fake fur – this had been sitting in a box for a few weeks, while I plucked up the courage to try cutting out the pattern pieces.

Purple-head

Rather than using the same pattern, I found a different one for this bear. The muzzle is longer (this one doesn’t have a chin), but I want to try something even more challenging for this bear – an open mouth! So far I have the head made and trimmed around the muzzle, in readiness for the lower jaw and nose.Once I’ve tackled that, I can add in his ears, then work on the paws!

purple-body

This fabric sheds even more than the black did, but I hope that once the bear is completely stitched up, that he won’t shed any further!

Leopard Bear

I was browsing the shelves in the fabric shop and came across their small selection of fake fur fabric – it was black but with dark patches, almost like Leopard spots. I decided to take the plunge and buy 50cm to try making a jointed plushie…. my first time of using fake fur, and also the first time I’d ever even looked at bear joints!

Apart from the fur shedding everywhere, and the mistake of using black thread (have you ever tried unpicking black stitches from black fake fur fabric?), I think he came out pretty well! I didn’t trim the muzzle, so this particular bear has no nose…. but from a distance, you wouldn’t know 😉1

His eyes are a little lopsided, but that just gives him a cute, slightly quirky look.

2

Happy Halloween!

How do you make a really good looking Halloween card, that isn’t just full of witches, cats and spiders? I was completely stuck until I came across a book on Zentangles – that gave me an idea…. what if I was to write out the letters, then do a Zentangle style pattern in the middle of each one?

Some black card a white gel pen and a white pencil later, this is the end result:

Happy Halloween

The outside of the card, with a Zentangle-inspired look

The white gel pen wasn’t as opaque as I’d hoped, and some of the patterns needed going over a few times to make them stand out, but it still has a really striking effect on the black!

Happy Halloween - Hobbit

Inside the card – copying a Hobbit font

But for the inside, I wanted to use an orange gel pen…. so I cut some white paper to line the card, and copied a Hobbit-themed font from my computer screen to make it look a little more unique!

I knew I wanted to send a gift with the card, and I’d found the bat pattern from BeeZee Art a little while ago. I made the mistake of buying some nice thick fleece to make the bat…. and ended up having to hand crank the sewing machine, as even with a denim needle, it struggled with the thickness of the fabric layers!

I’m pleased with how the bat came out though – although the black fleece was a nightmare to work with, it gives Batty a nice plush feel, and the orange lining for his ears and wings (remnants from the polycotton lining of the Trendy bag‘s second version) lifts the black.

Bat - wings open  Bat - folded wings

My topstitching on the wings came out surprisingly well, even though his nose is slightly crooked! But his new owner loved him, and that’s the whole point 😀