Category Archives: Clothing

English Tea Dress – take one

My previous experience with Simple Sews patterns wasn’t all that fantastic. Using the measurements provided, the dress should have at least fitted, but the back wouldn’t meet, let alone meet enough for a zip to go in. But the style of the English Tea Dress made me want to have another go, in the hope that I could figure out the fit a little better.

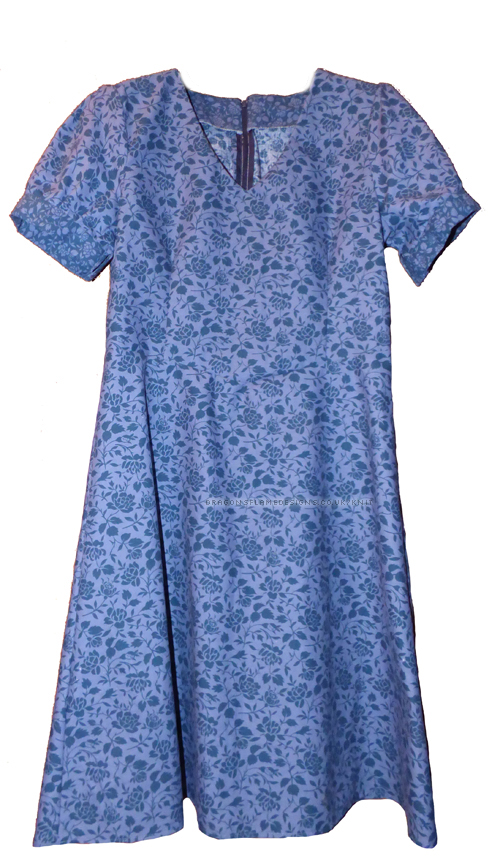
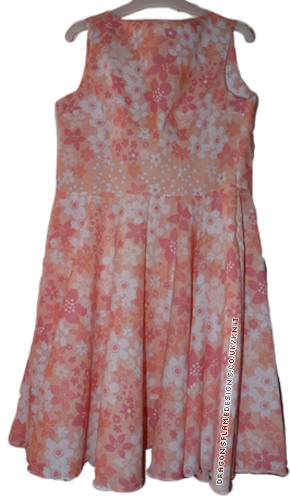
The neckline is more suited to my taste, with a nice v-neck that has just the right amount of plunge. The back is a round-neck, so no worries about picking a suitable bra to wear so the straps don’t show!

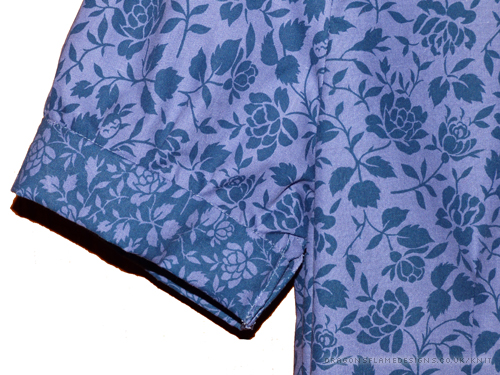
I did give an allowance of an extra inch on each of the back seams but I hardly used any of that, so the sizing definitely seems like it’s more accurate for this one. I will admit I got in a mess with the sleeves though; the pattern didn’t really make complete sense for the cap sleeves, nor for attaching the cuff. So, I used the short gathered sleeve, and added a contrast cuff as if it was bias-binding, rather than following the instructions. The cuff was slightly snug so I left it open on the end, stitching down the seams on either side.

Tea Dress - sleeve detail

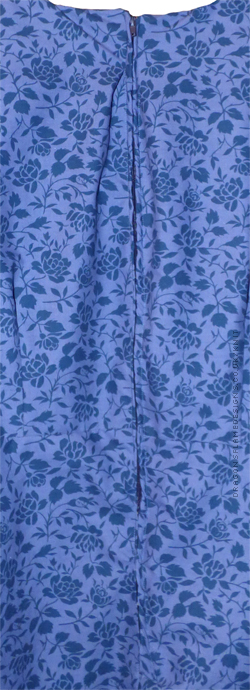
The zip isn’t the neatest in existence, and I used a regular zip rather than an invisible one, but for a first attempt at a zip in a dress, I think it came out really well 🙂

tea-dress-1-zip

The fabric was actually half of a single duvet cover from Primark (£9), so including the thread and zip (I already had the interfacing from a previous project), the dress cost me £6.40. Now that’s a bargain, especially for my first finished dress!

The Simplicity Blogger Challenge

Although I’ve sewn a few things so far, I’d never actually completed an item of clothing. I’ve started several, but they’re all still in various stages of “not quite finished”. However, Simplicity’s Blogger Challenge spurred me into actually starting and finishing something!

I picked the easiest option – pattern 2286, which gives 6 different options for elasticated waist skirts. Not being overly fond of “girly” clothing, I picked option B; no lace, overlay or frilly bits!

At only 5′ tall, I normally have to decrease the length of clothing, but I felt that 16″ was still a little too short for a skirt worn just below the waist, so I added a couple of inches to the length. But just adding to the length wouldn’t be enough to make it my own style, and being a relatively new sewer, I didn’t want to dive into something that would be beyond my skills!

skirt1

I added in one pocket rather than two (I prefer the asymmetrical look), and found some fantastic daisy trim that I hoped would work around the edge of the pocket. When the package arrived with the fabric and trim, the trim was a little larger than I had thought, and would overpower the pocket if I used it all the way around!

As luck would have it, I came across a flower button in the local sewing shop, which was a perfect match on size for the trim. But just sewing on a button wouldn’t be enough for me…. no, I had to make a working button, which would mean tackling my first ever buttonhole.

pocket

Thankfully my sewing machine has an automatic buttonhole setting, so after a quick practise, the final hole came out perfectly! Ok, it could’ve probably started about a centimetre lower down so it didn’t overlap the top stitches, but it works!

I stitched the trim with a single line across the centre, and caught it into the pocket stitches on the sides just to help it stay attached when the skirt goes in the wash.

And just to prove that the buttonhole works:pocket-montage


This skirt is part of the Simplicity Blogger Challenge. I was sent the pattern for free, as part of the contest entry. There are no affiliate link in this post.


A Strange Coincidence

A few weeks ago, I purchased a really nice looking duvet cover from Primark for 9 pounds. I figured that it’d give me about 2 metres of fabric from each side, so that’s about 2.25 per metre – not quite as good a bargain as the dress duvet cover, but still better than I could get for the fabric itself. I was thinking it might become a side-zipped top or possibly a button-up shirt…. but then I came across this:

CC Jacket

Source: CC

In a strange coincidence, this lined blazer from CC has an almost identical pattern to the fabric that duvet cover was made out of! So, there was no other option but to start making a jacket from it 😀

In the current issue (Feb – March) of Make it Today, they had a free gift of three paper pattern packs, which included New Look pattern 6231 – two jacket options, a skirt and a pair of trousers. Although the trousers look the easiest to make, my legs aren’t really designed for tapered close-fitting trousers, so it had to be the jacket.

It’s not an identical style to the CC one; this has a peplum instead of the vent flap, and isn’t lined, but it should work really well with the fabric 🙂

6231_env_front

So far I’ve got the front and back done, but a slight problem with the iron means that I’ve had to delay working on the collar until I can get the interfacing to stick to the fabric.

And speaking of Simplicity New Look patterns, have you seen their blogger challenge?


First venture into sewing from a printed pattern

Ok, that’s not quite my first venture, as I’ve started a Kimono-style jacket, but this is my first attempt at a “proper” printed pattern (one that comes in an envelope and is worse than a map to refold!) 😉

The pattern is the Ruby Dress from Love Sewing magazine, and the fabric? Well I didn’t want to spend a fortune on fabric only to find that the dress didn’t fit, so I bought a single duvet cover for just under 6 pounds, washed it, then unpicked the seams to leave me with two large pieces of fabric. One of those was just enough to make the dress 😀

Duvet cover Ruby DressNow there’s a slight problem with the fit at the moment – I’m not sure if it’s just my measuring, my wonky seam allowance, or a quirk in the pattern, but using what I deemed to be the correct sizing, it’s an inch out at the back (oops!). So, I’m working on using the other part of the duvet cover to make a second third bodice that I can then attach to the existing skirt, and hopefully that’ll fit! The second one I tried was closer – the back pieces meet, but not enough to allow any seam allowance for the zip.

I’ll get there in the end though!

At the moment this project is shelved, as I want to try working on a pattern for a slightly less fitting top, and a shirt – I’m hoping that those patterns will help me learn how to shape the bodice of the dress, so I can get the darts in the right place, and finally have a zip I can do up!