Category Archives: Sewing

Raspberry Bear (finished)

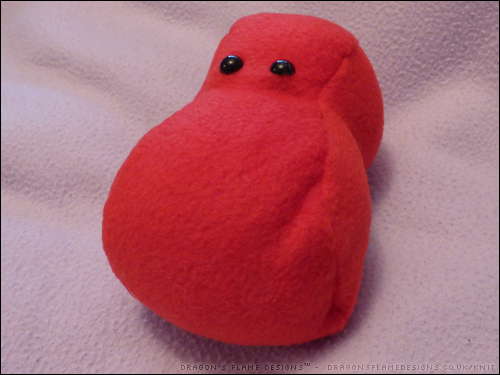
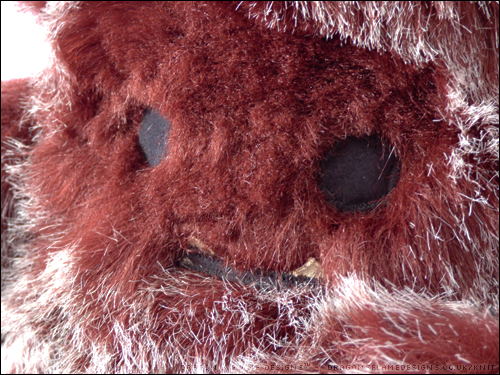
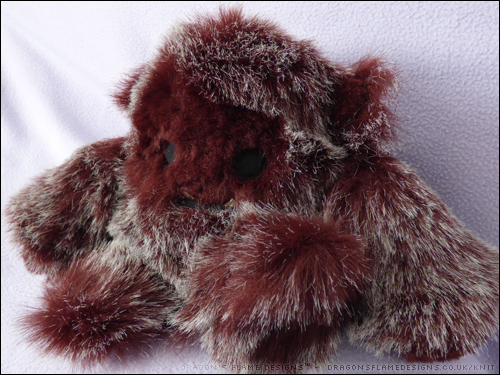
I’ve finally finished Raspberry Ripple Bear! I’d finished the main parts a while ago, but had been putting off adding in the ears and embroidering the nose and mouth, because those elements can either make a bear look perfect, or end up making it look really weird.

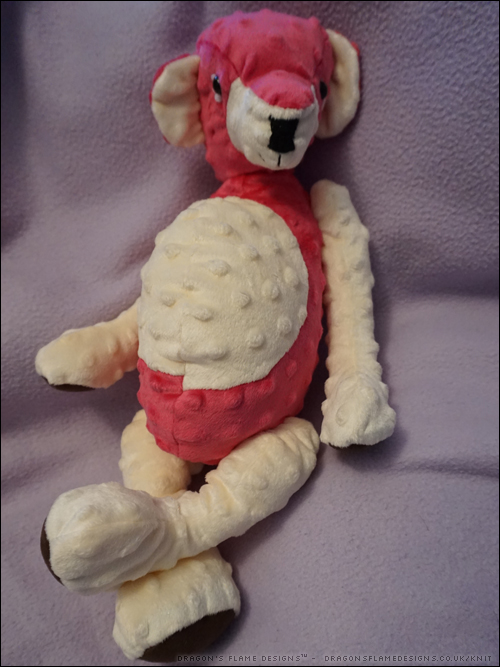
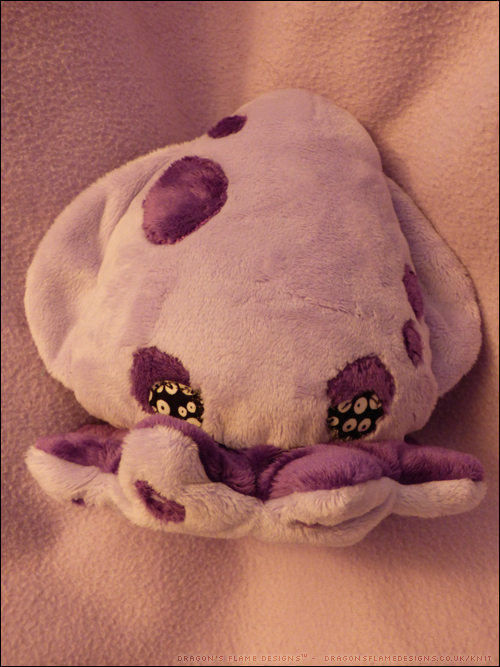
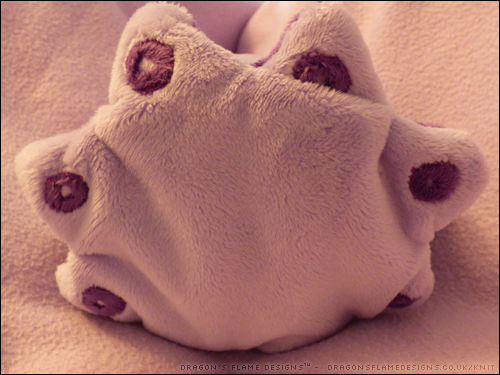
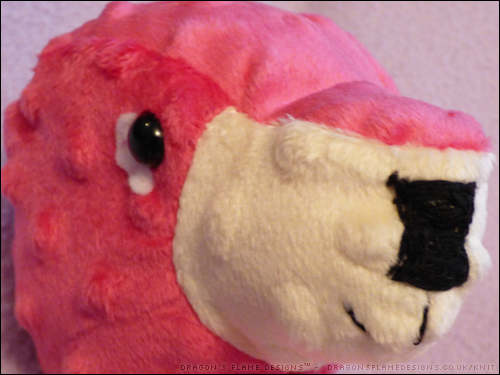
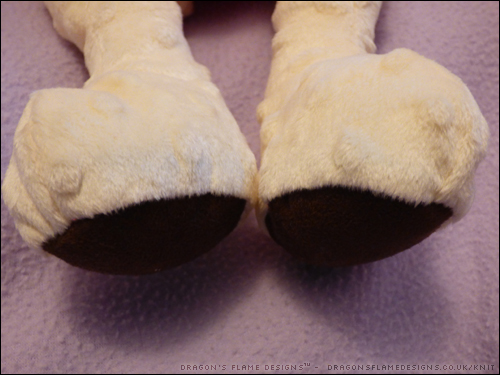
Raspberry Ripple has a jointed head, but the arms and legs are machine sewn into position, so they should be securely attached to allow for lots of play. The paw pads are made from some faux suede from Hobbycraft, just for a little different feel.

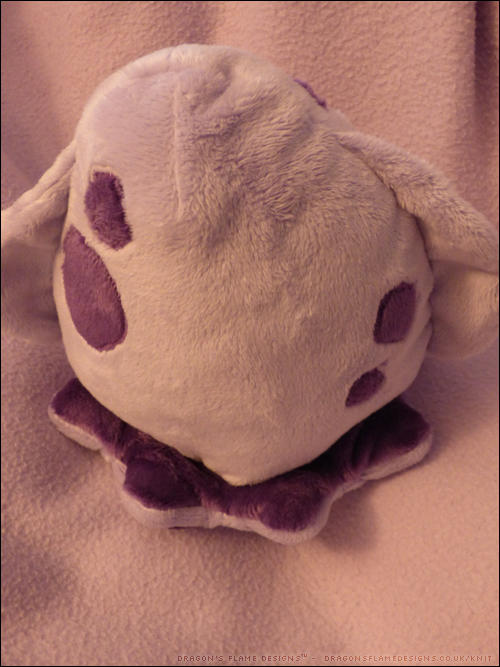
I stitched the ears on a lot lower than I would normally do, in the hope that Raspberry Ripple would have a younger look, as this little bear is destined to travel to the US to be a gift for a friend’s young child.


Release the Kraken!

After making Bertram Bigfoot, I decided he needed a friend, which also gave me a third entry in Choly Knight‘s Halloween Plush Contest!

The body of the Kraken isn’t too challenging to sew, even with the applique spots and eyes. I used a glow-in-the-dark fabric for the eyes like I did for the Loch Ness Monster, although as yet the fabric doesn’t want to co-operate and glow.

The base was the most challenging part to sew (ignore the colours being reversed from the official pattern instructions), with each of those polo mint look-alike suckers being machine sewn to hold them in place.

The Kraken (which incidentally is still in need of a name), is perfectly cuddly and the two shades of plush fabric are a great match for my purple and silver colour scheme. I was hoping to get a photo of the eyes glowing, but for now here’s a mockup of how they might look!

The Monster from the Deep

I thought I needed a slightly easier pattern to try, after Bertram Bigfoot, and Choly Knight‘s Loch Ness Monster looked like it would be ideal. The body and head have two sides and a bottom gusset, while the four flippers are sewn into the gusset seam. This means the only hand sewing is to just ladder stitch the turning gap at the end.

I chose some black and white glow-in-the-dark fabric for the eyes, so I used the eyelash eye pattern pieces, and left out any inner eye features. I hand stitched them in place, as I was finding it challenging to machine sew the eyes onto the plush fabric without it sliding about everywhere.

In the end, I using a small amount of fusible interfacing for the body dots, then machine stitched around them afterwards.

The neck dart was a challenge to get right – one side’s dart is a little longer than the other, but that just gives Nessie a uniquely quirky look.

Until I can get the fabric to glow properly, here’s a mockup of how the eyes will eventually look…. I hope!

Raspberry Ripple Bear (UFO)

After a mini shopping spree at Hobbycraft, I found myself with some dotty cuddle fat quarters. I thought they would make a lovely soft squishy bear, using the “Happy” pattern from Emma Bear’s.

I was originally going to use the pink and yellow for this bear, but the yellow looked a little harsh so I plumped for cream instead. It gives the bear a raspberry ripple look, and that was the fastest I’ve ever named a bear!

So far I have his head stitched (although he still needs ears), and his legs finished. The paw pads are faux suede just to add a different texture to the sleek dotty fabric.

Strawberry Dragon (UFO)

You’d think that with a blog called Dragon’s Flame Designs, I would have sewn several dragons already. But while I’ve sewn lots of bears, I’ve never tackled a dragon…. until now! I’m reliably informed that K likes dragons, so Yoki Dragon looked like the perfect early Christmas present for him.

I thought the original size might be a little fiddly to sew, so I scaled the pattern to 150% before printing. I’m using some red clothing fleece rather than minky, as I think it’ll stand up to rougher play.

So far I have the head sewn, and you can just about see the dragon shape starting to emerge.

Bertram Bigfoot

I can’t resist entering competitions, so when I spotted that Choly Knight had a Halloween Plush Contest, I had the perfect idea…. a fake fur Yeti!

Unfortunately, the fabric shop didn’t have any white fur in stock. However, they did have some amazingly sleek reddy brown fake fur tipped with a silvery white shade – perfect for a Bigfoot instead.
After all, the only difference between a Bigfoot and a Yeti is the colour of their fur, right?

Instead of adding an applique face, I trimmed the fur to make it look two-tone. That also made the applique features easier to sew in place. I didn’t risk using any fusible web to hold the eyes, teeth and mouth in place, so I tacked them down by hand first, before zigzagging around them on the machine.

You may notice that Bertram’s teeth are a creamy brown shade rather than white…. that’s just because he forgot to take his toothpaste with him!

I did also try trimming the fur for his paw prints, but that wasn’t quite so successful – I think that would’ve worked better if I’d trimmed that after I’d attached them, as once they were sewn in place, a lot of the detail around his toes was lost.

Despite that, Bertram was a really successful make – he only took me a few hours to make, and that included spending what felt like ages on the cutting out!


Fabric: half a metre of fake fur from Fashion Fabrics

Pattern: Bigfoot plush by Choly Knight

Sleek Satin Sewing Success!

I wasn’t entirely convinced that I would get this dress finished in time, but after a lot (and I mean a lot) of unpicking and resewing, I finally have a finished dress!

I went with the idea of using two different fabrics to show off the different pieces of the bodice, and chose a combination of two animal print satin fabrics from Minerva Crafts. The fabric was so sleek and had such a great feel, I also made a small shawl to go with it. I quite liked the semi-frayed look of the selvedge edge so I kept that on the shawl edge.

Originally I had aimed for the yoke and waistband to be in the leopard print, with the rest of the bodice in the tiger print, with the opposite on the lining. However, after a few mistakes, I ended up swapping the lining and main pieces, which thankfully went much better.

I would use satin fabric again, but only for a top – I don’t think my sewing skills are quite up to the task of tackling another dress in such a temperamental fabric just yet. I would try making another dress from this pattern though…. but out of polycotton or cotton instead.

But this has challenged me to make a dress I probably wouldn’t have attempted, out of a fabric I usually would avoid…. and I’ve got a dress out of it, so I’m happy!


Simplicity Sewing Challenge 2017

Fabrics used: Tiger Print Satin, Leopard Print Satin


Pattern? Check. Fabric? Check. Finished Shirt? Check!

I’ve been steadily working on my Simplicity Sewing Challenge makes, and tackled the dreaded buttonholes over the weekend…. much to my amazement, the gingham fabric I chose was a dream to sew! There were no ‘birds nests’ of thread and the sewing machine didn’t try eating the fabric through the bobbin either!

The fabric is a 1″ Check Corded Gingham from Minerva Crafts which works really well. I will admit I didn’t even attempt to match the checks on the seams, but then when you look at Dad’s ready-to-wear shirts, very few of them have matching patterns anyway. I did attempt to get the front checks to line up, but as you can see they were quite a bit off…. but that makes for a more unique looking shirt, right?

I did make a couple of alterations to the pattern; dad’s not all that tall, so I had to take out some of the length. In doing so, I realised I could actually get away with using one less button. As this is going to be a casual-wear shirt, I also left out the button on the collar. Dad doesn’t like to have the top button done up anyway, so there really wasn’t much point in adding one in just for show!

I think it passes the “dad test” – after posing for these photos, he didn’t want to change back out of the shirt, so I think he approves.


Shirt Inspiration – a Simplicity Sewing Challenge

Simplicity Sewing Challenge 2017

I’ve been working on my dress for the Simplicity Sewing Challenge, using a couple of really sleek satin fabrics from Minerva Crafts.

I measured out the bodice, stitched all the seams, then realised the waistline was about an inch lower than it’s meant to be (argh!). So I have to unpick the zip (which didn’t go in quite right in the first place anyway), to let me redo the horizontal bands and hopefully get everything lining up properly.

So, I’ve come to realise that there’s no way I will get it finished before the closing date. If I hadn’t needed to unpick the zip, I might have managed it, but unpicking stitches on a satin fabric has to be done more carefully than on a polycotton, so it’s going to take a while.

I’m determined to get it finished though – even if it will be too late to enter into the competition.