Category Archives: Sewing

Simplicity Sewing Challenge – Dressmaking Inspiration

“Your take on a Simplicity Make”

….it sounds so easy, doesn’t it? But just how can you show your individuality in a dress?

I had considered using some unusual fabric – maybe combining two colours, to separate the bodice, waistband and skirt.

Or maybe I should move the zip to the side and have a plain back.

Different still, would be losing the zip completely, and putting a front buttoned opening to make the dress into a shirt dress, although the thought of those buttons has me breaking out in a cold sweat!

I even considered taking a leaf out of a previous year’s winner’s book, and making the dress into top and skirt separates.

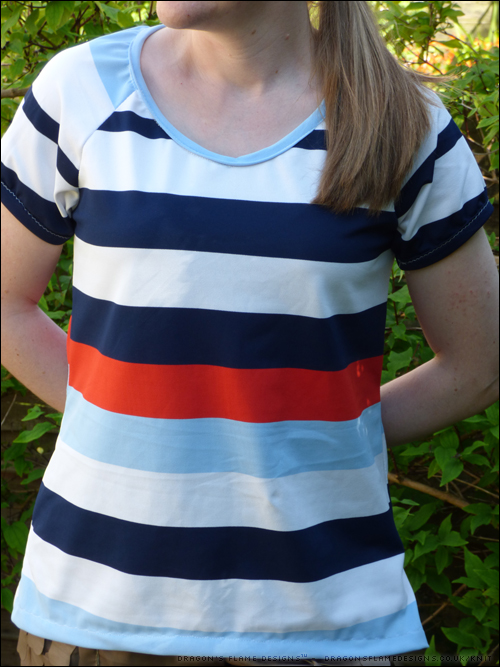
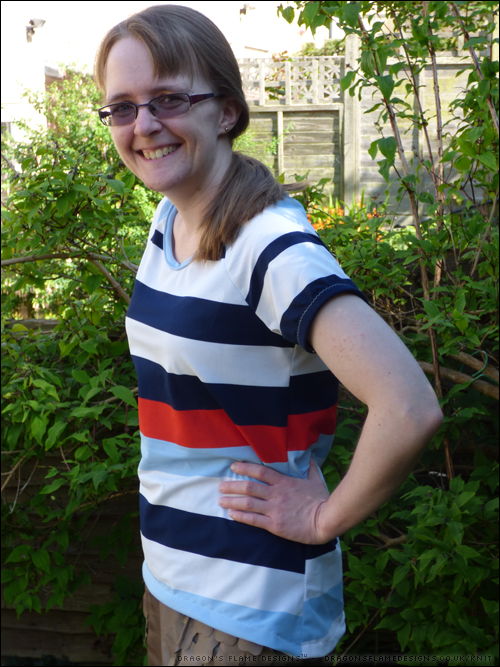
In the end, I decided to try adding elbow-length sleeves. I dug out some fabric oddments and made a rough version of the bodice, using version C with straps. I drafted a rough sleeve using another pattern I had as a template, and stitched them in.

Realisation 1 was that a boatneck style neckline with straps was never going to work – the straps slid off my shoulders almost instantly, pulling the sleeves with them.

I thought then maybe I needed to go for a smaller size, so I cut a size 10 from another selection of oddments, but realisation 2 was that a size ten made the armsyce way too snug so that it felt like I was about to bust the seam stitches each time I moved,

So it’s back to the original idea of a size 12, and I have just enough oddments left over to make another mockup version to check the fit before I cut into my ‘proper’ fabric.

Wish me luck – I think I’ll need it!

Shirt Inspiration – a Simplicity Sewing Challenge

I’ve made clothing for myself before, but the only wearable things I’ve ever made my dad (that fitted successfully) was a fleece hat. I think it’s about time I made hime something different, don’t you?

So I entered the menswear category of the Simplicity Challenge as an incentive to get something made.

At the moment I have taken the measurements (I didn’t want to rely on what dad said he measured!), and I’ve picked out some polycotton to make a “wearable muslin”.

I did get in a complete mess with sewing the facing – a combination of partially-written instructions, and a distraction while sewing, meant that I didn’t quite get it lying accurately. However, other than adding in the buttonholes and buttons and the final hems, this should be a shirt Dad can wear.

It does look a bit…. boring though. Plain polycotton might have been dad’s choice, but it isn’t going to look all that startling. So I had a rummage through dad’s wardrobe to see the kind of shirt design he prefers, and there’s a lot of checked fabric in there! I’ve got some gingham fabric and he’s picked out some buttons ready for the final version.

Wish me luck!

Blanc Tee

Rummaging through my bag of UFOs, I came across the pieces for this Blank Slate Patterns Blanc Tee. I’d purchased the fabric over a year ago, cut out the pattern, then didn’t have the confidence to figure out if the sizing was accurate, or if I’d need to grade the seam allowance at the waist.

I decided it was about time I finished it, and stitched the seams exactly as the pattern said. Blanc is quite a loose fitting top, and that style coupled with the really stretchy nature of the fabric, meant it really looked oversized in the shoulders and chest.

Putting it on inside out, I pinned out a new armhole and sideseam, which gives it a much better shape.

Oops – I hadn’t realised the fabric was quite so creased…. I think this proves I need to make use of the iron a bit more!

The neckline is wider than I’d normally wear, and my decision to simply turn and hem the neck has left the neckline a little saggy. I think next time I make a Blanc Tee, I’ll use some bias binding on the inside just to give the neckline some structure.

Overall, it’s a great fit and a complete bargain – the fabric was from the remnants pile in my local shop for £4 🙂


Rivage Raglan

The previous raglan sleeve top I made really didn’t fit properly, as I couldn’t figure out how much ease I would need and ended up making a size larger than was wise…. rather than use the same pattern, I decided to try the Blank Slate Rivage Raglan as I know the Blank Slate patterns I’ve tried before are a good fit.

The fabric came from a mystery lucky-dip bag from Abakhan – it’s not my favourite fabric, so I thought it’d work as a test run to check the sizing.

Obviously Blank Slate patterns are made to a shape that is more like my own than Simplicity patterns. I didn’t have to make any alterations other than the length (being petite, I’m getting used to altering patterns in length so the waist hits at the right point).

I tried to match the stripes, but somehow they became misaligned as I cut the pieces…. but for a trial run, I’ve ended up with a perfectly wearable top and a pattern I know works for my shape. And really, who’s going to notice the mis-matched stripes when I’m wearing it?

Jumbo Bear (UFO)

I loved the look of the bear’s paws in the Emma’s Bears Jumbo pattern, but unfortunately, Happy didn’t come with those “pulled toe” instructions. Jumbo lives up to his name, using an entire metre of fabric, and potentially multiple bags of stuffing!

I was going to machine sew the seams for strength, but the weight and bulk of the fake fur was pulling it away from the needle as I stitched, so the majority of the seams ended up being hand sewn. For added strength, I used 4 strands of thread twisted together, and backstitched the seams.

I did use slightly smaller eyes than the pattern suggested, as I only had 11mm eyes to hand at the time, but I don’t think that’ll be too noticeable once his ears are added, and he’s fully stuffed. There’s a couple of seams that I need to finish and I want to redo his neck seam to make his neck slightly shorter…. but there’s no major rush, as at the moment I’ve run out of stuffing anyway!

Starry Skies and Blue Bats

A month or so ago, I was browsing for sewing inspiration when I came across this glow in the dark fabric. I wasn’t too sure how well it would actually glow, but I thought it would look great paired with some blue “minky” to make a bat.

Using the bat pattern from BeeZee Art again, I marked out the pieces on the fabric using a white pen, as I felt that would be easier than using chalk. This is the first time I’ve tried sewing a bat from this pattern with “minky”, and although it has a tendency to slip and slide while I’m sewing, I think this bat is much better than my first attempt, which used regular fleece.

There are a couple of elements that could have been sewn slightly more accurately – my bat does look like he’s got one foot standing on the other, but that just gives him character. And to make him really special, those stars actually glow in the dark!

Happy Bear (now with ears!)

It’s amazing how different a bear looks once it has ears! Instead of looking like some strange furry alien, you suddenly realise it’s actually a cute and cuddly bear.

The long purple fur made the nose and mouth embroidery a little more challenging than I’d anticipated, but it did help to hide any mistakes.

I trimmed Happy bear’s paw pads on the arms, just to make them look a little tidier, although I left the foot paw pads long, just for a bit of variety. This is the first bear that I’ve added eye whites to (that was just a small piece of white felt positioned underneath the eye before I added the safety backing), but I think it gives him some extra character.

Happy Bear (who will be getting a new name soon), was made from an Emma’s Bears pattern, using fake fur from my local fabric shop.

Happy bear (UFO)

I was struggling to find any free “real” teddy bear patterns – there are lots of free patterns out there, but none that look like a true collector’s style teddy bear, so I decided to buy a pattern from Emma’s Bears. I picked Happy Bear, as I liked the idea of being able to make a two-tone bear.

I already had the rusty red and purple fake fur left over from previous projects, and knowing how the fake fur tends to slide around while machine sewing, I decided to be reckless and hand sew all the seams!

My hand sewing skills are somewhat limited – they tend to be a source of humour in the family, as I seem to have inherited my Great Gran’s skills…. the stitches don’t tend to be overly neat, and I always use a contrasting colour so they’re more visible against the fabric.

I used two strands of sewing thread to hopefully give enough strength, and backstitched every seam. I will admit I used a contrasting coloured thread, simply so I could see the stitches if I needed to unpick any! But with the stitches being on the inside, nobody would be any the wiser for which colour thread I actually used.

“Happy” is jointed to allow him to pose better, but I think he will look even cuter once he has ears, nose and a mouth.

Funky Furry Bear

After a couple of recent attempts at making bears from other people’s patterns, I decided it was time I tried making a pattern of my own. I wanted to use furry fabric, as that gives the muzzle a better shape, and can also help conceal any lumps in the seams, but fake fur can be expensive and I didn’t want to spend too much on something that might not even work.

Luckily, Abakhan had a sale which included some brown fake fur for just £3.99 a metre, so that made the perfect fabric choice.

The fur is shorter than the purple I used before, and is also trimmed at certain points, so it isn’t all the same length. The small size of this bear doesn’t really show off this multi-length fur to its best, as it does look like I’d just trimmed it myself and made a pretty bad job of it….

But considering this is a first draft of a self-made pattern, I’m pleased with how it came out. I think I would lengthen the arms on the next one, and possibly shorten the body, as he does seem quite thin and lanky.

The inner ears are made from scraps of minky left over from the previous bears, and so far I’m undecided if I should embroider a nose, or if he looks ok with a brown furry nose.

The round muzzle is a particular favourite feature, as most of the patterns I’ve seen have a pointy muzzle with the head gusset reaching all the way to the nose. This bear doesn’t actually have a head gusset at all!


A New Wallet

Mum had asked for me to buy her a new wallet for her birthday; it had to match the look of her old wallet, complete with a zipped pocket, and velcro closure, but that was easier said than done, as nowhere seems to stock a wallet that style now!

So instead, I decided to be reckless and have a go at making my own from scratch. After a rummage through my fabric scraps bag, I came across some suitable fabric, a zip I’d unpicked from a failed bag attempt, a small amount of velcro that Mum had let me have, and some bias binding that I think was originally earmarked for binding the seams on a bag.

With some measurements taken from the original wallet, and a little planning on paper to ensure I was able to put the zip in without too much trouble, I ended up with a passable wallet that looks almost the same in style as the original! The original wallet did use a more sporty fabric than the polycotton I’ve used, but this way Mum can have a unique wallet rather than something mass produced that everyone else might also have.

The only disadvantage of making Mum a wallet, is that now she has plans for a wallet for every season! But at least it means I’ve already got an idea what I can make her for Christmas.