Finished Showerproof Shoreline Boatneck

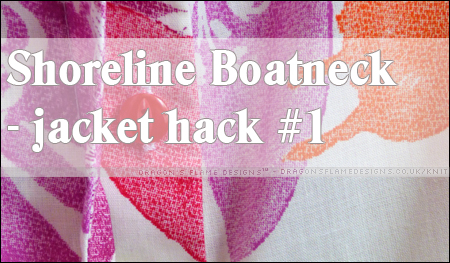
Well, the showerproof jacket is not 100% “finished” as I haven’t added a hood to it, but it’s 90% finished and wearable, so I’m counting that as no longer being a UFO! I ‘hacked‘ the Blank Slate Patterns Shoreline Boatneck to make a button-up shirt, and had the idea of making a showerproof jacket to wear on the allotment.

Sewing with ripstop gave some unexpected challenges though, as it slips around even more than fake fur when you’re trying to sew. I couldn’t pin unless it was within the seam allowance, as the pin holes were challenging and sometimes impossible to get rid of afterwards, so it took a lot of slow sewing and careful pinning to achieve.

The front closes with velcro, so it’s possible to do it up (and undo it) with gardening gloves on.

Eventually there will be a hood that will attach with velcro on the neckline. I decided to make the hood detachable for ease of sewing…. mainly because I was uncertain how to add the hood onto a jacket that had a facing. But it should also make the jacket more user-friendly when it comes to washing it.

So far I haven’t hemmed the sleeves or the base, partly because I wasn’t too sure how long I wanted the sleeves to be, but mainly because I don’t think ripstop will run, so there isn’t really much need to hem them.

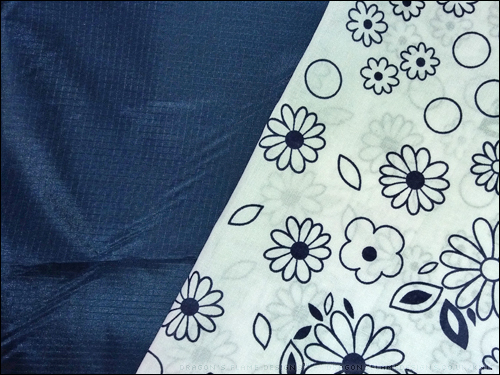
The ripstop should be showerproof (although I know if I get caught in a deluge, I’ll still get wet), and hopefully any mud or soil should just be able to be sponged off.

Calligraphy – just for a change

I’ve taken a week or two off from sewing, so instead of a current UFO (unfinished object), I’ve got a little calligraphy project to share.

I don’t like the idea of practising for the sake of practise, so my calligraphy practise is usually envelope art!

I hope it also brightens the postie’s day when they see the colourful envelopes 🙂

Shoreline Boatneck – another hack in progress

Even before I finished my first Shoreline Boatneck, I was already planning my next one. I needed a jacket to wear on the allotment if it looked like it might rain (typical British summers and all that), and my previous hacked Shoreline Boatneck looked like it would be just the right style.

I found some navy Rip-Stop and floral polycotton at Minerva Crafts, which look like they should be ideal for the jacket I want to make. So far I have most of the pieces cut out, but I’m still working on getting the hood to fit – the hood pattern comes from a different top, so the neckline is a totally different length, which is taking a bit of fiddling to get it to line up properly.


Shoreline Boatneck hack

I will admit that I have never hacked a pattern before – literally every item of clothing I’ve made so far, has been done according to the pattern. However, the Blank Slate Patterns Shoreline Boatneck caught my eye, and was screaming to be hacked into something slightly different.

The pattern itself comes with a ‘hack pack’ with suggestions like a button back, or making it into a dress. But the idea of buttons down the back has never really appealed to me – I wanted to add them to the front. However, my sewing machine didn’t really like me sewing 7 buttons on the front of my previous shirt so I wanted to find a way around that. Really, I needed to stitch the buttonholes first, so if I messed it up, I wasn’t ruining an entire top.

Luckily I found a tutorial for a hidden button placket at Craftsy, which with a few tweaks was able to be used on my Shoreline top. Ironically, those buttonholes are the neatest I’ve sewn so far, but it definitely looks nicer having them hidden from view.

The fabric is a double duvet cover set from Shaws Direct – I actually only used the two pillowcases for this top, so that leaves me with about 4m of fabric I can use for a couple of dresses.

I started the buttons just above the bust level, although I think I could’ve done with adding in another on the neckline just to help keep the shape. But as it is, I can use a small clip as a decorative feature if I want to. The only other change I made was to add a seam allowance to the back, and cut those pieces separately – the pillowcases didn’t quite work out to be the right size to cut the back on the fold!

So there you have it; my first Shoreline Boatneck, and my first pattern hack – you wouldn’t really know that was made from two pillowcases, would you?

Hello out there!

I know it’s been a while since I posted, but rest assured I’ve been busy sewing. Things have been a little hectic here, so I’ve not had as much opportunity to blog. Hopefully though, everything will quieten down a little, so I can get back to my regular weekly blog posts!

An Early Christmas Present

I was looking for something relatively easy to make for K’s Christmas present – his Mum has given me a great idea for a present I can work on for his birthday, but I needed something that would be a faster make for Christmas!

Enter the free Fleece Hat pattern from Fleece Fun – not only was it useful to make my own hat, but it has sizes all the way from baby to extra-large adult! I found just over half a metre of red fleece in my local fabric shop, along with a cute zebra iron-on patch just to liven it up a little.

I did modify the pattern slightly, making the hat a little longer than it’s meant to be, to allow for the brim to be rolled for a snugglier fit. I wasn’t too confident at how the patch would iron on (there weren’t any instructions on it), so I zigzag stitched around the outside just to ensure it would stay in place.

Hopefully we’ll get some seasonal cold weather, so K has an excuse to wear it!

Happy Christmas Eve eve eve eve eve!

Ok, so it’s still a few days to go, but I had to share the Christmas tree from Johanna’s Christmas – I stuck with some basic shading with colouring pencils for the tree itself, and fineliners for the rest to make it stand out.

I didn’t add any metallic detail into these, as the deep colours I used on the baubles meant the lighter colours stand out really well on their own.

My Creative Escape

Sticking with the Johanna’s Christmas book, this one was actually printed off from the Staedtler website for their #mycreativeescape competition.

I used Staedtler fineliners (of course) for most of the image, but the shading needed something a little less harsh, so I dug out my Derwent Coloursoft pencils to give the snow, polar bear and ice some depth.

I’m not all that confident at knowing how to place shadow, but I’m quite pleased with how the polar bear came out.

Johanna’s Christmas

I wasn’t able to find a copy of Johanna Basford’s Johanna’s Christmas in town, but I was able to order it from Amazon at a great price (£5 instead of £12.99), but that did give the disadvantage of not knowing what the book would be like until it arrived.

The pages are quite thick, with 37 one-sided images to colour (the reverse side of each image has a generic Christmassy pattern, which can also be coloured if you feel so inclined). The pages are also perforated, so you can remove them from the book once they’re coloured – or even remove them to use paints without the risk of getting paints or water over the other pages.

I used Staedtler fineline pens and a couple of metallic gel pens from Paperchase just to liven things up a little. I’m not sure if the background needs some colouring pencil shading or not….

Enchanted Hedgehog?

Notice a theme with these colouring pages yet? This one is also from Johanna Basford’s Enchanted Forest, and was also started with paperchase fineline pens. Unfortunately that pack only came with two shades of green, but when combined with the Staedtler pens, that gave me four shades to work with.