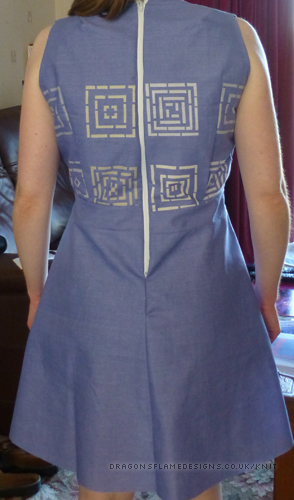
This is my first attempt at using my bodice sloper to make a dress bodice, and it hasn’t come out too badly! At the moment, the zip is tacked into place; there’s a bit of a catch at the base of the zip that I need to work on, but once that’s done, I can stitch the zip in place properly.
Those finishing stitches on the zip should also give a slight overlap of fabric, so the zip itself isn’t visible. One day I’ll invest in a concealed zip foot and learn how to do those, but for now, I’m sticking with a centre zip.
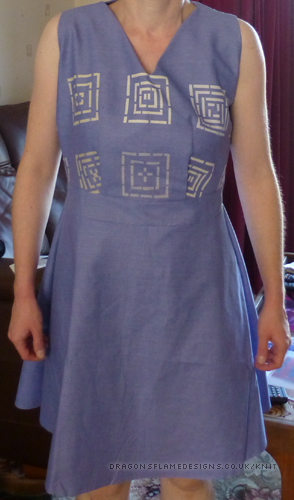
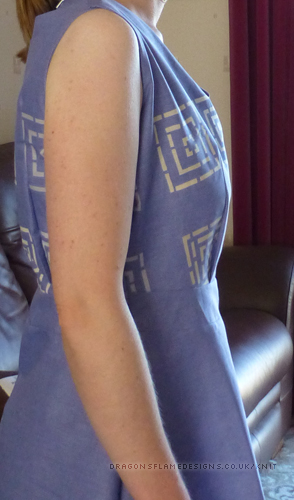
On to the not-quite-so-good parts…. I have no idea what happened with the darts – they’re not the same length, and are finishing way too high!
The armholes are perfect (which I’m amazed about, considering I don’t have a French Curve ruler and ended up drawing the curves in freehand)! But you can clearly see there’s some excess fabric at the front of the bodice, and also a bit of a gap at the back on the neckline.
I think maybe the back gaping wasn’t helped by changing the neckline on the front. I have a feeling that altered the shoulder width, so my darts in the back shoulders are a bit too wide. Hopefully the back gaping can be helped with a hook and eye at the top of the zip, but the front might need another dart coming from the armhole.
I’ve been needing a floor cushion for a while, but didn’t really want to spend out on a premade one. So spotting a 22″ polyester cushion pad at Shaws Direct for just £1.25, I bought a metre of purple polycotton to go with it, and set about making my own!
It’s a simple design – plain on the top, with an envelope style closure at the back (like a pillowcase). That means there’s no lumpy zips or buttons when you sit on the cushion.
I did have to piece the back, as I was originally aiming on using an 18″ cushion, but they only had 16″ or 22″ in stock. However, as it’s on the underneath of the cover, you wouldn’t know it was pieced from the top.
All the seams were stitched as French Seams (including the piecing) to hopefully ensure it’ll stand up to a lot of use, and also that no stray raw edges have any chance of fraying in the wash.
So, for £4.24 (I already had some matching thread left over from making my sun hat), I have a practical floor cushion that is the perfect colour to match the purple and silver theme of the room. Much better (and more comfortable to sit on) than some of the ones I’d spotted as premade cushions!
I had fully expected this floppy sun hat to also be a flop, but much to my utter amazement, it actually came out better than that!
It’s a pattern previously recommended by Love Sewing magazine, but the link they have to it no longer works 🙁
Luckily for me, my head measurements are identical to the person who wrote the pattern, so there’s no maths involved. I bought a metre of purple polycotton and some heavy iron-on interfacing (the previous hat pattern used sew-in interfacing which I found was too easy to rip as I turned the brim out). So far so good; the hat only cost me about £5 in supplies, but now comes the hard part – the sewing!
The lining is sewn more like an interlining for this hat – the seams are visible on the inside. That was great practise for faux overlocking, as the standard zigzag foot results in a tunnelling effect when I use it on the fabric edges.
Attaching the brim was an interesting process, as I had to add in a few pleats to make it fit…. but that was actually part of the pattern, so I didn’t feel I had made a mistake there.
I chose to add a bias binding trim over the faux overlocked seam edges where the main hat piece meets the brim – it’s not something you should be able to see, but it should stop the seams irritating my forehead!
Overall, I think I’m actually quite pleased with this hat – I could do with adding another layer of interfacing on the brim if I make another, as the brim is a little too floppy for my liking. However, it fits (yay!!), so I’m happy with this one 🙂
I was struggling for something to get my Dad for Father’s Day last month – I’d asked him if there was anything he was particularly wanting, and was told “surprise me”…. not all that helpful!
I knew he’d been unable to find a decent summer hat in the shops, and I’d spotted a pattern on Melly Sews, which I thought would work perfectly. To start with, I made a pattern for a hat that would fit a teddy bear, and that came out pretty well:
(it does fit the bear it was intended for, but this bear is more photogenic…. it just has a larger head!)
I made a pattern from newspaper, bought the outer and lining fabric, and started pinning it together. After sewing the crown to the main front of the hat, I asked Dad to try it on…. and of course it was too small. However, it did fit me! So as I couldn’t make the hat any larger without starting from scratch, I decided to stick with the hat and make it for myself instead. I was almost ready to attach the brim when another relative asked to see it, and suggested that the main part of the hat was too tall. Cutting that down by a couple of inches, I pinned the brim to the hat and it still fitted me.
Buoyed on by my apparent success, I then machine stitched the brim to the hat, and guess what? Yeah, you guessed it – the hat’s now too small (ironically, it’s not tall enough over my ears now). I tried hard to stick to a really narrow seam allowance and it was pretty even all the way around. All I can think is that the original measuring is out a bit and maybe also the cutting.
I will try another hat for Dad before the end of the summer, but I think I will try a polycotton version first, rather than just diving in with the decent fabric next time!
Back in May, I signed up for the Simplicity Sewing Challenge – I chose two categories to enter: Best Dressmaker, and Best Blogger Feature. Part of the challenge is to put your own style into the pattern, so I’ve been trying to figure out just how I’m going to do that.
It took a while for the patterns to arrive, but they came in the post at the beginning of the month, so I’ve started on a muslin version of the dress. Cutting out the pieces was interesting, given that I’ve never made a dress with princess seams before, and my ability to sew an accurate opposing curve tends to be lacking! But I’m definitely up for the challenge for that.
Tracing off the dress panels using dressmaking carbon paper
The blogger category allowed you to pick a pattern from the other categories, so I chose the skirt. Originally I was planning on making the button-up version, but I decided that the zipped one might be a style I would get more wear from. I do have an idea of how I can make that slightly different to the pattern, but it’ll be interesting to see if I can actually achieve what I have in mind!
So far so good – I’ve got the pieces cut out for the dress, and have started working on the skirt for a bit of variety. All I need to do now, is get a zip in the right length, so I can work on that part.
I don’t know about you, but trying to make an item of clothing that actually fits is something I’ve been struggling with. Either the pattern company is adding some strange amounts of ease, or the pattern has hardly any ease at all!
So, I decided to have a go at making a bodice sloper to try and figure out my own sizing a bit better. So far I have the paper pattern drawn out – it looks a bit small, but the instructions said to stick with it, so that’s what I’m going to do! I doubt the armholes will look right, given that I don’t (yet) have a French Curve ruler to use, but I’m hoping that the fit will be reasonably accurate to my shape.
Several weeks later, and I have a bodice sloper that kind of fits! The back seems a different length to the front for some odd reason, and there’s quite a generous amount of ease – I’m not sure if that was intentional from the pattern instructions or if my measuring was off in a few places!
For this sloper to actually be of some practical use, I now need to figure out how to make alterations to a pattern using my sloper as a template. The website guide I was using, showed how to spot where some alterations could be made, but didn’t actually explain how to actually alter the patterns, so I’ll have to hunt around for some instructions on that!
I’ve never sewn a vintage-style garment before, but when I saw the BIG Vintage Sew-along advertised online, I decided it was worth trying.
I picked a vintage inspired shirt: Butterick 6217, which seems to fit me more accurately than the other tops I’ve tried making so far!
I made a version from a duvet cover to start with, but that was way too big across the chest, and also a bit too low – verging on “indecent” to wear outside!
So this is the sneak peek at my second attempt, made from some fabric I bought in a remnants pack. I took off an inch at the shoulders on the front, adding it back onto the base again, and that seems to have resolved the too-low V-neck problem. I just need to get the buttons attached, then I can get some photos of it actually being worn.
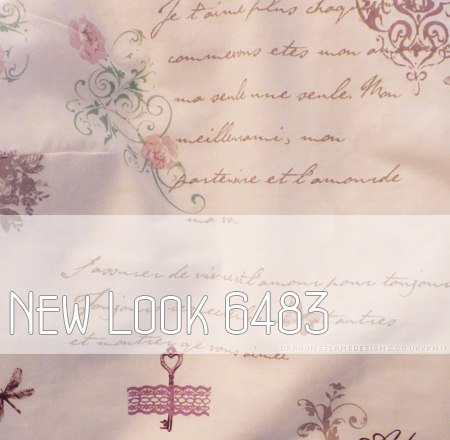
The June 2016 edition of Sew Magazine came with a free New Look 6483 pattern – with 5 different styles of tops, all able to be made from non-stretchy fabric, I decided this was one I would definitely get a lot of use from.
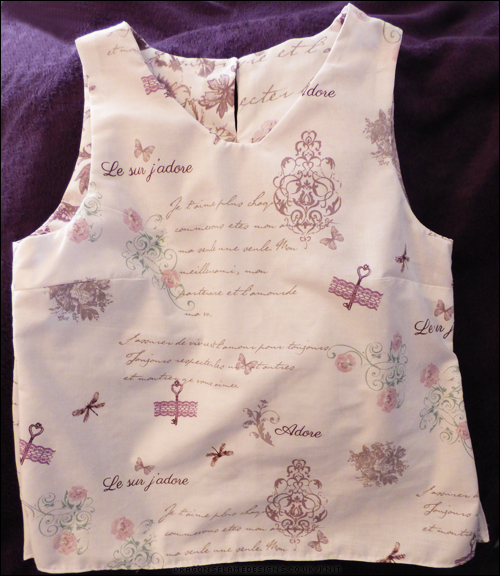
It’s designed as quite a loose fit, so looking at the finished garment measurements, I chose a size 8…. usually I’d make an 8 for the shoulders and chest, and grade it out to a 12 at the waist, but this one is plenty big enough!
This was view C, but I have cut the neckline a little deeper – the original line for the neck was much too high for my liking, but I didn’t like the wide nature of view E. I probably would try making that as a proper v-neck next time.
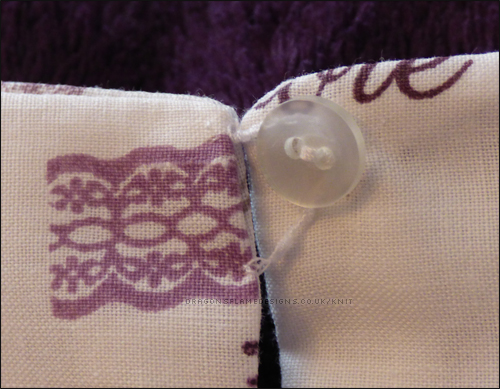
The only real trouble I had in making the top, was making the thread loop…. the instructions weren’t overly informative on how to achieve it, so I had to ask for advice on that. In the end, I made a kind of blanket stitch around the three thread loops, and that seems to work.
The fabric is actually a duvet cover from Primark – it’s not the thickest of fabric, but it’s fully washable and will be nice and light for the summer.
Last month, a friend sent me a handmade mousepad for my birthday; she’d used a self-adhesive foam backing, and fray-check on the fabric to stop the ends from fraying. It looked a lot better than the bought mousemat I’d been using, and inspired me to have a go at making a couple myself, to give to friends for their birthdays.
It’s not something I want to keep to myself, so I thought I’d share my fabric mousemat tutorial with anyone who wants to try making one!
Materials
Foam sheet: 9″ x 8″ or larger Fabric : 10″ x 9″ for the zigzag version, 11″ x 10″ for the hemmed version Matching thread
Optional Old mousemat to use as a template (mine was 9″ x 8″) Denim needle Walking Foot
I found an A4 sheet of foam for 60p in the local craft store, and some purple fabric in my scraps pile, so this turned out to be a very cheap mousemat!
Fabric Mousemat Tutorial (zigzag version)
Take your old mousepad, place it onto the foam and trace around it. Cut out the rectangle from the foam. If you didn’t have a mousemat to trace around, you could always just cut a rectangle 9″ x 8″ and round the edges by drawing round a round object like a saucer.
Take your fabric, with the right side facing the table, and draw around the foam you just cut out. Then, draw a line 1/2″ outside that (this is the line we’ll be cutting). Cut out the fabric on that outer line.
With the right side facing the ironing board, iron the fabric along the inner line, so you’re creating a 1/2″ fold onto the wrong side on each edge.
Place the fabric over the foam, and carefully bend those folded edges around to the back of the foam.
Hand tack (baste) the fabric from the underside, to hold it safely in place for the next step. When it comes to the curved corners, you can fold over a little bit of the fabric to help keep the front nice and smooth.
The underside of the mousemat – I will admit I could have measure and cut the fabric more accurately to have my 1/2″ fold on each edge!
As you can see, the fabric was still slightly damp at this point, from my attempts to iron out some really stubborn creases! The tacking isn’t straight, but that doesn’t matter, as the tacking stitches will be removed anyway.
The advantage of folding the fabric over the edge of the foam, is that it doesn’t rely on any glue staying adhered over time, and also eliminates the need to use fray-check.
Starting on one edge (not on a corner!), carefully zigzag around the mat – this will ensure the fabric stays as flat as possible (nobody wants a lumpy mousemat!), and to also help prevent any fraying from the edges underneath.
I did use a walking foot and denim needle just to be on the safe side as I was a little uncertain how the regular foot and needle would cope with the foam…. however, my hand sewing needle went through the foam really nicely so I don’t think a denim needle or walking foot are really essentials for this.
Carefully trim the underside edges of the fabric with scissors, just to make them a little neater.
And there you have it – a finished mousemat!
The corners might not be the neatest in the universe, but for a 60p mousemat that can be made in any colour combination, you can’t really go wrong!
But what if you don’t like the idea of a zigzag all the way around the mousemat? Then you could try the hemmed version instead….
Fabric Mousemat Tutorial (hemmed version)
Take your old mousepad, place it onto the foam and trace around it. Cut out the rectangle from the foam. If you didn’t have a mousemat to trace around, you could always just cut a rectangle 9″ x 8″ and round the edges by drawing round a round object like a saucer.
Take your fabric, with the right side facing the table, and draw around the foam you just cut out. Then, draw a line 1″ outside that (this is the line we’ll be cutting). Cut out the fabric on that outer line.
I then used the faux overlock stitch (a zigzag, but with an overlock foot) on my sewing machine to neaten the edges – this bit won’t be seen in the end, but it’ll stop the edges from fraying.
With the fabric right side down, place the mouse mat foam pad on the top. Fold over the ‘overlocked’ edge slightly, then fold again, so the zigzag stitches are all hidden. Tack (baste) this down, through the mousemat foam.
You may want to measure the amount of fabric you have showing on the wrong side, to ensure you catch it with the stitches in the next step.
Starting on a straight edge (not on a corner!), carefully (and slowly) sew through the fabric and mousemat foam. I used a straight stitch, but you could use a contrast thread and a fancy stitch if you prefer.
Looking at the back of the mousemat, all the fabric should be stitched, with none of the ‘overlock’ stitches showing.
And there you have it – a finished hemmed mousemat!
I’ve tested out the zigzagged mousemat, and haven’t had any problem with the mouse catching on the stitches around the edge. Just make sure you don’t sew over the body of the mousemat itself, as that would disrupt the movement of the mouse and prevent the mat from working as it should. Keeping the stitches to 1/8″ – 1/4″ from the edge is the most practical option.
This fabric mousemat tutorial is provided free for everyone to use. Link backs to this tutorial are welcome – please do not copy the tutorial and post it on your own site!
You may sell items you have made from this pattern, but please do not sell the pattern itself!
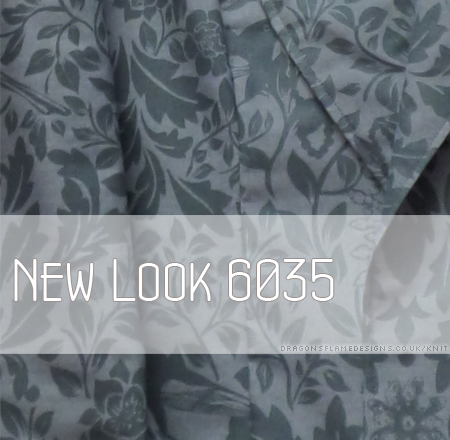
I will admit I made this jacket a while ago, but never got around to taking photos of it!
New Look 6035 came free with an issue of Sew Home & Style and although the rest of the items look good, I had to try making the jacket first. Rather than risking using a fancy fabric for a first attempt at this pattern, I used a duvet cover from Primark for my fabric – it’s polycotton, nicely patterned, and can result in a wearable item if I get the sizing right.
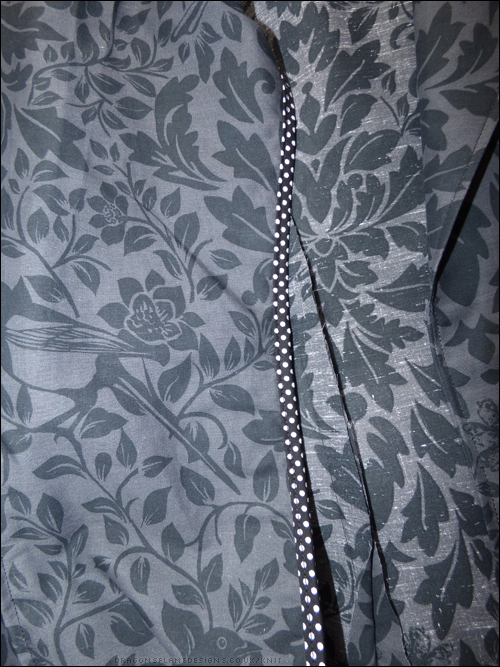
To make the seam finishes a little neater on the inside, I bound them with some polka dot bias binding. It looks a lot nicer than just zigzagging the edges, and should hopefully be more sturdy when washed.
Overall, it’s a good fit – I made view B, which is a perfect sleeve length for me. I didn’t add any pockets, mainly because I wanted to concentrate on the shape and size of the jacket itself, but if I made another one, I definitely would add the pockets in. It is unlined, so the jacket is quite thin (mainly due to the thinness of the duvet cover), but if it was made in a denim-weight fabric, it would be an ideal Spring / Autumn jacket.
I do want to try making a heavier-weight jacket, so I think I would probably give this one another go at some point – the shoulders are a perfect size (usually across the back, a jacket can be too snug for me), although the sleeves were a little wide at the end.