New Look 6231

Finally I’ve completed the hem on the jacket! This was the first jacket I attempted, and it’s been sitting on a clothes hanger for ages while I plucked up the confidence to tackle the hem.

The peplum gives the jacket an interesting shape, but unfortunately it also gives it a curved hem…. and that was something I really struggled with.

The inside of the hem isn’t the neatest and there are some tucks and folds in there, but from the outside it looks pretty neat and that’s what matters. After all, who’s going to see the inside of the hem anyway?

English Tea Dress – take two

Following on from my success with the English Tea Dress, and realising that the style actually seems to suit me a lot better than the “fit -and-flare” style dresses I’ve tried before, I thought it was time I dug out Summery duvet cover, to make a second dress from.

Tea Dress

Of course this fabric doesn’t really fit the English Tea Dress name, so I’ve renamed this one the French Tea Dress. The duvet cover also came from Primark, and was slightly more see-through than the previous one, so I had to make a lining for the skirt. I cheated though, and just cut another piece of each skirt part, then held them together as I stitched the seams, treating the two pieces of fabric as one. I’m positive that not the “correct” way to include a lining, but it worked for me!

Unfortunately, I didn’t have quite the right length of zip, so it’s a little snug to get on and off…. but it still fits, even though there’s a couple of areas on the sides which aren’t perfectly aligned (blame that on adding in the second piece of fabric for the lining – my seams didn’t catch all found layers on the sides, so there’s a few wiggly lines here and there).

Tea Dress Zip

The zip itself is a load neater than the first one – I think I’m gradually getting the hang of this now! All I need to do next is find some shoes to wear with it – trainers just wouldn’t look right.

English Tea Dress – take one

My previous experience with Simple Sews patterns wasn’t all that fantastic. Using the measurements provided, the dress should have at least fitted, but the back wouldn’t meet, let alone meet enough for a zip to go in. But the style of the English Tea Dress made me want to have another go, in the hope that I could figure out the fit a little better.

The neckline is more suited to my taste, with a nice v-neck that has just the right amount of plunge. The back is a round-neck, so no worries about picking a suitable bra to wear so the straps don’t show!

I did give an allowance of an extra inch on each of the back seams but I hardly used any of that, so the sizing definitely seems like it’s more accurate for this one. I will admit I got in a mess with the sleeves though; the pattern didn’t really make complete sense for the cap sleeves, nor for attaching the cuff. So, I used the short gathered sleeve, and added a contrast cuff as if it was bias-binding, rather than following the instructions. The cuff was slightly snug so I left it open on the end, stitching down the seams on either side.

Tea Dress - sleeve detail

The zip isn’t the neatest in existence, and I used a regular zip rather than an invisible one, but for a first attempt at a zip in a dress, I think it came out really well 🙂

tea-dress-1-zip

The fabric was actually half of a single duvet cover from Primark (£9), so including the thread and zip (I already had the interfacing from a previous project), the dress cost me £6.40. Now that’s a bargain, especially for my first finished dress!

Skyline

I found this incredible fabric in the sale for just a pound per metre. I’m honestly not sure what fabric this actually is; my best guess is a kind of canvas – slightly shiny and textured and reasonably thick. The fantastic pattern of silhouetted buildings would be perfect to make something for an architecture-loving friend, but I wasn’t too sure what I would be making.

Going back through my folder of downloaded patterns, I came across the Notebook Folder Tutorial from Riley Blake Designs. I’d made one of these previously, but struggled to get all the layers through my Mum’s sewing machine, so I wasn’t too sure how this canvas would behave!

Notebook Folder

Outer cover, complete with strap and button

The inside of each panel is a black polycotton which compliments the silhouettes and also helps balance the thickness of the fabric.

Notebook Folder

Front cover with strap undone

I don’t trust my hand-sewing enough to stitch the button on by hand, so I machine stitched it on after completing the folder. There was just enough space to sew it in while holding the slanted pocket out of the way.

Notebook Folder

Inside the folder. There’s a pen pocket on the left, and the pouch to the right is large enough to hold an extra large notebook!

I decided to skip the interfacing as the canvas is sturdy enough without it. I couldn’t find any batting in my local shop, so I picked wadding instead and quilted  it to the inside panel so it wouldn’t shift around as I turned the folder the right way around. I also cut the wadding shorter than recommended, leaving a half inch border around, to ensure the final seams wouldn’t overlap it.

The quilting could be a bit neater; if I made another, I might try and make more of a feature of the quilting, picking a better pattern than a simple cross on the back.

Notebook Folder

The inside cover – you can just about see the quilted backing behind the slanted pocket.

I used a denim needle in my sewing machine due to the thickness of the canvas. It stitched really easily, which was a pleasant surprise after the struggles I’d had with the previous one on an older machine!

Notebook Folder

Inside the folder, with the notebook lifted out of the way.

There’s a couple of seams that aren’t entirely straight, mainly because I had the canvas layer on the bottom, and it seemed to slip as the feed dogs fed it through the machine. But overall it came out really well.

Notebook Folder

Finished notebook folder – front and back covers, with the strap

Sewing – UFOs

I’ve been working on several sewing projects lately, most of which have yet to be completed for varying reasons! So, here’s a (not so) quick run down of my current UFOs (UnFinished Objects), in the hope it’ll spur me on to get at least one of them completed!

  • First attempt dress: I haven’t worked on this lately, as I’m trying to learn how to do shaping for the bodice, so I can try to get the fit to work. At the moment, the darts don’t line up quite right, the neckline is far too high for me, and the zip doesn’t meet at the back….
    Edit: this one has been shelved indefinitely…. or until I know a lot more about alterations!
  • The jacket:  This is waiting for me to have the patience to try hemming the base. I’m not 100% sure the style suits me, as it has a peplum which does enhance the shape of my rear…. and that doesn’t really need any enhancement. However, I do want to get this finished, so either I need to try hemming on the curved base, or maybe try using some bias binding to cheat a little.
  • Top number 1: My mistake on this one, was to follow the sizing on the Simplicity pattern – instead of working from the finished garment measurements, I worked on the suggested size. As a result, this is way too big right now. The instructions on the sleeve were really hard to follow; after I stitched it on, I realised I’d messed up, so I need to unpick that and redo it. Like the first attempt dress, I need to learn how to alter the top so I can make it a better fit and something I could wear, rather than something that will just sit on a hanger.

top-1

  • Top number 2: This one worked a lot better – it’s meant to be a loosely fitting top, and fits quite well. I shelved this while I was getting a couple of buttons for the back loops and haven’t quite had the right amount of patience yet to try sewing them on.
  • Dress number 2: Almost finished, but just needing a couple of adjustments, this was actually made from rough guidelines courtesy of Culture of Thrift. I’m not 100% happy with the style of the skirt part and the left strap needs a bit of work to make it fit properly, but overall considering this wasn’t made from a printed pattern, I’m quite happy with how it fits. Also, it’s proving a good exercise in how to make darts that fit me!
Dress - 2

Following the guidelines at Culture of Thrift

  • Dress number 3: I wasn’t overly inspired by the look of the dress on the magazine cover, and the pattern is designed by the same company as my first attempt, which means there’s the potential there for the fit to be a little out. But after seeing some of the pictures people had posted of the dress as they’d made it, I decided it was worth a try. Using the other half of the duvet cover from the jacket, I’ve got as far the zip…. which is pinned in at the moment, just to figure out the sizing.I need to rework the cuff on the sleeves, as at the moment it seems too tight. I might just make a vent where the seam is and hope that gives enough allowance for my arms to be able to move! The dress itself actually fits me (I did add an inch on the back seams just in case, but I don’t think I’ll actually be needing that!), and I just need to buy and sew in a suitably dark coloured zip, then hem the base of the skirt.

dress-3

It’s not the most summery of fabrics, as the duvet cover it’s made from was quite heavy. However, that means it shouldn’t be as see-through as the lighter ones, which should save the hassle of figuring out how to line it!

Edit: This dress now becomes my first completed dress 😀


They’re not looking too terrible at the moment – all I need to do now, is get on and finish some all of them!


Smartphone Case Tutorial

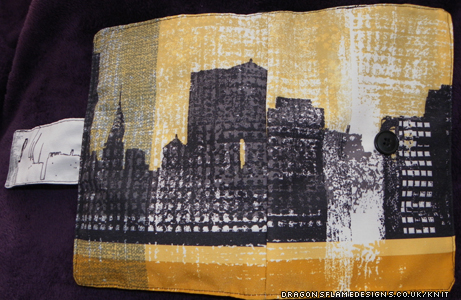
A while ago, I knitted a smartphone case for my Mum, but she was looking for a second case, and requested a fabric one. I couldn’t find any tutorials that worked for her specific phone, so I decided to make it up myself, and share this Smartphone Case Tutorial with you!

This case will fit a Nokia Lumia 530 with a little wiggle room, and also a Samsung Galaxy S2 (very snugly). If you have a different sized phone, you could always add a little onto the width of the pieces first – it’s better for it to be slightly too big to start with, as you can always take it in before you finish!


Materials

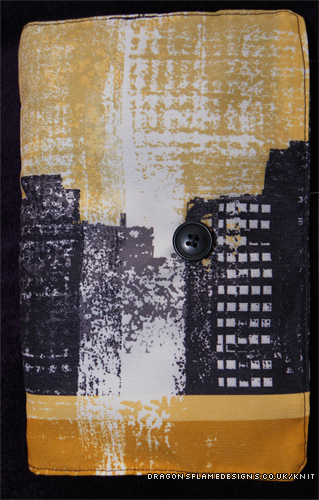
10″ x 10″ outer fabric (I used a remnant from a fat quarter)
10″ x 10″x lining fabric (I picked a firmer fabric to give it some body)
10″ x 10″ wadding (you could use batting, but I used the lightest-weight wadding my local craft shop sold)
1 x hair elastic
1 x button
Supplies

In the end, I decided not to use the ribbon to make a keyring loop

Cut out the fabric

  1. From the lining fabric, cut: one rectangle 4 ½” wide and 6 ½” high, and one rectangle 4 ½” wide and 8 ½” high.
  2. Cut the same from the outer fabric.
  3. Cut two 4 ½” x 6 ½”  rectangles from the wadding.

Quilting the wadding

If you skip this step, nothing will stop the wadding from moving around when you turn the case the right way round later, so this step is important!

  1. With the small lining rectangle WS up, stitch the wadding to the top edge with a 3/8″ seam.
  2. I stitched straight down the centre, and made a wonky diamond, but let your imagination run wild to quilt the wadding to the lining! You won’t see much of it when the case is finished, but you’ll know it’s there.
    quilting
  3. Stitch around the remaining three edges with  a ¼” seam. This will hold the wadding in place on the edges, but the seams won’t be visible on the finished case.

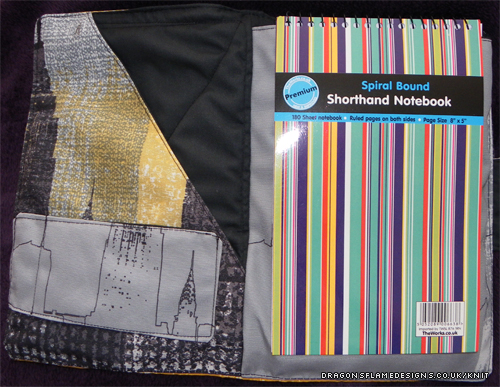
Set the small rectangle to one side, and do the same with the large rectangle, except that this time we need to line the wadding up at the base of the rectangle, leaving the top section unwadded. This will be the top flap, and if it’s padded it makes the case a little too bulky to put into a coat pocket!

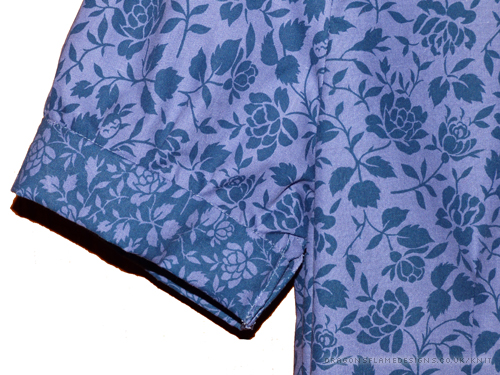
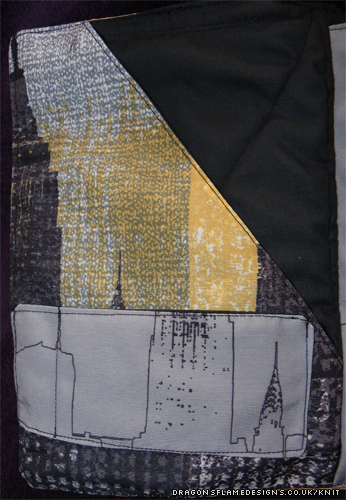
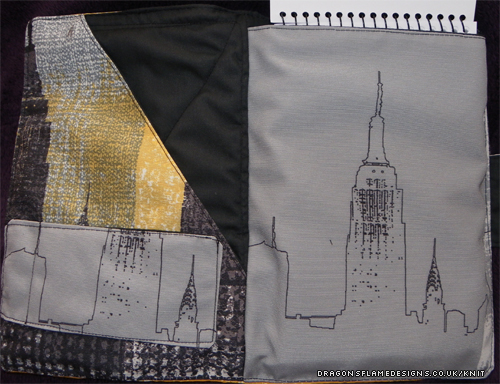
With both lining rectangles finished, it should be looking something like this:

wadding

The unwadded top flap is folded over on the right, with the small lining rectangle on the left

The front smartphone case section

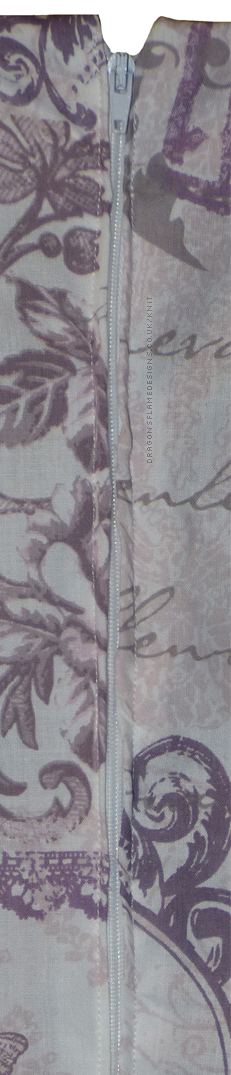
  1. Taking the small lining rectangle, and the matching outer rectangle, place them RS together. Stitch across the top edge with a ¼” seam allowance.
  2. Turn to RS, and top stitch over that seam with a 1/8″ seam allowance.top-stitch-front
  3. This is now the front section.

Putting it all together

This is where it starts to sound really complex, but you’re almost at the finish line!

      1. Take the large lining rectangle, and place it RS up. This will be the back lining for the case.
      2. Place the hair elastic at the top of this rectangle, with the neat loop pointing towards the bulk of the fabric. Pin or tack (or both – hair elastics can be a nightmare to keep in one place before stitching!).

        Hair Elastic

        The metal piece will be inside the seams, and can be cut off before turning.

      3. On top of this, place the front piece, with the front lining face down, so the front cover is RS up.
      4. Finally, place the back cover on the top, WS up.
      5. Pin and tack! This is really important, as it’s so easy for something to move as you stitch!
      6. Mark a gap to be able to turn the case the right way out. I left a gap on the corner which wasn’t ideal, but it was easier than leaving a gap where there’s more than 2 layers!
      7. Sew carefully around the case, with a ½” seam allowance, backstitching at both sides of the gap to reinforce the seam. When stitching over the hair elastic, I ran a few stitches backwards, then came forwards again just to ensure it’s held firmly.
      8. Trim the seam allowances to make it less bulky when turned, and clip the corners being careful to not cut into the stitches. Cut the metal part off the hair elastic.
      9. Carefully turn the case the right way around – this will seem quite fiddly, but stick with it.turned
      10. Before doing anything else, check the phone fits comfortably in the case. If the case seems a little large, turn it back the wrong way around, and sew another seam down either side, just a little further from the edge than the first ones, to make it a little narrower. Then turn back the right way and check again.
      11. Assuming the phone now fits comfortably in the case, carefully fold in the edges of the gap, so they match the seam line on the rest of the flap.
      12. Top stitch around the flap, with a 1/8″ seam allowance to close the gap and make the flap look better. I prefer to make the flap corners a diagonal rather than perfectly pointy corners, but you might prefer to make them perfect right angles.
        top-stitch-flap
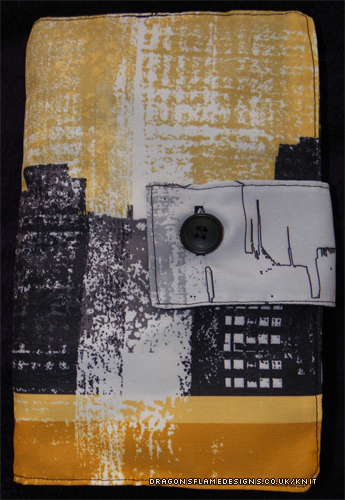
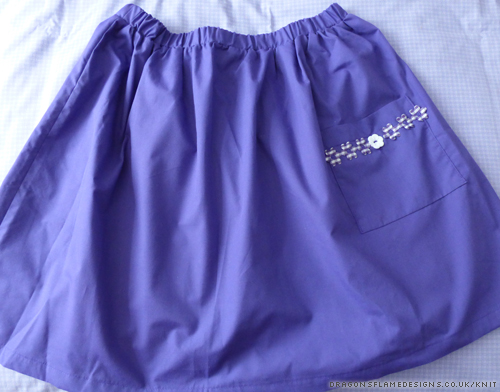
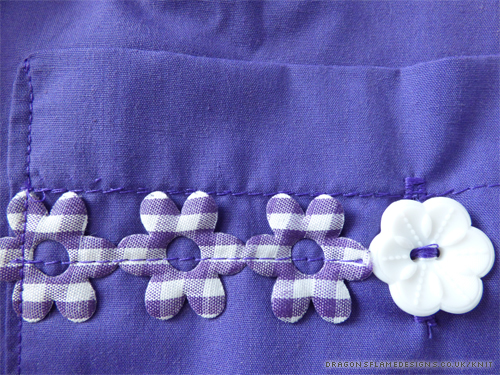
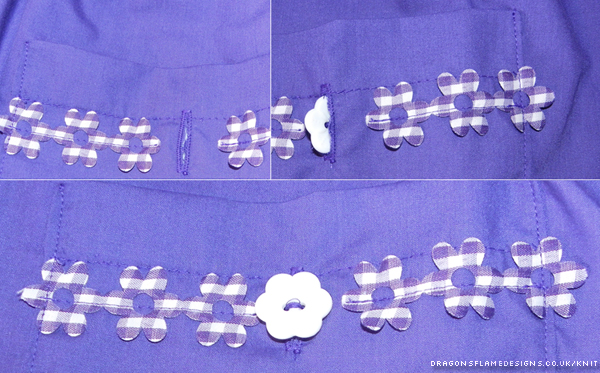
      13. Put the phone back into the case, and check the required position of the button. Remove the phone (again) and carefully sew the button onto the front of the case. You could of course have machine-stitched the button on earlier, but this way you can ensure a snug fit for the phone, rather than risking it either being a bit loose or the elastic not quite reaching.

And there you have it! One finished smartphone case!

Phone Case - finished


I’d love to see the cases you make with this tutorial – simply post links to the pics in the comments 🙂


Outer fabric and button from The Makery, lining fabric from Hobbycraft and hair elastic from WilkoNone of these links are affiliate links.


This tutorial is provided free for everyone to use. Link backs to this tutorial are welcome – please do not copy the tutorial and post it on your own site!

You may sell items you have made from this pattern, but please do not sell the pattern itself! 

Fabric Basket

Ever since I was given a Lush bubble bar for my birthday a year ago,  I’ve developed a bit of an obsession with things from Lush. My main trouble though, has been where to put everything; there’s a limit to how well you can stack bath bombs, pots of hand cream and shampoo bars, especially when the Lush packaging is mainly paper bags – that isn’t ideal for a damp shampoo bar!

My room’s colour scheme is purple and silver, so I didn’t really want to buy a basket to put them in, as it’d be guaranteed there wouldn’t be one that was quite the right size or colour. I did however find some really nice purple cotton fabric in the sale, and with the tutorial from Delia Creates, I was able to make a basket that not only fits the products, but also looks much better than a pile of bags and pots on the surface!

I found a few plastic containers in Poundland (these easily house a shampoo bar) and which work perfectly for storing my shampoo bars, conditioner bar and also pieces of soap. This basket is the perfect size for those, a few pots of hand cream, and also a bath bomb!

basket-a2

To stop the purple looking a bit too heavy, I did the top stitching in white to lift it a little. Silver might have looked better still, but I didn’t have any suitable thread. I decided that the handles weren’t really needed, so I left those out. The basket is washable and also fully reversible – if any of the Mask of Magnaminty ends up on it, it’s not the end of the world!

The Simplicity Blogger Challenge

Although I’ve sewn a few things so far, I’d never actually completed an item of clothing. I’ve started several, but they’re all still in various stages of “not quite finished”. However, Simplicity’s Blogger Challenge spurred me into actually starting and finishing something!

I picked the easiest option – pattern 2286, which gives 6 different options for elasticated waist skirts. Not being overly fond of “girly” clothing, I picked option B; no lace, overlay or frilly bits!

At only 5′ tall, I normally have to decrease the length of clothing, but I felt that 16″ was still a little too short for a skirt worn just below the waist, so I added a couple of inches to the length. But just adding to the length wouldn’t be enough to make it my own style, and being a relatively new sewer, I didn’t want to dive into something that would be beyond my skills!

skirt1

I added in one pocket rather than two (I prefer the asymmetrical look), and found some fantastic daisy trim that I hoped would work around the edge of the pocket. When the package arrived with the fabric and trim, the trim was a little larger than I had thought, and would overpower the pocket if I used it all the way around!

As luck would have it, I came across a flower button in the local sewing shop, which was a perfect match on size for the trim. But just sewing on a button wouldn’t be enough for me…. no, I had to make a working button, which would mean tackling my first ever buttonhole.

pocket

Thankfully my sewing machine has an automatic buttonhole setting, so after a quick practise, the final hole came out perfectly! Ok, it could’ve probably started about a centimetre lower down so it didn’t overlap the top stitches, but it works!

I stitched the trim with a single line across the centre, and caught it into the pocket stitches on the sides just to help it stay attached when the skirt goes in the wash.

And just to prove that the buttonhole works:pocket-montage


This skirt is part of the Simplicity Blogger Challenge. I was sent the pattern for free, as part of the contest entry. There are no affiliate link in this post.


Cooey!

I can’t resist a bargain, so when I spotted the Stitch London book in the Works for just £3, I knew it would be an interesting read. Several of the projects use the dreaded double pointed needles, but there’s also a few that are knitted flat, so for about the price of a Starbucks Frappuccino, I decided to get the book.

It comes complete with a kit to make Cooey the Pigeon…. along with some tiny dpns to use. My previous attempts with dpns have always ended in me frogging the knitting, and ramming the needles back into the base of my knitting bag. But I wanted to give this a go, as Cooey just looked too cute to pass up on!

I pulled the first two rounds off the needles when I realised I hadn’t made the stitches tight enough, but on the second attempt, things went much smoother – I think the shorter dpns were more helpful, as the longer ones just seem to wave around too much when I knit.

I couldn’t find the instructions for how to make Cooey’s feet (the website link has changed since the book was printed), so Cooey has slightly quirky feet, which are sewn on with yarn rather than glued. I wasn’t able to get the first wing to look all that neat by the colour changes, so for the second one, I cast on another 5 stitches at the start of the white row, then cast them off in the next row. That was then sewn onto the back of the wing after I’d finished sewing in the blue yarn, neatly hiding the yarn ends.

pigeon-blog

The only disadvantage with the book, is picking what to knit next – should it be the Tube Rat, Red Phonebox (maybe a TARDIS), or the Tube Scarf? They all look so incredible, that I just can’t decide!

Porker the Pig

I’ve been wanting to try needle felting for a while, but it always seemed quite an expensive thing to try, especially if you don’t know that you will get to grips with it. But I found a pattern for a pig at Tally’s Treasury which sounded like it should be a reasonable first project.

The needle was 1.50 and the felt cost just 40 pence, with enough left over to make another pig.

Porker

Porker the Pig – his eyes are scraps of blue felt

I hadn’t realised how easy felt would be to sew on the machine – even with a 1/4 inch seam, it behaved perfectly, not even attempting to ram some of the felt into the bobbin holder! The needle felting was a challenge, as I wasn’t really sure what I was doing, but once the snout started taking shape, I got the hang of it.

Porker

Felt is surprisingly challenging to get an accurate photo of! This is Porker’s true colouring

So, here’s Porker the Pig – he needs a little more work on his snout, but other than that, he’s ready and waiting for me to make him a little brother. Apparently one little pig is lonely on his own….

Porker

All this modelling for photos is tiring work…. well, his legs are slightly lopsided too, which means he tips over quite easily