Tag Archives: toy

Bertram Bigfoot

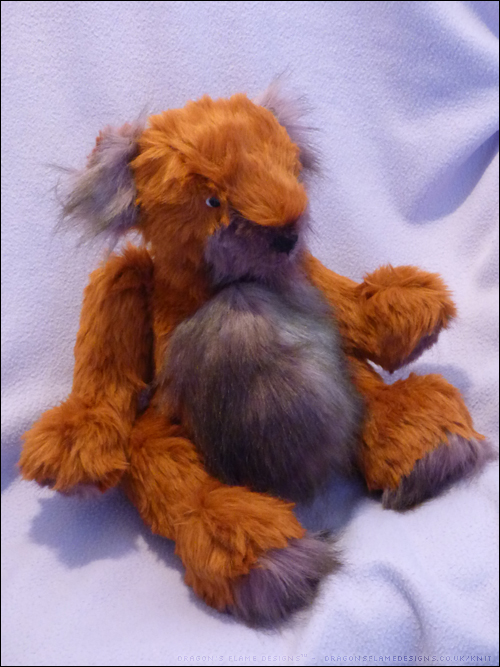
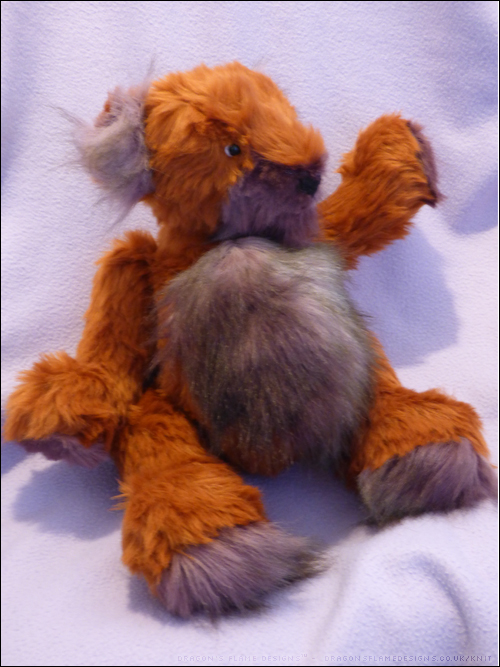
I can’t resist entering competitions, so when I spotted that Choly Knight had a Halloween Plush Contest, I had the perfect idea…. a fake fur Yeti!

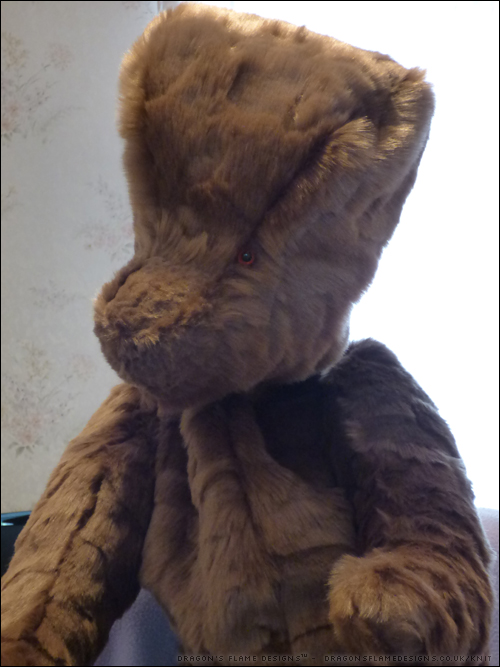
Unfortunately, the fabric shop didn’t have any white fur in stock. However, they did have some amazingly sleek reddy brown fake fur tipped with a silvery white shade – perfect for a Bigfoot instead.
After all, the only difference between a Bigfoot and a Yeti is the colour of their fur, right?

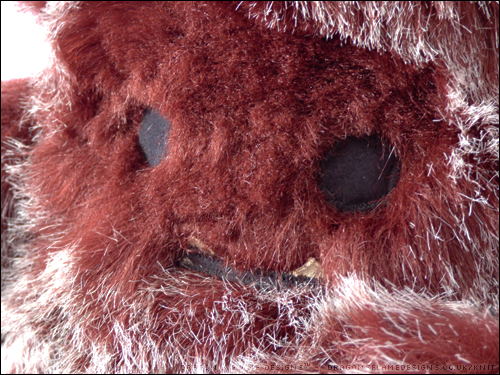
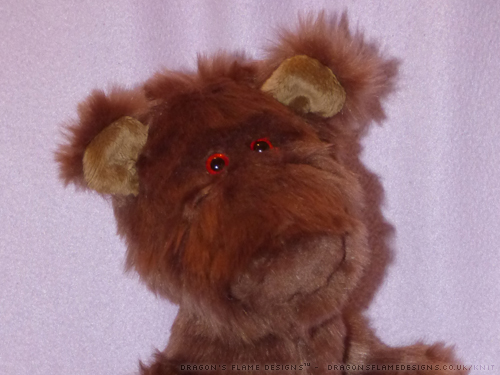
Instead of adding an applique face, I trimmed the fur to make it look two-tone. That also made the applique features easier to sew in place. I didn’t risk using any fusible web to hold the eyes, teeth and mouth in place, so I tacked them down by hand first, before zigzagging around them on the machine.

You may notice that Bertram’s teeth are a creamy brown shade rather than white…. that’s just because he forgot to take his toothpaste with him!

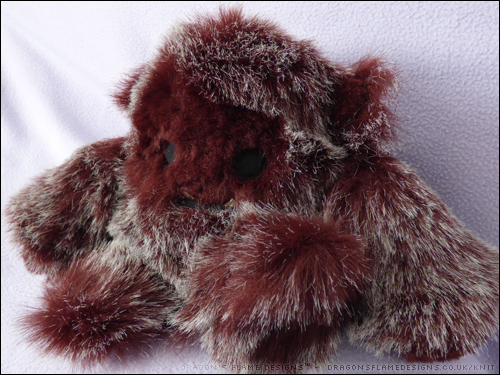
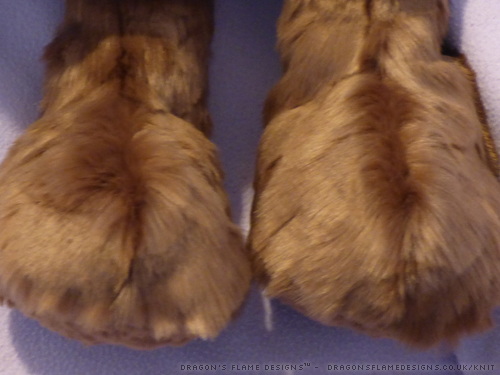
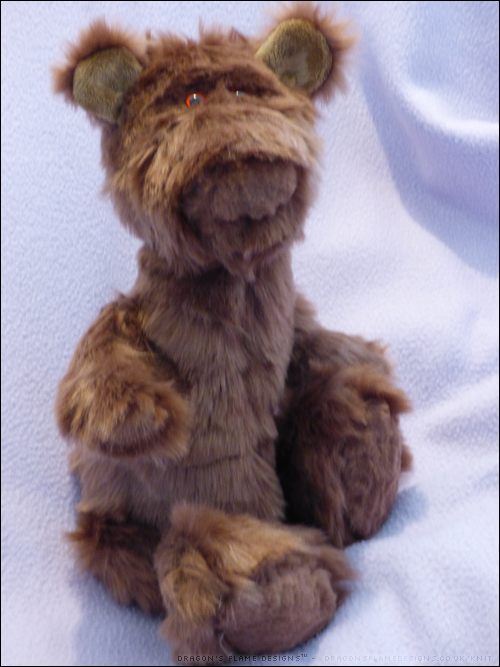
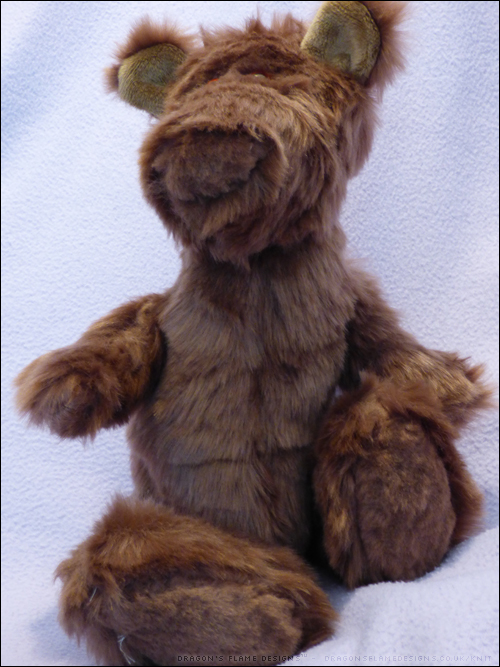
I did also try trimming the fur for his paw prints, but that wasn’t quite so successful – I think that would’ve worked better if I’d trimmed that after I’d attached them, as once they were sewn in place, a lot of the detail around his toes was lost.

Despite that, Bertram was a really successful make – he only took me a few hours to make, and that included spending what felt like ages on the cutting out!


Fabric: half a metre of fake fur from Fashion Fabrics

Pattern: Bigfoot plush by Choly Knight

Jumbo Bear (UFO)

I loved the look of the bear’s paws in the Emma’s Bears Jumbo pattern, but unfortunately, Happy didn’t come with those “pulled toe” instructions. Jumbo lives up to his name, using an entire metre of fabric, and potentially multiple bags of stuffing!

I was going to machine sew the seams for strength, but the weight and bulk of the fake fur was pulling it away from the needle as I stitched, so the majority of the seams ended up being hand sewn. For added strength, I used 4 strands of thread twisted together, and backstitched the seams.

I did use slightly smaller eyes than the pattern suggested, as I only had 11mm eyes to hand at the time, but I don’t think that’ll be too noticeable once his ears are added, and he’s fully stuffed. There’s a couple of seams that I need to finish and I want to redo his neck seam to make his neck slightly shorter…. but there’s no major rush, as at the moment I’ve run out of stuffing anyway!

Starry Skies and Blue Bats

A month or so ago, I was browsing for sewing inspiration when I came across this glow in the dark fabric. I wasn’t too sure how well it would actually glow, but I thought it would look great paired with some blue “minky” to make a bat.

Using the bat pattern from BeeZee Art again, I marked out the pieces on the fabric using a white pen, as I felt that would be easier than using chalk. This is the first time I’ve tried sewing a bat from this pattern with “minky”, and although it has a tendency to slip and slide while I’m sewing, I think this bat is much better than my first attempt, which used regular fleece.

There are a couple of elements that could have been sewn slightly more accurately – my bat does look like he’s got one foot standing on the other, but that just gives him character. And to make him really special, those stars actually glow in the dark!

Happy Bear (now with ears!)

It’s amazing how different a bear looks once it has ears! Instead of looking like some strange furry alien, you suddenly realise it’s actually a cute and cuddly bear.

The long purple fur made the nose and mouth embroidery a little more challenging than I’d anticipated, but it did help to hide any mistakes.

I trimmed Happy bear’s paw pads on the arms, just to make them look a little tidier, although I left the foot paw pads long, just for a bit of variety. This is the first bear that I’ve added eye whites to (that was just a small piece of white felt positioned underneath the eye before I added the safety backing), but I think it gives him some extra character.

Happy Bear (who will be getting a new name soon), was made from an Emma’s Bears pattern, using fake fur from my local fabric shop.

Funky Furry Bear

After a couple of recent attempts at making bears from other people’s patterns, I decided it was time I tried making a pattern of my own. I wanted to use furry fabric, as that gives the muzzle a better shape, and can also help conceal any lumps in the seams, but fake fur can be expensive and I didn’t want to spend too much on something that might not even work.

Luckily, Abakhan had a sale which included some brown fake fur for just £3.99 a metre, so that made the perfect fabric choice.

The fur is shorter than the purple I used before, and is also trimmed at certain points, so it isn’t all the same length. The small size of this bear doesn’t really show off this multi-length fur to its best, as it does look like I’d just trimmed it myself and made a pretty bad job of it….

But considering this is a first draft of a self-made pattern, I’m pleased with how it came out. I think I would lengthen the arms on the next one, and possibly shorten the body, as he does seem quite thin and lanky.

The inner ears are made from scraps of minky left over from the previous bears, and so far I’m undecided if I should embroider a nose, or if he looks ok with a brown furry nose.

The round muzzle is a particular favourite feature, as most of the patterns I’ve seen have a pointy muzzle with the head gusset reaching all the way to the nose. This bear doesn’t actually have a head gusset at all!


Reggie the Reindeer

When I spotted the pattern for Reggie the Reindeer, I knew I was going to want to make at least one of them. I found a pack of two fleece blankets on sale for £3.95, which were the perfect colours for a Reindeer, so he was a bargain to make!

The first Reggie I made had thread jointed limbs, but this one is for a 9 month old child, so I used the alternative instructions to machine sew them into the seams.

spottyreindeer1

If I was to make a third Reggie the Reindeer, I would probably turn the legs 90 degrees before sewing, so they shouldn’t turn inwards at the hoof, but that’s just a minor annoyance for me.

spottyreindeer2

Mum keeps saying that Reggie is a cow (because of the spotty fabric), but whether you see him as a cow or a reindeer, hopefully little K will like him when Santa delivers the package on Christmas Eve!

Porker the Pig

I’ve been wanting to try needle felting for a while, but it always seemed quite an expensive thing to try, especially if you don’t know that you will get to grips with it. But I found a pattern for a pig at Tally’s Treasury which sounded like it should be a reasonable first project.

The needle was 1.50 and the felt cost just 40 pence, with enough left over to make another pig.

Porker

Porker the Pig – his eyes are scraps of blue felt

I hadn’t realised how easy felt would be to sew on the machine – even with a 1/4 inch seam, it behaved perfectly, not even attempting to ram some of the felt into the bobbin holder! The needle felting was a challenge, as I wasn’t really sure what I was doing, but once the snout started taking shape, I got the hang of it.

Porker

Felt is surprisingly challenging to get an accurate photo of! This is Porker’s true colouring

So, here’s Porker the Pig – he needs a little more work on his snout, but other than that, he’s ready and waiting for me to make him a little brother. Apparently one little pig is lonely on his own….

Porker

All this modelling for photos is tiring work…. well, his legs are slightly lopsided too, which means he tips over quite easily