Tag Archives: sewing

Fabric Basket

Ever since I was given a Lush bubble bar for my birthday a year ago,  I’ve developed a bit of an obsession with things from Lush. My main trouble though, has been where to put everything; there’s a limit to how well you can stack bath bombs, pots of hand cream and shampoo bars, especially when the Lush packaging is mainly paper bags – that isn’t ideal for a damp shampoo bar!

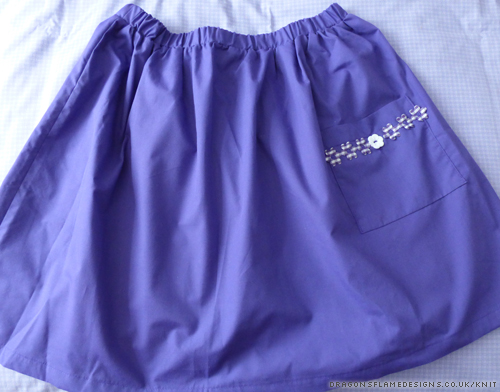
My room’s colour scheme is purple and silver, so I didn’t really want to buy a basket to put them in, as it’d be guaranteed there wouldn’t be one that was quite the right size or colour. I did however find some really nice purple cotton fabric in the sale, and with the tutorial from Delia Creates, I was able to make a basket that not only fits the products, but also looks much better than a pile of bags and pots on the surface!

I found a few plastic containers in Poundland (these easily house a shampoo bar) and which work perfectly for storing my shampoo bars, conditioner bar and also pieces of soap. This basket is the perfect size for those, a few pots of hand cream, and also a bath bomb!

basket-a2

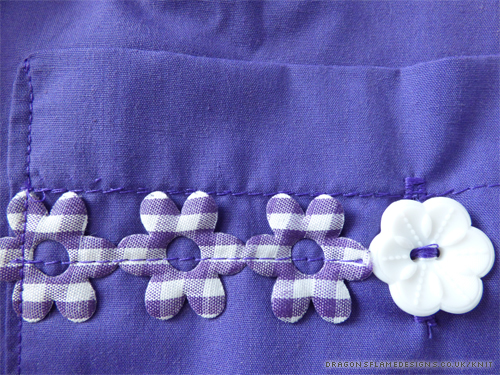
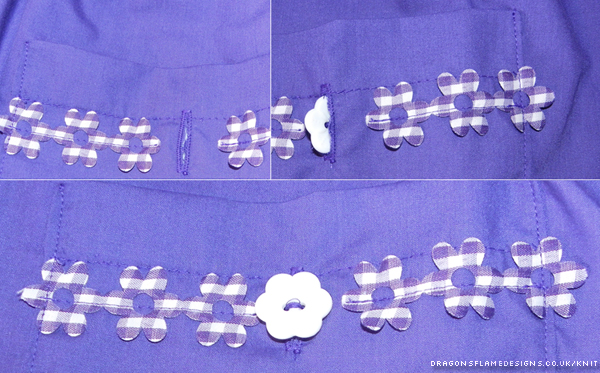
To stop the purple looking a bit too heavy, I did the top stitching in white to lift it a little. Silver might have looked better still, but I didn’t have any suitable thread. I decided that the handles weren’t really needed, so I left those out. The basket is washable and also fully reversible – if any of the Mask of Magnaminty ends up on it, it’s not the end of the world!

The Simplicity Blogger Challenge

Although I’ve sewn a few things so far, I’d never actually completed an item of clothing. I’ve started several, but they’re all still in various stages of “not quite finished”. However, Simplicity’s Blogger Challenge spurred me into actually starting and finishing something!

I picked the easiest option – pattern 2286, which gives 6 different options for elasticated waist skirts. Not being overly fond of “girly” clothing, I picked option B; no lace, overlay or frilly bits!

At only 5′ tall, I normally have to decrease the length of clothing, but I felt that 16″ was still a little too short for a skirt worn just below the waist, so I added a couple of inches to the length. But just adding to the length wouldn’t be enough to make it my own style, and being a relatively new sewer, I didn’t want to dive into something that would be beyond my skills!

skirt1

I added in one pocket rather than two (I prefer the asymmetrical look), and found some fantastic daisy trim that I hoped would work around the edge of the pocket. When the package arrived with the fabric and trim, the trim was a little larger than I had thought, and would overpower the pocket if I used it all the way around!

As luck would have it, I came across a flower button in the local sewing shop, which was a perfect match on size for the trim. But just sewing on a button wouldn’t be enough for me…. no, I had to make a working button, which would mean tackling my first ever buttonhole.

pocket

Thankfully my sewing machine has an automatic buttonhole setting, so after a quick practise, the final hole came out perfectly! Ok, it could’ve probably started about a centimetre lower down so it didn’t overlap the top stitches, but it works!

I stitched the trim with a single line across the centre, and caught it into the pocket stitches on the sides just to help it stay attached when the skirt goes in the wash.

And just to prove that the buttonhole works:pocket-montage


This skirt is part of the Simplicity Blogger Challenge. I was sent the pattern for free, as part of the contest entry. There are no affiliate link in this post.


Porker the Pig

I’ve been wanting to try needle felting for a while, but it always seemed quite an expensive thing to try, especially if you don’t know that you will get to grips with it. But I found a pattern for a pig at Tally’s Treasury which sounded like it should be a reasonable first project.

The needle was 1.50 and the felt cost just 40 pence, with enough left over to make another pig.

Porker

Porker the Pig – his eyes are scraps of blue felt

I hadn’t realised how easy felt would be to sew on the machine – even with a 1/4 inch seam, it behaved perfectly, not even attempting to ram some of the felt into the bobbin holder! The needle felting was a challenge, as I wasn’t really sure what I was doing, but once the snout started taking shape, I got the hang of it.

Porker

Felt is surprisingly challenging to get an accurate photo of! This is Porker’s true colouring

So, here’s Porker the Pig – he needs a little more work on his snout, but other than that, he’s ready and waiting for me to make him a little brother. Apparently one little pig is lonely on his own….

Porker

All this modelling for photos is tiring work…. well, his legs are slightly lopsided too, which means he tips over quite easily

Zips…. attempt number one

I’ve heard a lot about zips being a nightmare to sew, and seeing as the dress will need an invisible zip, I needed to learn how to at least sew in a regular one. After having made that card pouch, I realised that I also could do with one to hold my reward cards – that way I can find the one I need a little easier than having to pull them all from my purse when I get to the till!

zipper1

I came across a free pattern at Craft Passion for a zipper card pouch, which sounded just what I needed. I couldn’t get a 9 inch zip (the store only sold them in even numbered lengths), so I went with an 8 inch plastic zip instead. I had some fabric left over from a fat quarter bag, and that worked perfectly for the pouch, with some starry fabric for the lining.

zipper-inside

Apart from a slight adventure when I accidentally let the zip pull fly off the open end of the zip, and several tense minutes afterwards, trying to put it back together again, it went quite smoothly!

I will admit my hand sewing skills are relatively non-existent, so I did machine the final seams together, with some top stitching around the outside.

zipper-side

It’s slightly wonky, but it works, and for a first zip, I think it looks pretty neat! 😀 I’ve been using the card pouch for a little while, and it’s holding together perfectly.

A Strange Coincidence

A few weeks ago, I purchased a really nice looking duvet cover from Primark for 9 pounds. I figured that it’d give me about 2 metres of fabric from each side, so that’s about 2.25 per metre – not quite as good a bargain as the dress duvet cover, but still better than I could get for the fabric itself. I was thinking it might become a side-zipped top or possibly a button-up shirt…. but then I came across this:

CC Jacket

Source: CC

In a strange coincidence, this lined blazer from CC has an almost identical pattern to the fabric that duvet cover was made out of! So, there was no other option but to start making a jacket from it 😀

In the current issue (Feb – March) of Make it Today, they had a free gift of three paper pattern packs, which included New Look pattern 6231 – two jacket options, a skirt and a pair of trousers. Although the trousers look the easiest to make, my legs aren’t really designed for tapered close-fitting trousers, so it had to be the jacket.

It’s not an identical style to the CC one; this has a peplum instead of the vent flap, and isn’t lined, but it should work really well with the fabric 🙂

6231_env_front

So far I’ve got the front and back done, but a slight problem with the iron means that I’ve had to delay working on the collar until I can get the interfacing to stick to the fabric.

And speaking of Simplicity New Look patterns, have you seen their blogger challenge?


First venture into sewing from a printed pattern

Ok, that’s not quite my first venture, as I’ve started a Kimono-style jacket, but this is my first attempt at a “proper” printed pattern (one that comes in an envelope and is worse than a map to refold!) 😉

The pattern is the Ruby Dress from Love Sewing magazine, and the fabric? Well I didn’t want to spend a fortune on fabric only to find that the dress didn’t fit, so I bought a single duvet cover for just under 6 pounds, washed it, then unpicked the seams to leave me with two large pieces of fabric. One of those was just enough to make the dress 😀

Duvet cover Ruby Dress
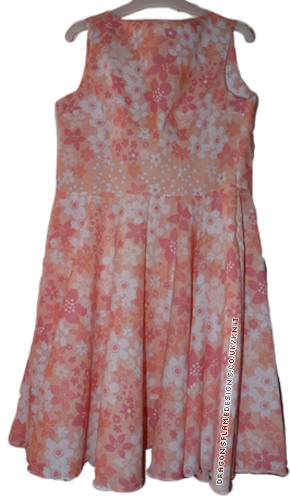
Now there’s a slight problem with the fit at the moment – I’m not sure if it’s just my measuring, my wonky seam allowance, or a quirk in the pattern, but using what I deemed to be the correct sizing, it’s an inch out at the back (oops!). So, I’m working on using the other part of the duvet cover to make a second third bodice that I can then attach to the existing skirt, and hopefully that’ll fit! The second one I tried was closer – the back pieces meet, but not enough to allow any seam allowance for the zip.

I’ll get there in the end though!

At the moment this project is shelved, as I want to try working on a pattern for a slightly less fitting top, and a shirt – I’m hoping that those patterns will help me learn how to shape the bodice of the dress, so I can get the darts in the right place, and finally have a zip I can do up!

A quick little project or two….

I noticed that a friend was using a really tired-looking purse to hold her store loyalty cards, and decided it was about time I made her a little present. I had some fat quarters left over from my last Hobbycraft purchase, and found the perfect tutorial at Midwestern Girl for a  wallet – it’s a perfect size for those loyalty cards, and should save her needing to use that tired old purse any more!

Card Holder (outside)

And inside the card holder:

Card Holder

If I made another one, I would try to get those corners turned out better – that really lets it down on looks. But it’s practical, which is the whole point 😀 I think I would also add a button & elastic to hold it closed, as it’s made quite loose (to fit as many cards as possible in), but that does mean the cards slide about a bit in the pouches.


While I was in a sewing frame of mind, I thought it was time I made my Christmas apron for Gran. Yes I know it’s now March, but Gran requested Christmas fabric for Easter! You can probably just make out the pocket in the photo – that’s slightly higher placed than the last apron I made, and the top is slightly narrower than the first apron, although I think it needed to be slightly wider than I have it. The straps are simple cotton herringbone tape rather than being made out of the same fabric – Gran prefers them to look like that.

Easter Apron

A rush request

I heard from a relative that he was going to be a daddy 😀 ….only trouble is, he told me about 3 weeks from the due date, which didn’t give me much time to make something!

I’ve sewn a couple of messenger bags using the tutorial from Crazy Little Projects before, and knew I could make one in quite a short space of time….  and I’d found the perfect fabric in the sale at just one pound for a metre!

So here we have the Jungle Book Nappy Bag….

Jungle Book Bag (outer flap)

Jungle Book Bag (outer flap)

Jungle Book Bag (back)

Jungle Book Bag (back)

Jungle Book Bag (inner)

Jungle Book Bag (inner)

The panels are (almost) fussy-cut, so the characters lined up nicely. I still can’t get the lining to behave though; it always appears too small when I start, and way too big once I sew the final stitches.

But I couldn’t make something for the parents and not make something for the baby, could I? Using my favourite bear pattern, I knitted Cheshire the Cat-Bear in white and cream yarn which gives him a nice mottled effect. He’s meant to be a bear, but I think his face looks more cat like, so he’s a Cat-Bear 😉

Cheshire the Cat-Bear

Cheshire the Cat-Bear

He should be just the right size for little hands to grab!


2015

How did 2014 fly past so quickly that it’s 2015 already?! It doesn’t seem a year ago that I decided I wanted to start learning to sew, and was borrowing Mum’s sewing machine to get to grips with the basics!

Anyhow, with the new year in mind, I’ve decided to take part in Crazy Little Project’s Crazy New You challenge! Looking at the really cluttered way I store my fabric & yarn, I figured that I needed to sort that out, and that’s my challenge for this month 🙂

So far, I’ve bagged all my fabric in freezer bags (surprisingly useful to make sure it’s kept reasonably tidy), and put it all neatly into a cardboard storage box. Of course then I managed to find some really fantastic fabric in the sale, so I still have a couple of things that won’t quite fit into the box…. Maybe that’s a good excuse to start sewing another project?!

This year I’ve a few projects in mind, and hopefully I’ll be able to finish most of them:

  • Knit Sherlock Mouse‘s hat (at last) and add in some hair as well
  • Sew another Notebook Folder
  • Make myself a cover for my notebooks, as that’s got to be better than piles of post-it notes, right?
  • Sew another messenger bag (I’ve got the perfect outer fabric for that, just need to work out what the lining will be made from)
  • Learn how to add a zip into a bag, so I can make the messenger bag close up properly
  • Make a laundry bag (a request from my Mum)
  • Finish at least one of my knitting UFOs
  • Make a mini Sherlock-themed scrapbook – that may or may not happen 😛
  • ….and possibly attempt a curtain, but that is very unlikely!

So just a short list! I’m hopeful I can at least get Sherlock Mouse finished this month, then once I’ve figured out what fabric would work well together, I can work on a notebook folder / cover 😀


There are no affiliate links in this post. I just happened to find WH Smith storage boxes the perfect size!

Sew Long to Poverty

If we want a new sewing machine, most of us can either save up the funds, or use a credit card maybe, to purchase it. But for the women in Malabar Memsahib, a small co-operative set up by Kerala Crafts in southern India, that’s not an option. The ladies in this co-operative make clothes to sell locally, and also make Fair Trade pants for Kerala Crafts, which are then sold in the UK, with all profits going back to community projects in southern India.

The Fair Trade pants have been so popular, that the current sewing machines they have, are struggling to keep up with the demand, so Kerala Crafts wants to purchase an industrial sewing machine for them, which would in turn mean more funds heading back to community projects in southern India, through increased sales of these pants.

But, without our help, these ladies will be stuck with their current machines, unable to get the industrial one they so desperately need, to keep up with the demand! There’s just 7 days remaining on the  Sew Long to Poverty crowdfunder, and they need just £110 more, to get to 100%! If they can’t get to a hundred percent, then they get nothing, so it’s really important that we can help them get that remaining amount!

If you can’t, or would rather not donate, then that’s perfectly fine – but please consider spreading the word to people, so that they might donate

Thank you 🙂